Often starting fresh is the only way to go. This statement can be applied to general life situations but also to your WordPress development, testing, and recovery efforts.
In short, you could say that this tool is the king of WordPress reset tools. Besides WP Reset, there are definitely a huge number of reset plugins available on the market, but WP Reset is the only one that can reset your entire site or just specific parts of it in seconds with just a click of a button.
WP Reset doesn’t just put emphasis on the practicality and speed of resetting; it also puts a lot of focus on the site’s well-being and security with the help of things such as database snapshots and the emergency recovery script which we’ll cover in-depth over the course of this review.
Who is WP Reset for?
The answer is for anyone who wishes to have a tool that will give them a brand new WordPress installation or that can get rid of all the “junk” that has accumulated on their site, at any time, in a blink of an eye. What this means is that WP Reset can be used by a standard user, a WordPress site developer or tester, but also a plugin/theme developer or tester, basically, anyone who’s job involves a lot of trial and error in order to create the perfect end result.
What does WP Reset do?
It does exactly what it promises, resets a site that has gone wrong due to a bad plugin, failed update, or is simply too messy to handle. It can do everything from a simple media library cleanup to a full-blown reset which gets rid of everything, literally everything. It also enables you to configure a site to be exactly how you want it post-reset by allowing you to create collections of themes and plugins but also to switch between versions of WordPress with no hassle whatsoever.

As we said earlier, to the creators of this plugin, safety is number one priority, that is why they equipped the plugin with the ability to create snapshots of your database prior to making any changes using the plugin, a unique recovery tool that can get you out of dead-end situations such as the notorious white screen of death, easy management and protection of licenses, and the possibility to connect to WP Reset or any other major cloud service.
Along with all of the tools the plugin comes with, users who purchase the plugin’s PRO version will have access to the WP Reset dashboard. WP Reset’s dashboard is a place from which you can manage all things WP Reset, your licenses, purchases, collections, snapshots, and the WP Reset Cloud, of course.
Basically, this dashboard makes managing pretty important and usually confusing aspects a walk in the park but also gives you a clear view of where you stand with using up the WP Reset resources you received with your purchase.
We’re sure that after reading this not-so-short introduction to WP Reset, you are eager to learn even more about the plugin. So get excited, because now it’s time to take you on an in-depth tour of WP Reset. Without further ado, let’s dive into exploring all its amazing features!
Installation
Installing WP Reset PRO won’t be much different from installing any other plugin. To get ahold of the plugin files, you can choose one of three routes.
The first route is to go into the Plugins section in your WordPress dashboard and simply type in WP Reset, and the plugin should pop-up as the first result.
The second route is through the WP Reset dashboard, to which you can log in to using the same email you used when making the purchase of the plugin. Once you log into the dashboard, on its first page, you will see a link for the download of the plugin.
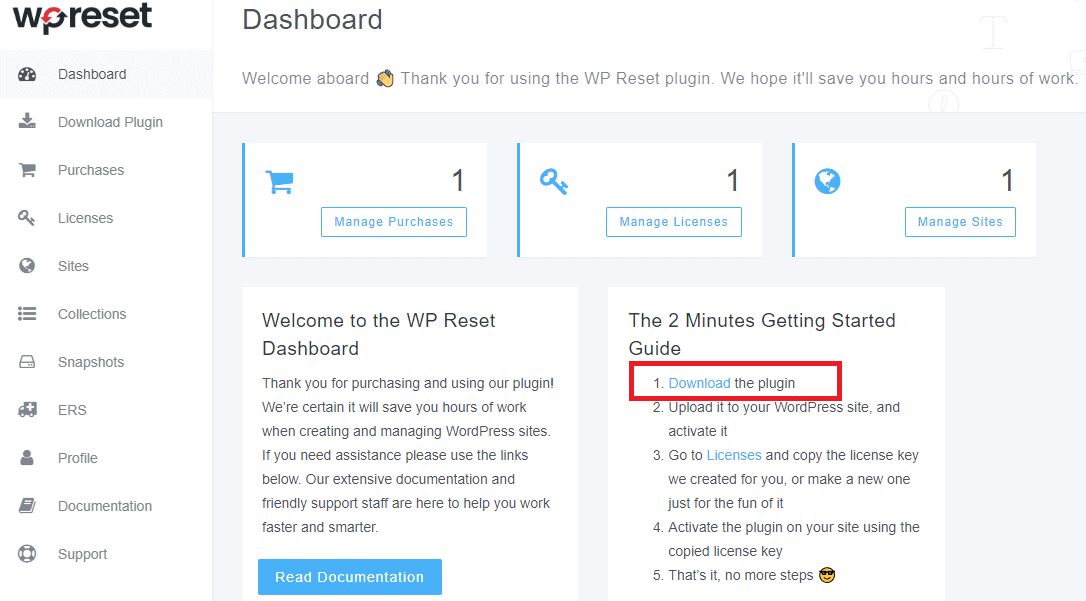
The third route is to download the plugin from the WordPress repository.
Those of you who decide on using the second route, you will have the plugin’s PRO version right off the bat so you will only need to activate a license and not have to upgrade the plugin first.
If you download the plugin directly from the plugin section(route #1) or the WordPress repository (route #3) you will be installing the free version of the plugin, which you will have to upgrade to the PRO one, but don’t worry doing that is a piece of cake and we’ll demonstrate how it’s done right now.
Upgrading to the PRO version of the plugin (if necessary)
Once the plugin is installed and activated, go into the Tools section, and then the WP Reset section. After you have done that, you should see the same screen that is shown in the image below.
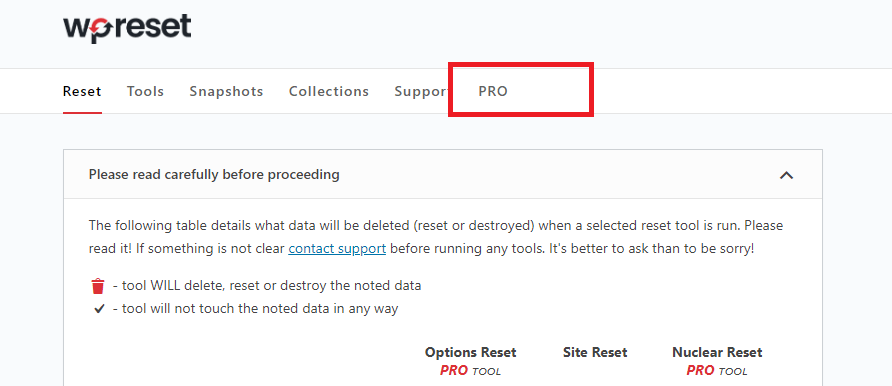
See the PRO tab that is highlighted in red? Click on it and then scroll to the bottom of the page you were led to.
There should be a license activation form which will enable you to activate the plugin’s PRO version. Once you have activated the license (explanation in the paragraph below), you’ll be shown a message saying “Update WP Reset to files to PRO & finish the activation” click on it and the plugin will then update and reactivate on its own. You’ll be left with the PRO version.
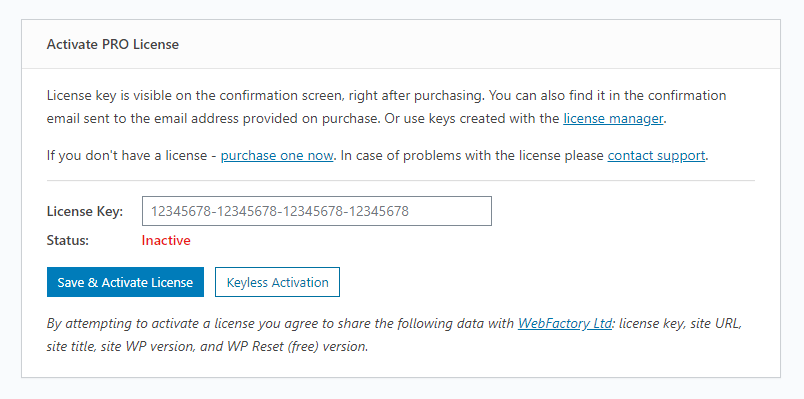
License activation
The license activation can be done in two ways. The first one is with a license key, which you can find in the confirmation email of your purchase or generate through the WP Reset dashboard in a few easy steps.
If you wish to generate a key, go into the WP Reset dashboard, click on “Create your first license key.”
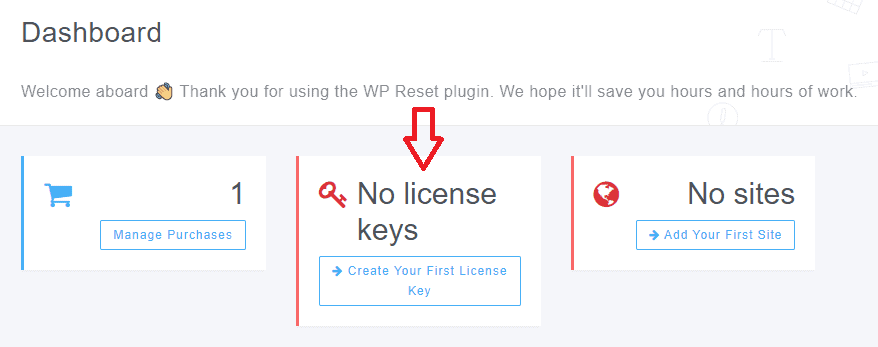
Choose a license type. First, we’ll go over the key license type; later, we’ll cover the domain one.
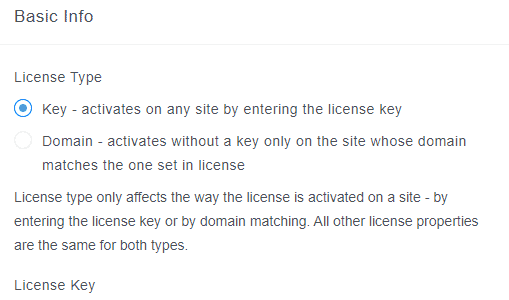
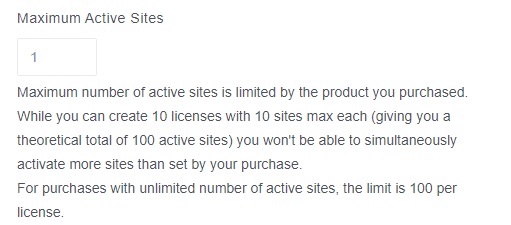
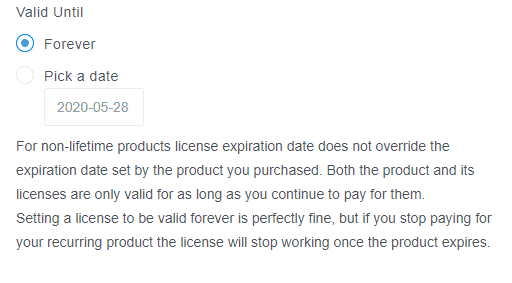
After you have picked the “key” license type, set the number for maximum active sites and the valid until date.
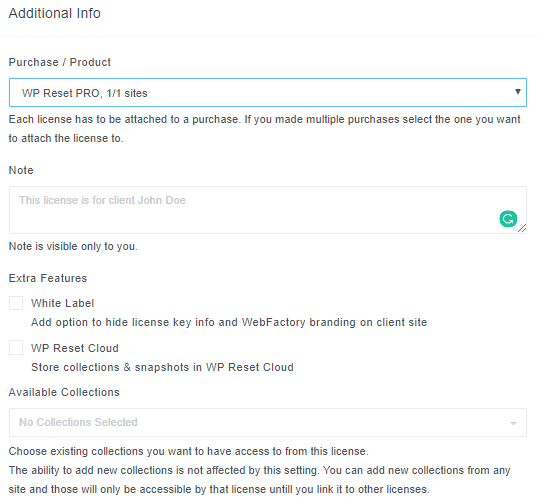
There are some additional pieces of information you can set for a license such as a note, the purchase it is related to, whether it will have extra features such as White Label, the WP Reset Cloud, and which collections will be available with that license (we will talk about collections a bit more in-depth later on).
Click on “Create & Activate license,” and you’ll be automatically redirected to a page containing the license key, which you will then copy and paste in the previously-shown license activation form.
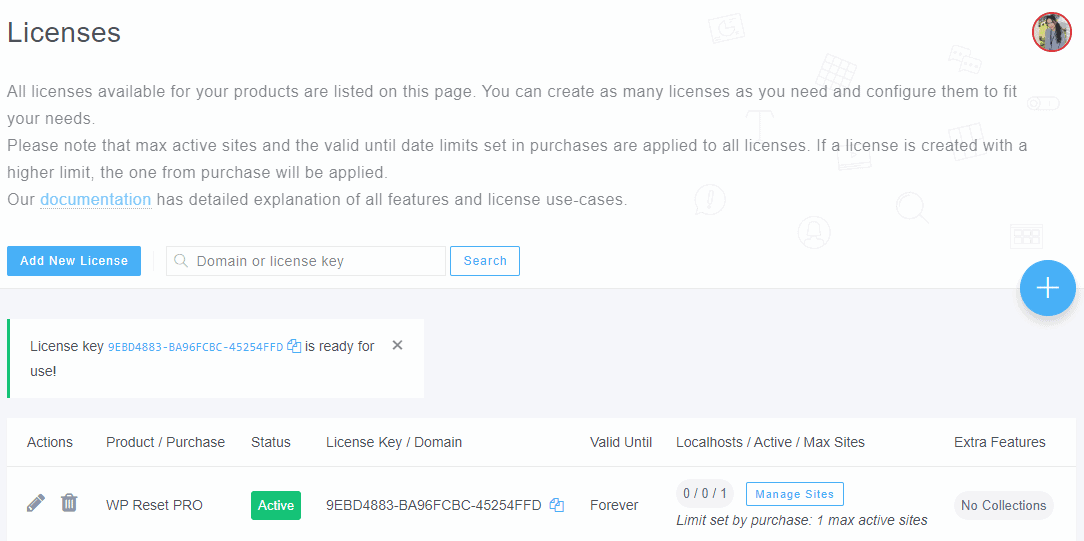
Once a license is created, you will be able to edit it and change all its previously set properties. Also, all licenses can be deactivated from inside the plugin and, of course, from the WP Reset dashboard.
The second way of activating a license is through so-called keyless activation. To make a keyless activation happen, again go into the license tab in your WP Reset dashboard, click “Add a new license” but this time for the license type pick “domain,” enter your site’s domain, set a valid until date and click “Create & Activate license.”
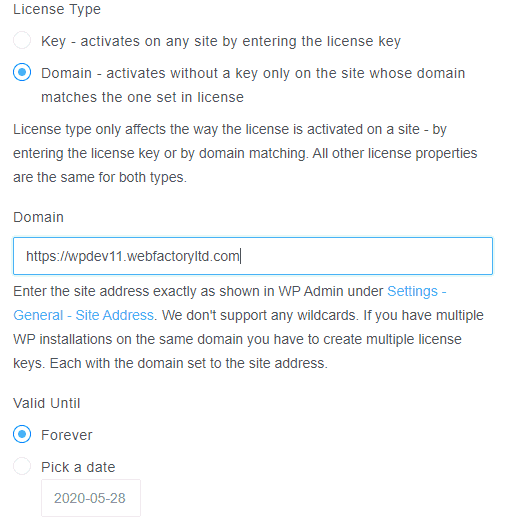
Go back into your WP Reset plugin, find the license activation form, select keyless activation, and the license should activate in a matter of seconds.
Onboarding
After the WP Reset PRO has been activated, you should be met by a pop-up that is offering to take you through an onboarding process.
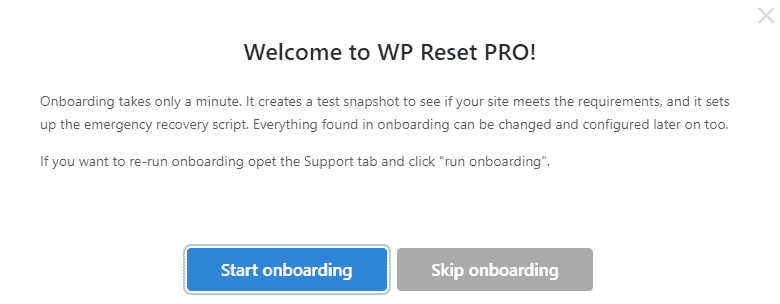
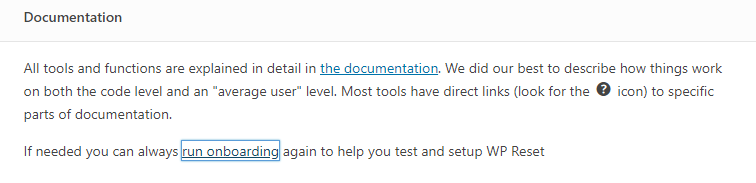
If you accidentally close that pop-up, but still want to go through the onboarding process, you can find the link for it in the Documentation section of the Support tab.
The onboarding process, as you can read in the image above, is intended to help test and set up the plugin and will consist of the following two steps.
1. Deciding whether to enable automatic snapshots before running WP Reset tools and/or enabling snapshots for when you manipulate plugins and themes.
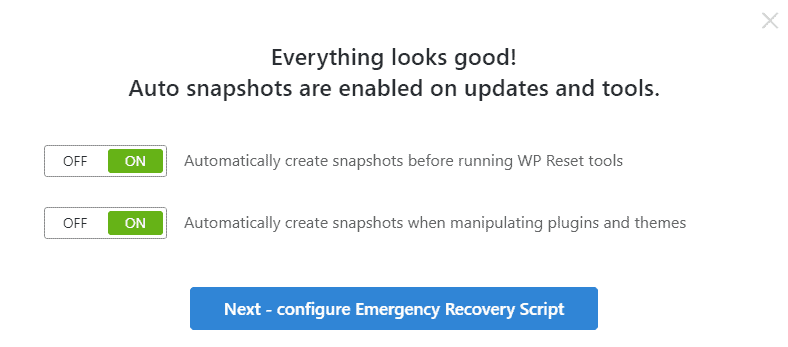
2. Installing the emergency recovery script.
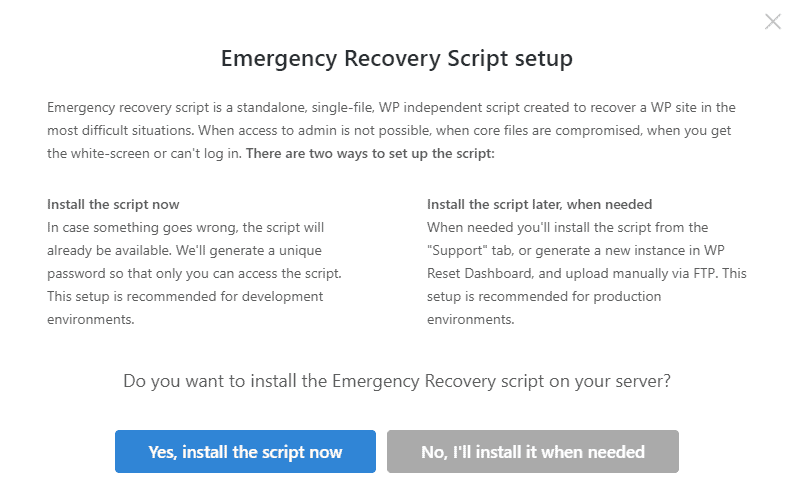
If you click yes to installing the script, the pop-up shown below should be the next thing you see. We won’t get into what it is saying right now, because later on in the article, we’ll have a part dedicated specifically to the emergency recovery script.
To exist, the onboarding process just clicks finish or the X in the top right-hand corner.
WP Reset PRO tabs
Now that we have covered the plugin and license activation as well as the onboarding process, it’s time to move on to the fun part, showing you what this plugin is capable of. To demonstrate the plugin’s true powers, we will go through each one of its tabs and talk about all of the features within those tabs.
Reset tab
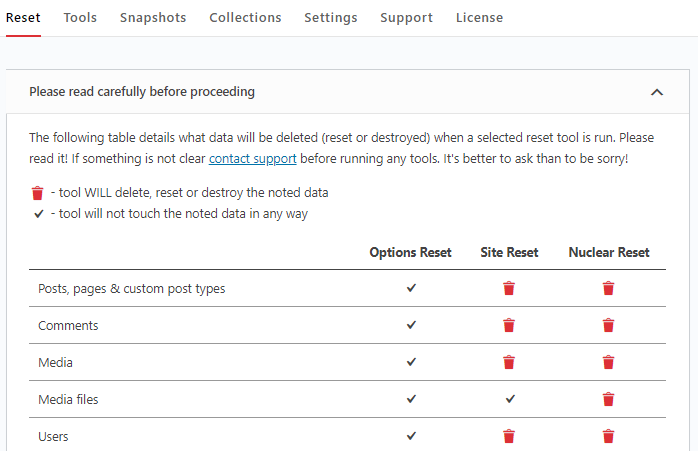
We will be starting things off with the Reset tab. One half of this tab is intended to inform you about everything this plugin will do to certain site files using certain types of resets, while the other half is dedicated to doing the three major resets.
The first part is quite large, so our screenshot could not capture it in its entirety. Essentially in this section/table, you will get a pretty detailed but also a straightforward explanation of what will happen to every file type once one of the resets has been initiated. At the bottom of the table are some pointers and explanations related to performing resets through the GUI and also for doing the same through the WP-CLI.
Next, we’ll talk about the second half of the page where the sections for the three major reset options are located.
First comes the Options Reset. This feature does the resetting of WP core, plugin, and theme settings, but also of widgets and customizations. Near the bottom of the section will be two checkboxes, one for reactivating the current theme and the other one for reactivating currently active plugins, including WP Reset.
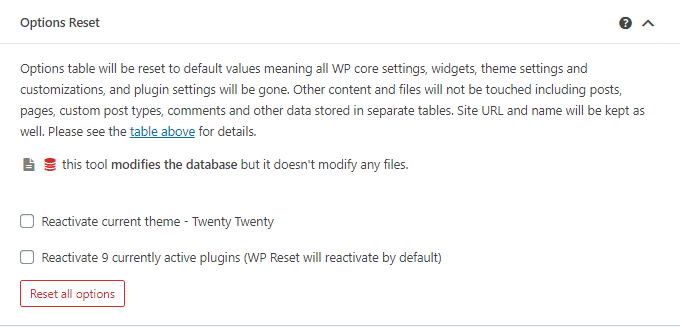
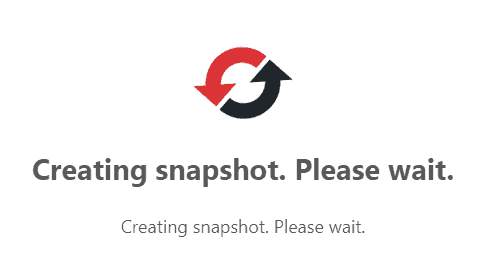
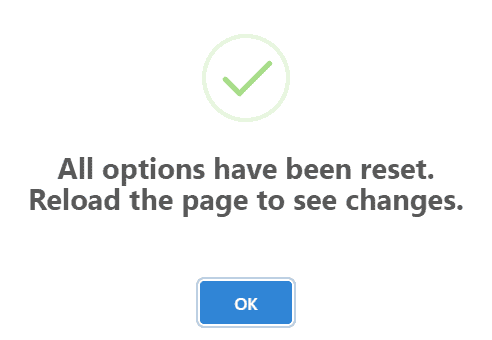
For every reset you do whether it is a reset of the entire site or just a reset of your site’s theme files, for example, you will be presented with a pop-up asking you to confirm the reset once again, a pop-up saying that a snapshot is being created (only if you have that option enabled), and finally a pop-up saying that the reset has been completed successfully.

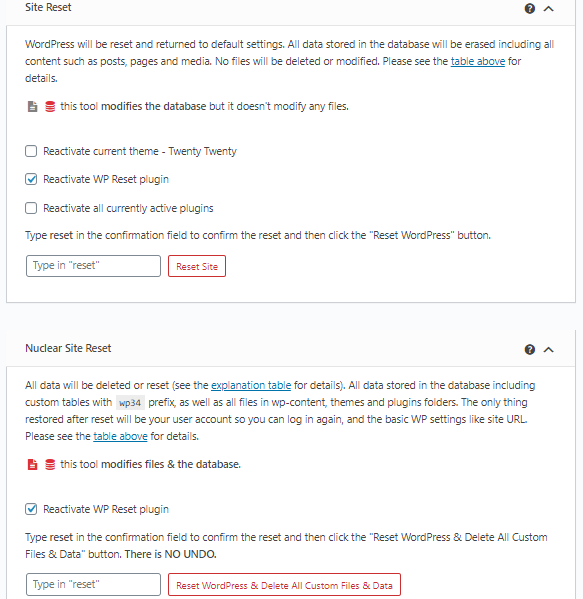
The two other major resets located in this tab are the Site Reset and Nuclear Reset. In a nutshell, the difference between the two reset types is as follows.
The Site Reset deletes things like media, posts, and pages. Basically, it takes the site to its default settings without deleting or modifying any files; the only thing that will be modified is the database.
The Nuclear Reset, on the other hand, deletes everything, all plugins, all themes, all the data in the database. The only thing it leaves behind is the user account, so you are able to access the site again, along with some basic WordPress settings, everything else is gone.
The Site Reset will allow you to decide whether to reactivate the current theme, the WP Reset plugin and all currently active plugins, while the Nuclear Reset only gives you the option to reactivate the WP Reset plugin after the reset. Both reset options have a fail-safe mechanism that requires you to type the word “reset” in order to confirm the initiation of the reset process.
Tools tab
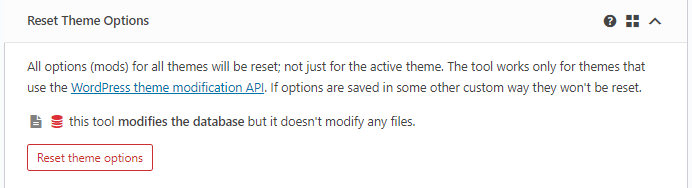
After introducing you to the three major resets, we will now move onto exploring the plugin’s smaller-scale features/tools located in the Tools tab. At the top of the page, which is dedicated to the Tools tab, will be an index of tools.
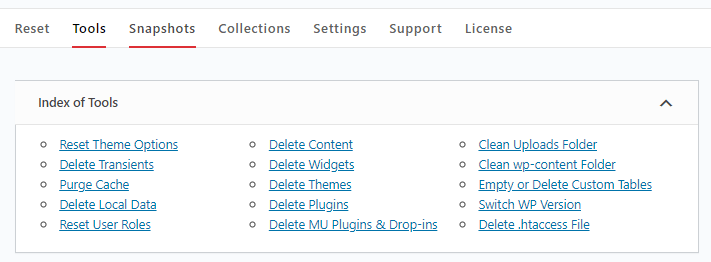
As you can see, there are 15 very useful and practical tools at your disposal. If you click on one of the tools in the index, you will be taken straight to its dedicated section, but if you don’t mind scrolling down to find the desired section, you can do that as well. Almost all of the tools are the same and have just one button used to initiate the tool, plus some basic information on what the tool does.
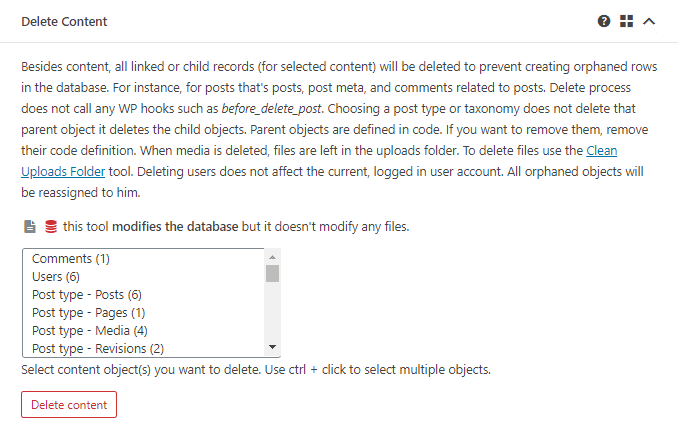
The few tools that work a bit differently are the deleted content and the empty or delete custom tables tools that will ask you to select (by pressing “ctrl +click”) all/one/multiple items you want to delete or empty.
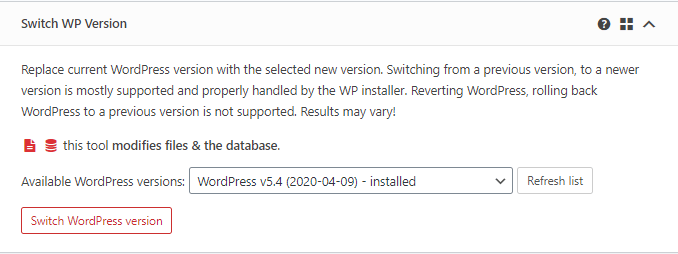
The switch WP version tool is also a tad different because it will, of course, require you to first pick the WordPress version you want to switch to.
Snapshots tab
Before we go into exploring the snapshots tab, we should first explain what snapshots are. Basically (as you can read in the image below), a snapshot is a copy of all your WP database files. It is not in any way meant to be a replacement for a backup, just a copy of a former version of your database, which you can restore if and when needed. The possibility to create snapshots is very rare with reset plugins and is what sets WP Reset apart from the rest of the crowd.
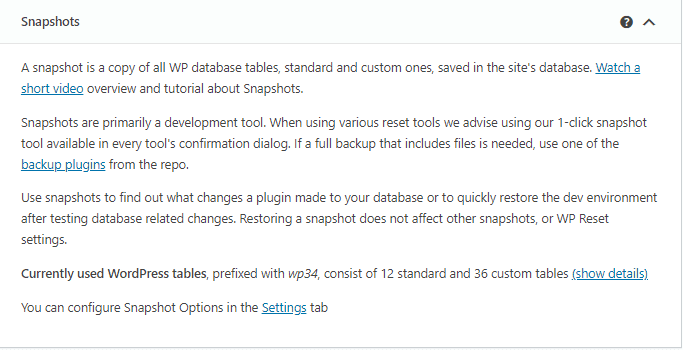
Like we said, at the top of the page will be some info on snapshots and some useful links within that info. As we move further down the page, there are going to be two sections: the user-created snapshots section and the automatic snapshots section.
*Disclaimer* If you didn’t enable the automatic snapshots feature, there wouldn’t be two sections, but only one simply labeled “Snapshots.”
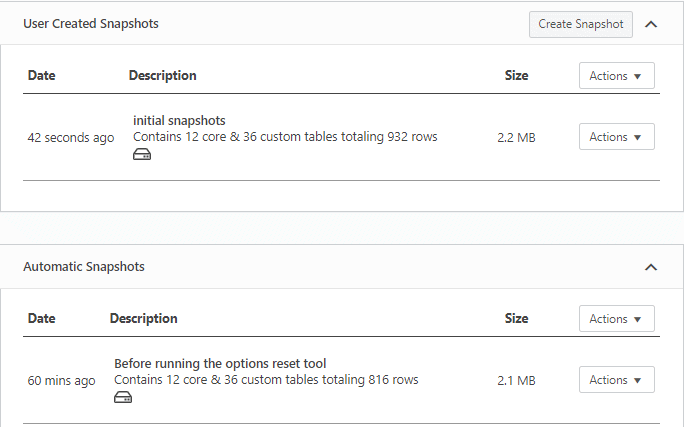
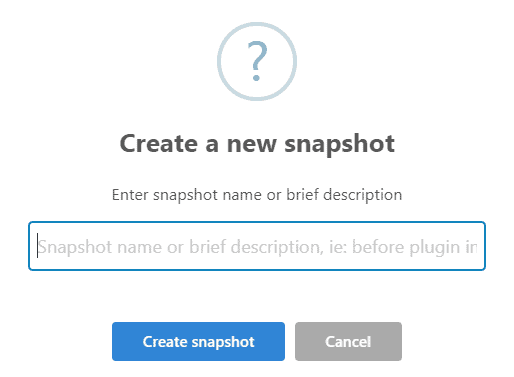
In the user-created snapshots section or the snapshots section, whichever one you have, will be the option to create a snapshot. That process is very simple and will require you only to enter a name or short description for the snapshot.
In the same section will also be a dropdown labeled actions through which you can import a snapshot, refresh cloud snapshots, and delete all user-created snapshots. All are pretty self-explanatory options.
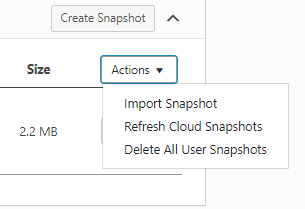
For each individual user-created or automatic snapshot, you will have a dropdown also labeled actions which will contain the options shown in the image below.
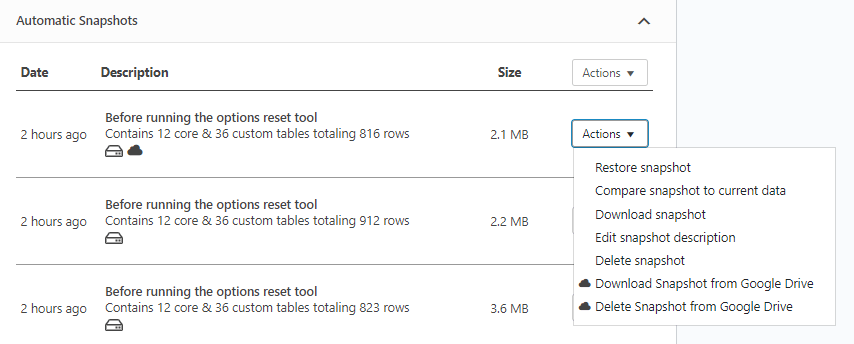
The options to upload, download, and delete a snapshot from/to a cloud will not be there unless you connect a cloud storage account to WP Reset. We will go over that in a few moments.
Next, we need to mention the truly awesome option of comparing a specific snapshot to current database tables. This option will, in a very clear way, even with the use of colors, tell you which of your tables match and which don’t.
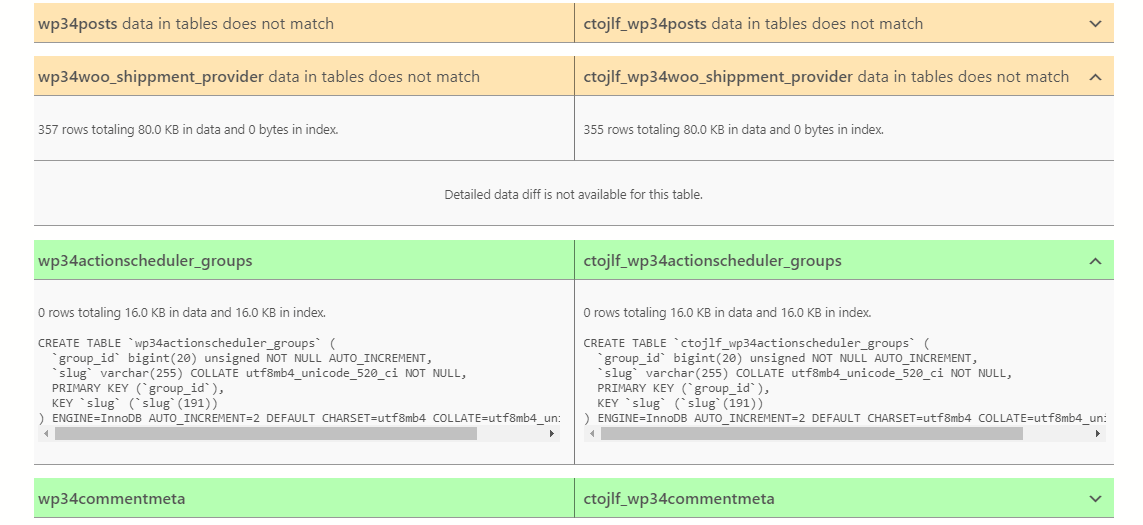
On the left-hand side will be the currently used tables, while on the right-hand side will be the tables from a snapshot.
Collections tab
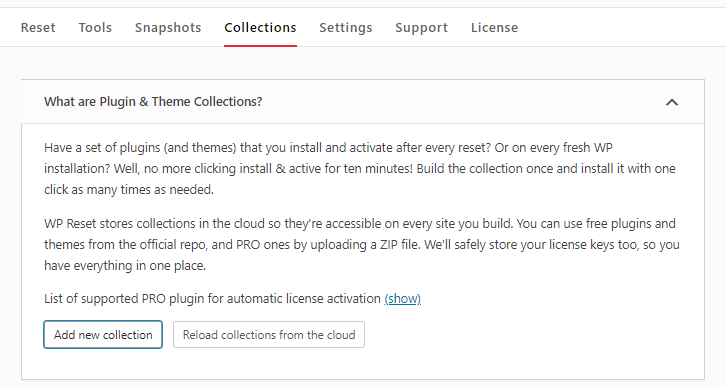
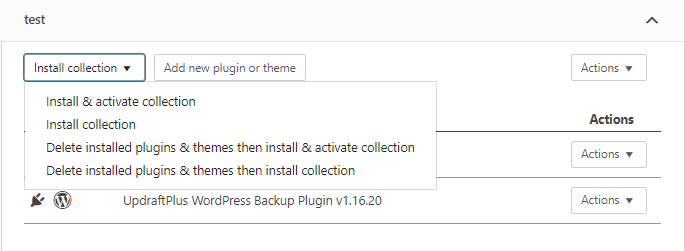
Through the collections tab, you will be able to add a new collection and reload a collection from the cloud. Now, you might be thinking, “Okay, cool, but what are collections?”. A collection is something intended to quickly set up a site after it has been reset. Basically, a collection will be a number of plugins and/or themes you want to have installed in bulk, automatically, after a reset. You can create as many collections as you want and install one collection as many times as you need.
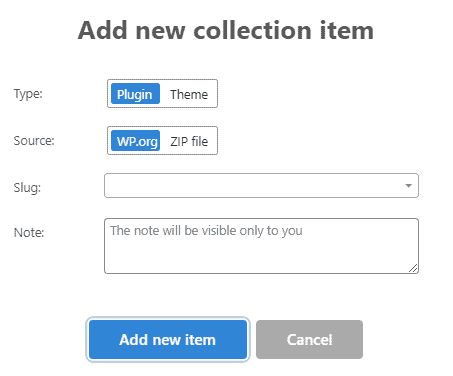
Creating a collection is done in two easy steps. The first one is naming the collection. The second one is adding as many plugins or themes as you want to the collection either from the WP repository or from a zip file.
After a collection has been created, it can then be installed or installed and activated in both cases with or without first deleting the already installed plugins.
Settings tab
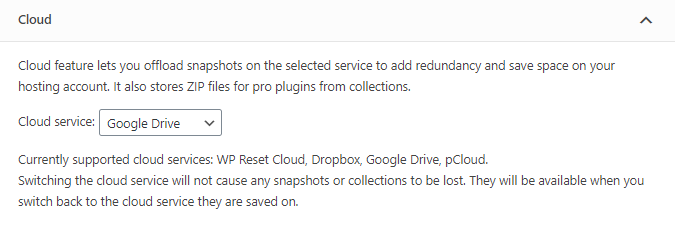
The settings tab lets you do two things, the first one is to connect your cloud storage to WP Reset. This will be necessary if you want to store your snapshots and/or collections somewhere else besides on your site’s server, but also if you want to be extra sure that they are in a safe place.
Just choose the cloud service you would like to use, confirm the request to connect, and you are set.
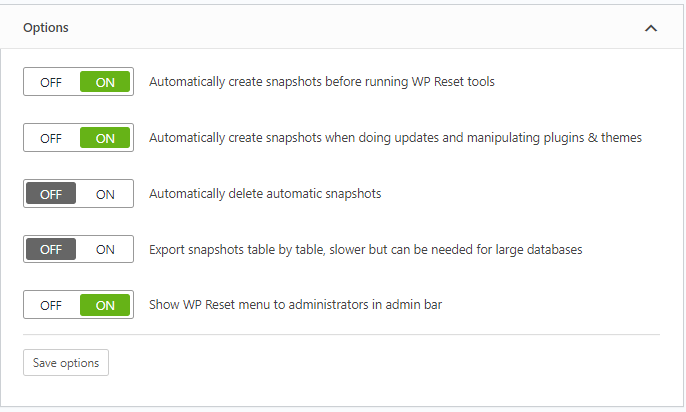
The other thing you can do in the settings tab is to turn on or off the options shown in the image below. Change this to fit your preferences and click the “Save options” button, and that is all there is to it.
Support tab
Now we will talk about one of the most important tabs of the WP Reset plugin. It might not be a tab with lots of features, but it is the tab that is of most importance for the well-being of your site.
In this tab, you will find a few things. The first one is the emergency recovery script, which is essential for times when your site is down, inaccessible, or God forbid have been hacked.
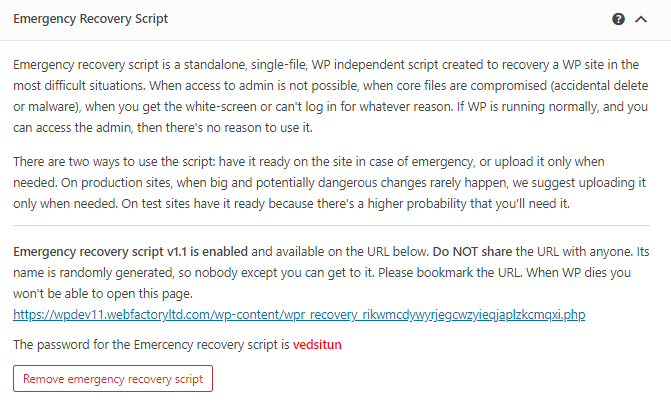
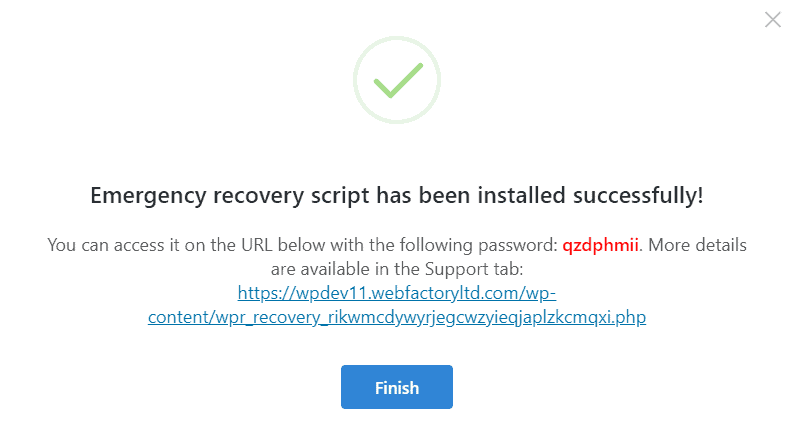
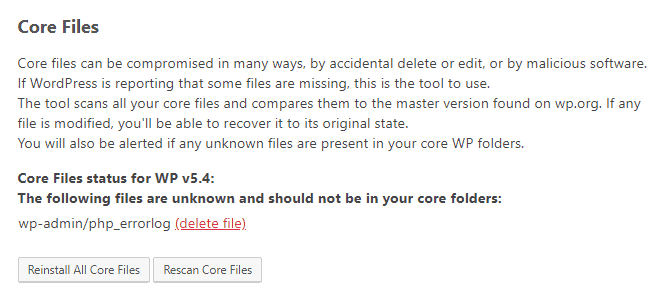
To use the recovery script, you will receive a URL and a password. The URL will take you to a login screen where you will enter the received password. Once you have entered the password, you will be taken to the emergency recovery script page where you will find WordPress info, server info but most importantly the options to:
- Rescan and reinstall core files.
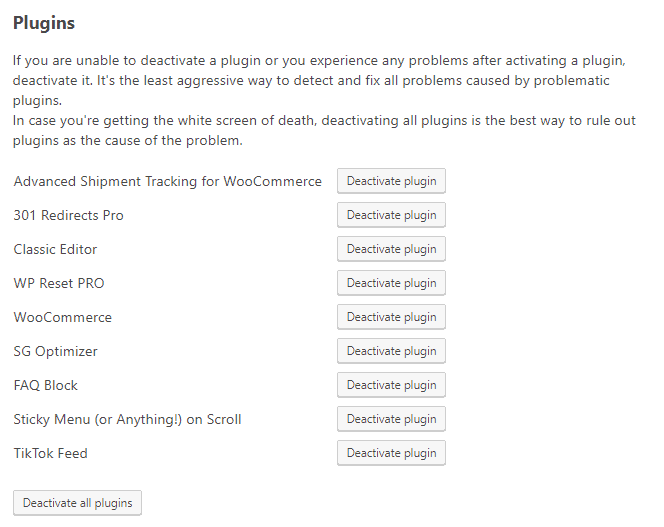
- Deactivate plugins one by one or in bulk.
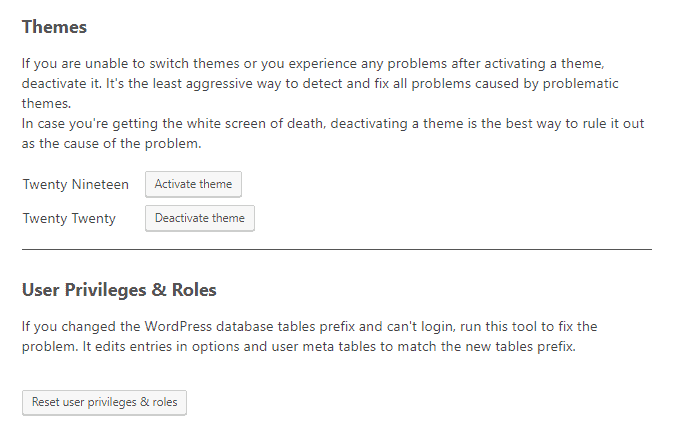
- Activate and deactivate a theme and reset user roles and privileges.
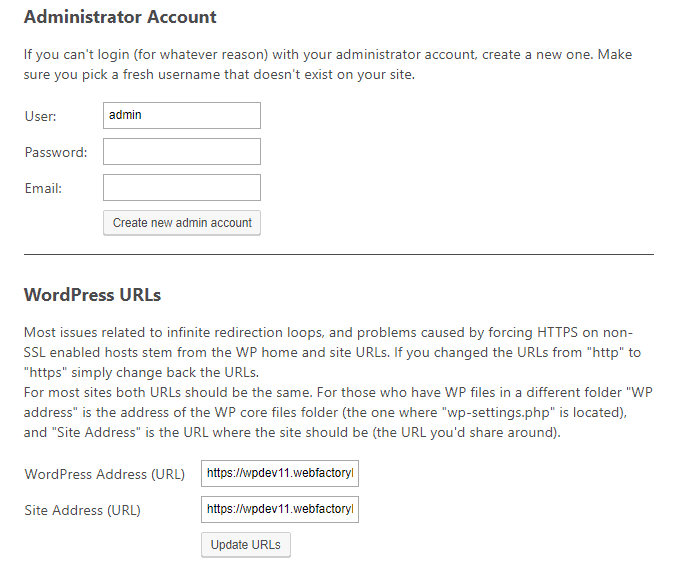
- Create a new admin account and update URLs.
- As you can see, the emergency recovery script is an extremely powerful tool, so be smart about who you share it with and where you store its URL and password.
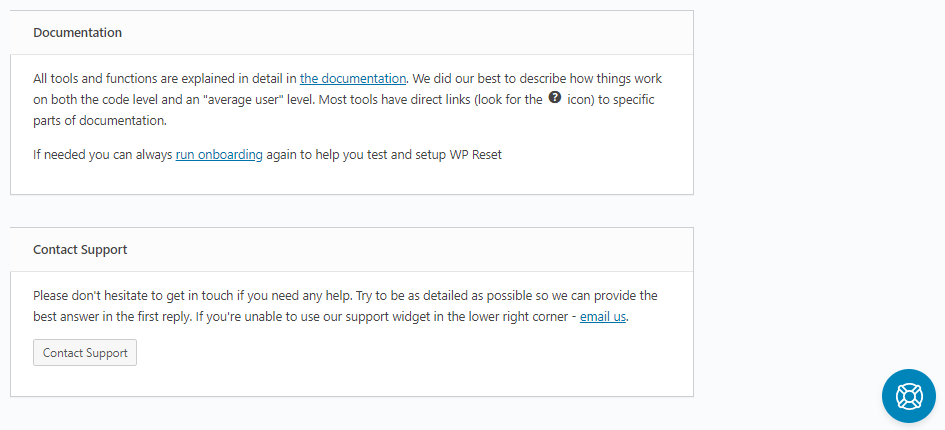
The rest of the support tab consists of the documentation section in which you can find a link to the plugins detailed documentation along with the earlier-mentioned link for the onboarding process, and the contact support section. An important fact, the contact support button can actually be found on each and every tab of the plugin (its bottom right corner) in the form of a cute blue circle with a rescue float icon.
License tab
Lastly comes the license tab, which doesn’t require much explaining since the only thing it consists of is the license activation form, the same form we got very familiar with at the beginning of the article. But in short, in this tab, you will be able to activate/deactivate a license and see the license key unless, of course, the license activation was a keyless one.
Conclusion
And there you have it ladies and gents, a full-on detailed review of one of WordPress’ most popular tools, WP Reset PRO. Besides all the amazing features of this plugin, there are two things we would like you to remember from this review:
- Number one, that WP Reset is a truly unique tool and that its approach to WordPress resetting is like no other.
- Number two is one of the few tools that will provide you with so much power through so much ease of use.
Although this review was specifically dedicated to the more superior, PRO version of WP Reset, it wouldn’t be fair for us not to say that in case you are on a budget and are fine with having limited WP Reset features, the free version of this plugin could work wonders for you as well. Either the PRO or the free version will be really a game-changer.
Thanks for setting aside time to read this article, and we hope that after you finish reading this last sentence, you’ll be on your merry way to download the plugin from either the WP Reset site or its dedicated page on the WordPress repository. Have fun!