Being the most popular content management system (CMS), WordPress is a common target of cyber attacks. Due to its popularity, WordPress is a regular target for cyberattacks. Research suggests that around 4+ million WordPress sites are hacked annually.
If your WordPress site gets hacked, you may notice hidden spam in headers or footers, unfamiliar pages in Google search, unexpected redirects, or hosting warnings about malicious activity.
If malware isn’t detected and removed in time, it can lead to serious issues like data loss and downtime. And the longer malware remains on your site, the worse the damage becomes.
In this blog, we’ll cover why malware removal is essential and walk you through simple ways to scan and clean your WordPress site.
Let’s get started!
Why Detecting and Removing Malware Is Important?
WordPress sites, even with strong security, can still be hit by malware. Hackers often exploit weaknesses in plugins, themes, or core files to gain access.
For example, in February 2024, a critical remote code execution (RCE) flaw, CVE-2024-25600, put over 25,000 sites using the Bricks Builder theme at risk. This issue allowed attackers to run arbitrary PHP code without authentication, leading to full site takeovers. (Source)
Another case surfaced in November 2024, when CVE-2024-10924 was found in the Really Simple Security plugin. Attackers could bypass authentication and login as any user, including admins, if two-factor authentication was enabled. (Source)
Malware infections can result in stolen data, spam injections, and loss of customer trust. Spotting and removing threats quickly is the best way to keep your site safe.
Now that you know why it is important to detect if your WordPress site has been infected, let’s figure out how to do it…
How to Check for Malware on Your WordPress Site?
Malware can silently infect your website, causing serious damage if left unchecked. As I said earlier, the longer it stays, the worse the consequences—your hosting provider might suspend your account, search engines could blacklist your site, and visitors may lose trust.
Here are a few options you can use to detect malware on your site.
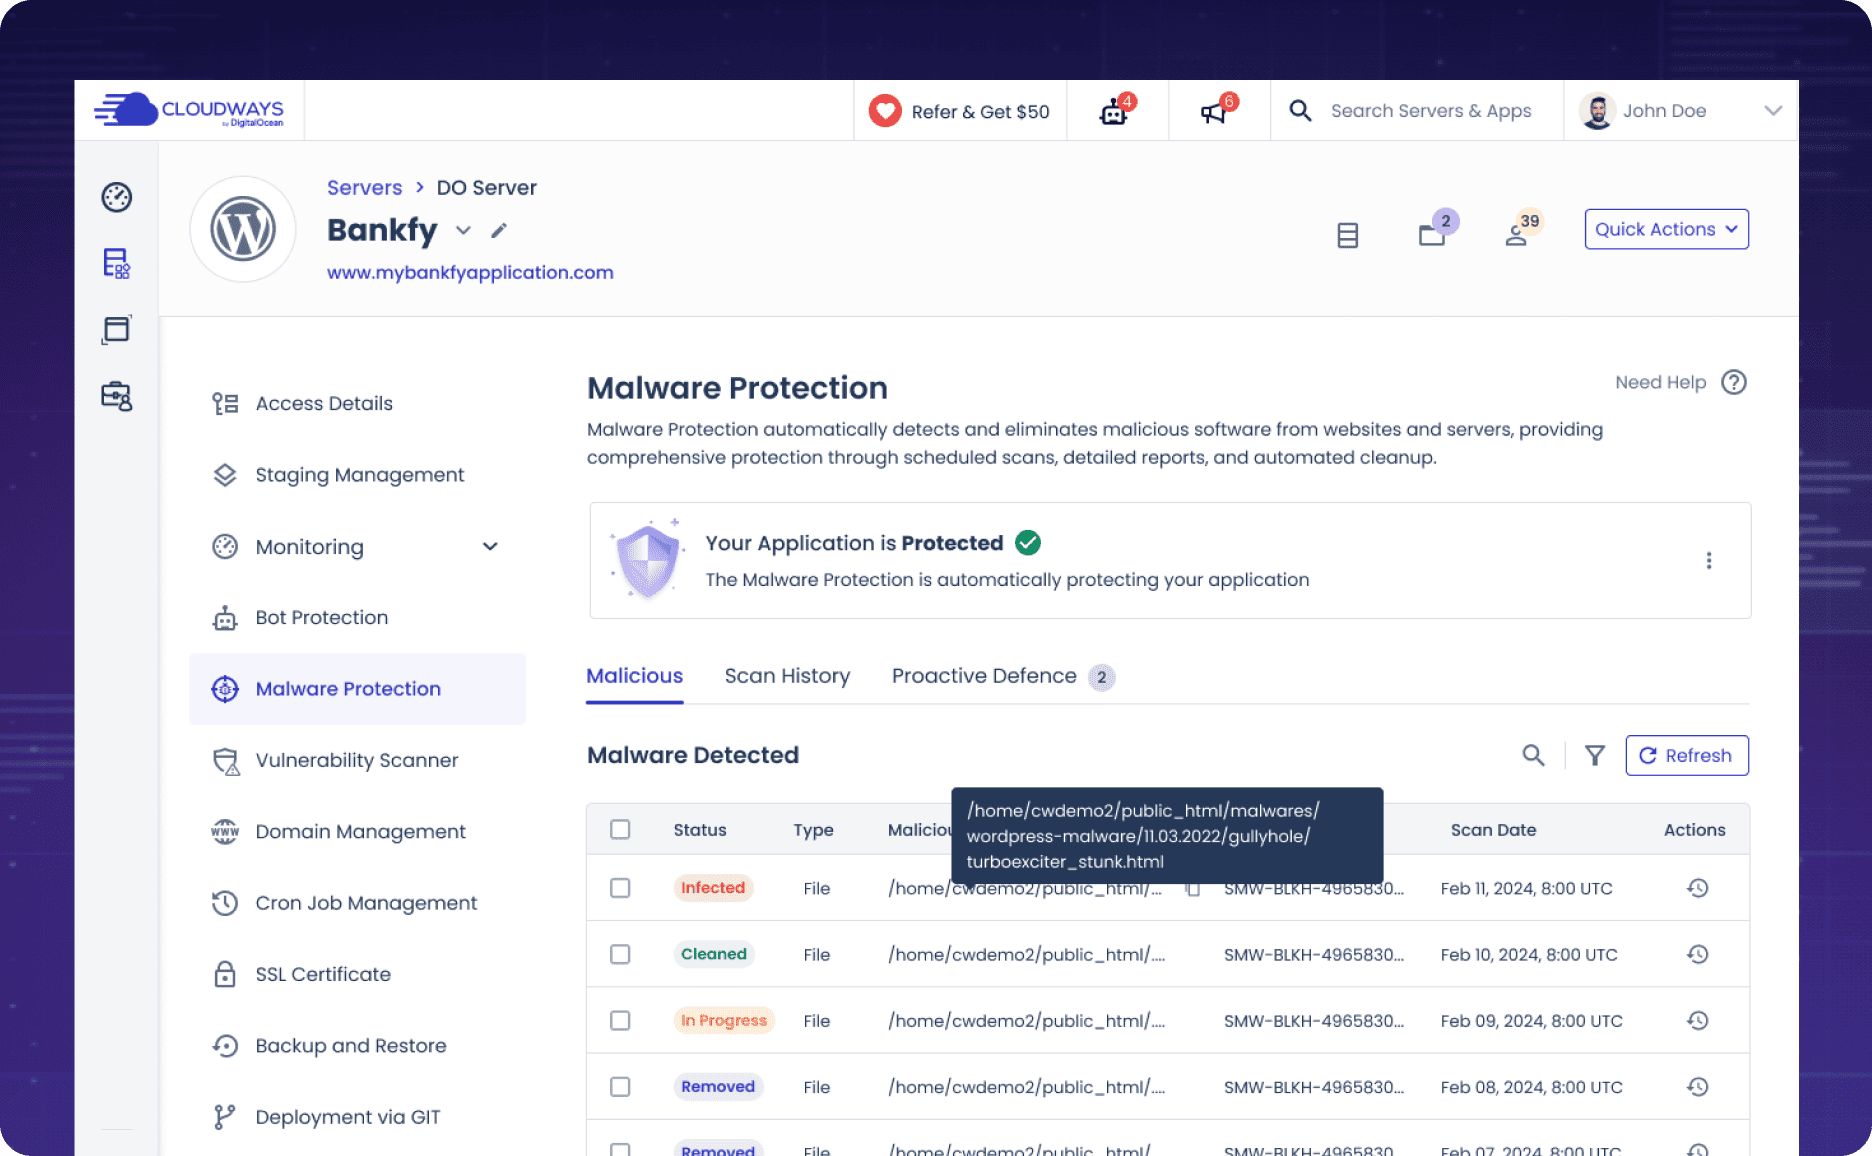
Option #1: Use Cloudways Malware Protection
If you’re hosting your site on Cloudways, you can take advantage of the Malware Protection add-on powered by Imunify360. This addon automatically scans your site and removes detected malware without requiring manual intervention.
Unlike other solutions, it works at the server level, blocking threats before they can affect your application.
It also features RASP (Runtime Active Self Protection), which scans files in real time when changes are made, stopping malicious code before it can do any damage. It’s a true hands-off way to keep your site secure from malware.
Option #2: Scan for Malware Using a Plugin
For those who prefer using WordPress plugins, tools like Wordfence Security can help detect malicious code, backdoors, and infected files.
After installing Wordfence, go to its settings and click Start New Scan.
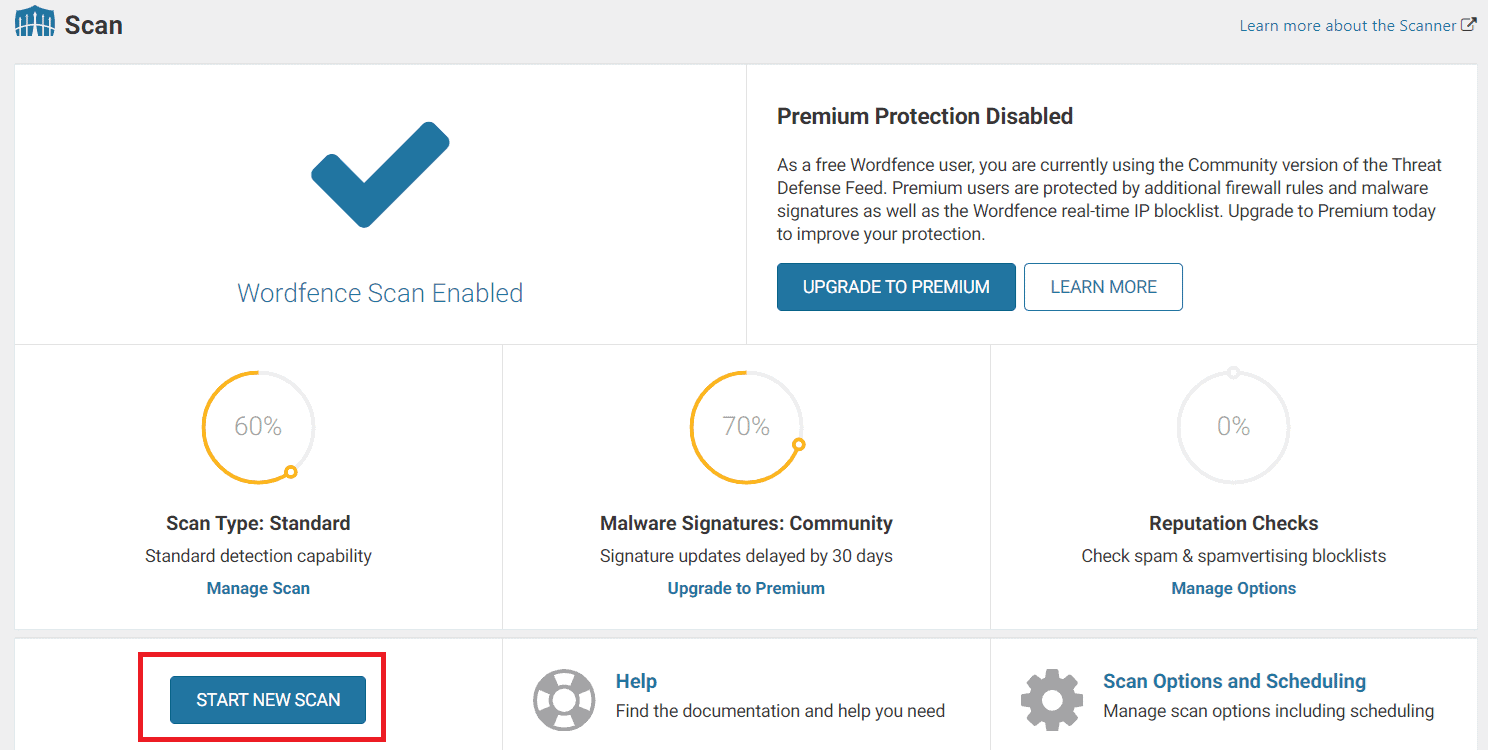
Once the scan is complete, it will highlight any security threats and recommend actions to remove them. The free version offers solid protection, but some advanced features are limited to premium users.
Keep in mind that not all third-party plugins are safe. Always check plugin reviews, developer reputation, and update history before installing security tools.
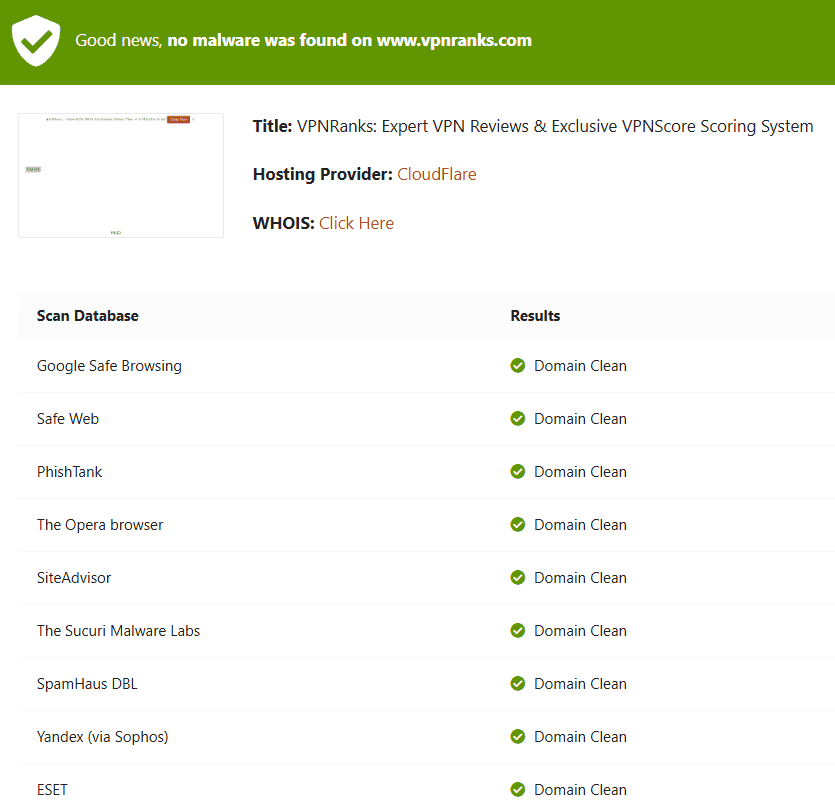
Option #3: Use Online Malware Scanners
If you don’t want to install a plugin, online scanners like IsItWP’s Malware Scanner, provide a quick way to check your site for security threats.
However, these scanners only analyze publicly visible files, meaning they might not detect malware hidden in deeper directories or system files.
Before Removing Malware from Your WordPress Site
Before jumping into malware removal, it’s crucial to take precautionary steps to prevent further damage. Here’s what you should do:
1. Restrict Access to Your Website
If you suspect that your WordPress site has been compromised, restrict access immediately to prevent malware from spreading or redirecting visitors to malicious sites. Limiting access ensures only administrators can investigate and fix the issue while tracking changes more effectively.
To temporarily block all external access except from your own computer, modify your .htaccess file.
To access your .htaccess file, connect your server via an FTP Client like FileZilla.
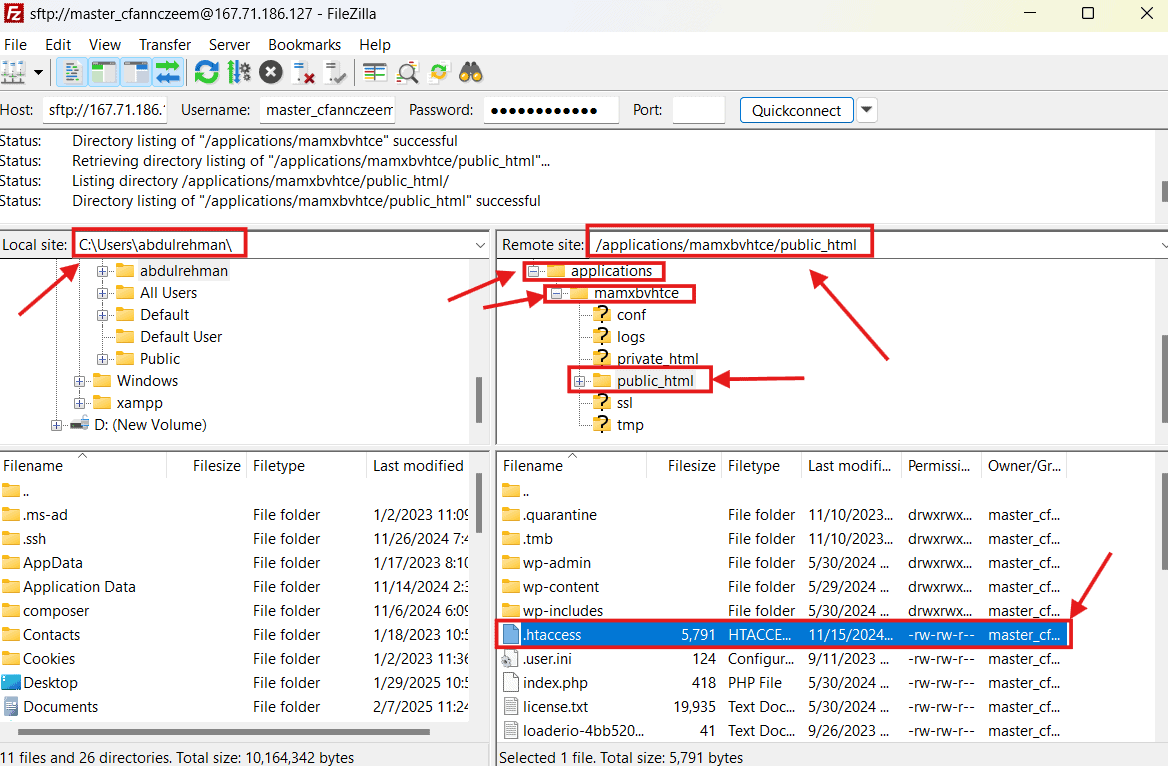
Add the following code at the bottom of the file (replace your_IP_address with your actual IP):
order allow,deny
deny from all
allow from your_IP_address
Save the changes.
2. Reset File & Folder Permissions
Incorrect file permissions can expose sensitive data, making it easier for hackers to inject malicious code. Set correct permissions using an SFTP client like FileZilla or via SSH:
find . -type d -exec chmod 755 {} \;
find . -type f -exec chmod 644 {} \;
3. Reset Passwords and Security Keys
Hackers often use malware to steal login credentials. As a precaution, immediately update all passwords, including:
- WordPress admin login
- Database credentials
- Cloudways account password
- SFTP/SSH access
Use a password manager like 1Password to generate and store strong passwords.
Additionally, reset WordPress salts to secure your log in sessions. Run this SSH command:
wp config shuffle-salts && wp user reset-password $(wp user list –role=administrator –field=ID)
This resets all admin passwords and updates authentication keys in wp-config.php.
These are just some basic precautions to take if you detect malware on your site and plan to remove it.
How to Clean Malware from Your WordPress Site: 2 Methods
Below, we’ll explore three proven methods to remove malware and secure your site. Whether you’re a beginner or an advanced user, there’s an option for you.
Method 1: Manual Malware Removal (For Advanced Users)
Manually removing malware is a technical process, so proceed only if you’re comfortable with WordPress file structure and databases. If not, consider using a plugin or professional service.
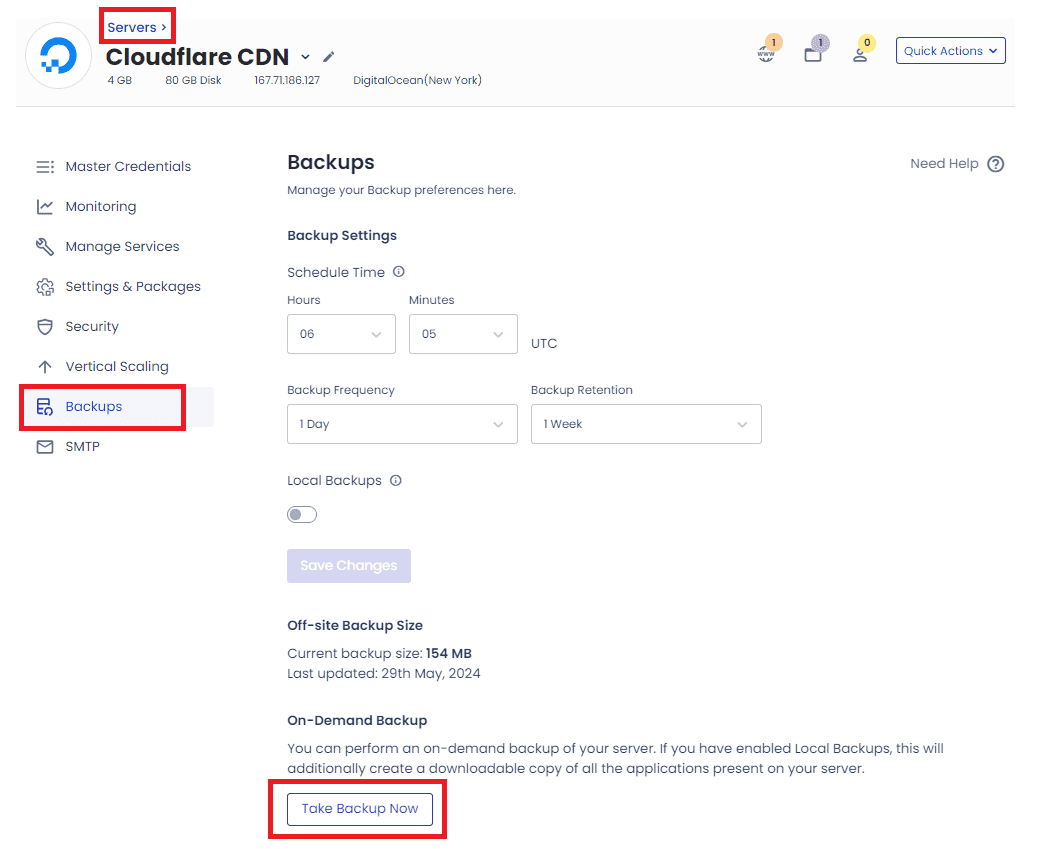
Step 1: Back Up Your Site
Before making any changes, create a full backup of your website. This ensures you can restore your site if something goes wrong. If you’re using a hosting provider like Cloudways, you can easily create a backup from your dashboard.
Alternatively, use plugins like UpdraftPlus, BlogVault, or Solid Backups.
Step 2: Download Clean WordPress Core, Themes, and Plugins
Get fresh copies of the WordPress Core, themes, and plugins from their official sources. Make sure the versions match what’s currently installed on your site.
Step 3: Replace Infected Files
Using FTP or your hosting file manager, replace the following folders and files with clean versions:
- Replace the wp-admin and wp-includes folders.
- Check and clean these files:
- index.php
- wp-config.php
- .htaccess
Look for suspicious code like eval(base64_decode()) or unfamiliar PHP files in the wp-uploads folder (delete any PHP files found here).
Step 4: Clean the Database
Access your database via phpMyAdmin or a similar tool. Search for suspicious entries in the wp_options and wp_posts tables. Delete any unfamiliar or malicious entries.
Step 5: Change All Passwords
Update all passwords, including:
- WordPress admin login
- Database credentials
- FTP/SFTP accounts
- Hosting account
Step 6: Clear Cache
Clear your site’s cache to remove any cached malware-infected files.
Step 7: Scan and Verify
Use a malware scanner like Wordfence to confirm your site is clean. If any issues remain, repeat the steps or consider professional help.
Method 2: Use Cloudways Malware Protection Add-on (Automatic Approach)
For a more secure and automated solution, Cloudways offers a Malware Protection add-on powered by Imunify360. This tool operates at the server level, providing real-time protection and automatic malware removal.
Key Features:
- Real-time malware detection and blocking
- Automatic cleanup of infected files and databases
- On-demand and scheduled scans
- Protection against phishing and other attacks
How to Enable:
- Log in to your Cloudways dashboard.
- Go to App Management and select your site.
- Click on Malware Protection and enable the add-on.
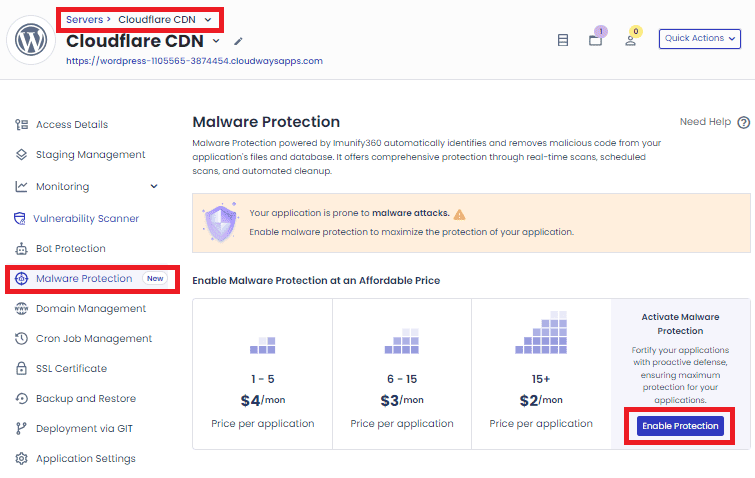
Once activated, the add-on will automatically scan and clean your site. You can view the scan history and restore cleaned files if needed.
Why Choose Cloudways Malware Protection?
Unlike plugins, Cloudways’ add-on operates outside the application layer, making it more reliable and secure. It’s an excellent choice for users who want hassle-free, server-level protection.
How to Clear Malware Warnings from Google?
When a website gets infected with malware, Google and other search engines may blacklist it, making it inaccessible to users. Many web hosting providers also rely on Google’s security list, so removing these warnings quickly is essential.
To do this, you’ll need to use Google Search Console, where you can request a security review after confirming your website is completely free of malware. However, if Google still detects malicious content, your request will be denied. Multiple rejections can get you flagged as a Repeat Offender, meaning you’ll be locked out of further review requests for 30 days.
Steps to Remove Google’s Malware Warning
- Access Google Search Console and go to the Security Issues tab.
- Identify the problems flagged by Google and resolve them by removing all traces of malware.
- Scroll to the bottom of the page and select Request a Review.
- Clearly explain what steps you took to eliminate the security risks.
- Submit your request and wait for Google to process it.
Once your request is in, the review process may take several days. Since Google handles these manually, there’s no way to speed it up. Avoid repeatedly submitting requests, as that could negatively impact your site’s reputation. Instead, focus on ensuring your website remains secure to prevent future issues. The Cloudways Malware Protection add-on is a great way to ensure this.
Wrapping Up!
Keeping your WordPress site free from malware is important for protecting your data, reputation, and visitors. By following the steps in this guide, you’ll be able to detect and remove malware effectively. Regular scans and backups are the best way to prevent future threats.
If you’re using Cloudways, the Malware Protection add-on can automatically identify and remove malware, keeping your site secure.
If you think we’ve missed anything, let us know in the comments!