Going broad when marketing services or products nowadays simply doesn’t cut it anymore. You’ll need to run campaigns that are specific, almost to the point of being individual to get the best results. Catching the eye of every potential consumer by catering to their wants and needs is the new way of business. To do this you’ll have to gather information on them. Outside of blatantly asking for crucial information, there are different, more subtle, methods that can and will go a long way.
One of these methods is geolocation. Using geolocation on your site gives you information that derives from the place (or rather IP) your visitor is accessing your site.
Knowing where your visitor comes from enables you to adjust the currency of your product and even time your campaigns to their timezone, more specifically the time they’re mostly online. Geolocation also helps with regulating certain ads for specific countries where they don’t comply with the native laws. There are even more examples, but the essence is that geolocation can be used in a multitude of ways that will make your campaigns more focused on the individual. With everybody wanting to feel special receiving that personal touch can put you one step ahead of the competition.
The perfect solution
IP Geolocation is one of those solutions you’ve got to love. They encompass three APIs:
- Geolocation API – the standard; make a request and get real-time geolocation for your visitors’ IP
- Timezone API – aside from the geographical location you’ll also be able to get back the timezone, date and local time information
- Astronomy API – not used as much, but still viable in certain situations, you’ll be able to get the sun and moon information for a given location (rise and set times, position, angle, distance etc.)
Not only that, but you’ll also get an option to get results in various different languages. These include, as of writing: English, German, Russian, Japanese, French, Chinese (simplified), Spanish, Czech and Italian. Keep in mind that the default language is English and it’s the only option for non-paying users. If you opt for one of the numerous payment plans, then you get access to the additional language options.
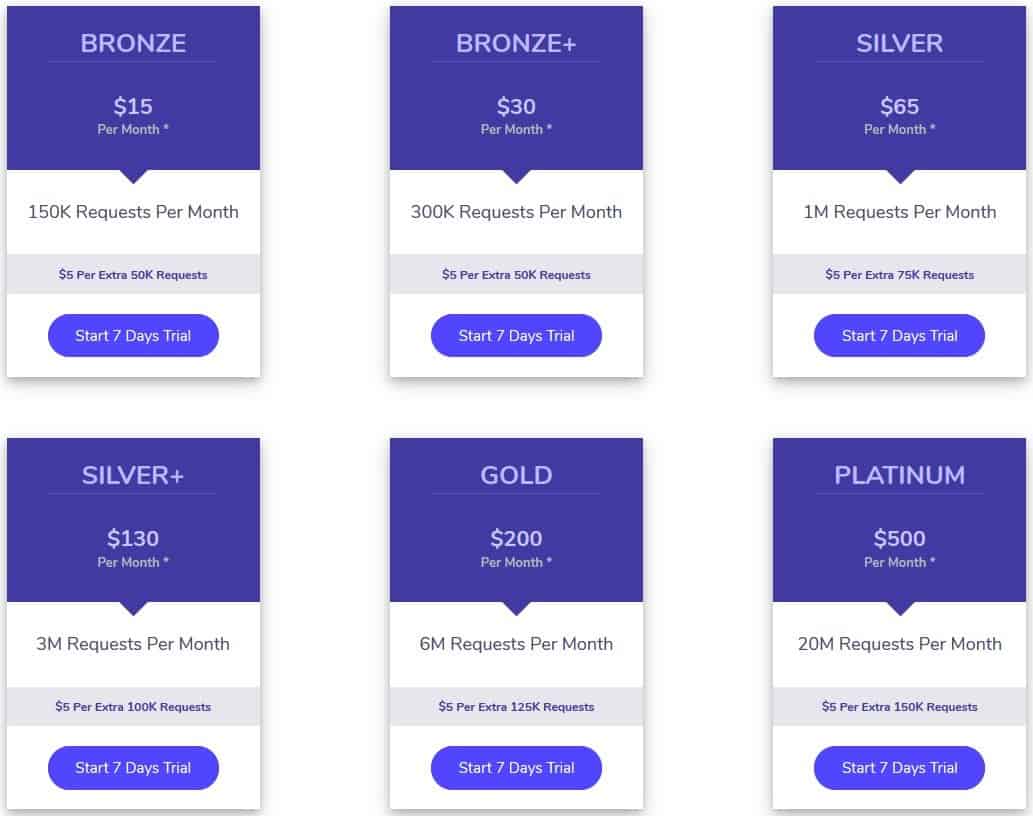
An overview of monthly payment plans
Speaking of payment plans, you’ll be hard pressed to find more variety in general, not only in the field of geolocation solutions. Aside from the free plan, you get to choose from six different plans that have both monthly and annual variants (annual plans obviously cost more, but are cheaper on a per month basis), bringing up the total to a whopping twelve premium plans.
One additional plan is available – the Enterprise plan for those who need more than 20 million requests per month. You’re bound to find something that works for you with all those options. If you’re in any doubt, however, you can also use the 7-day free trial which is limited to 100.000 requests but has all the options of a full plan.
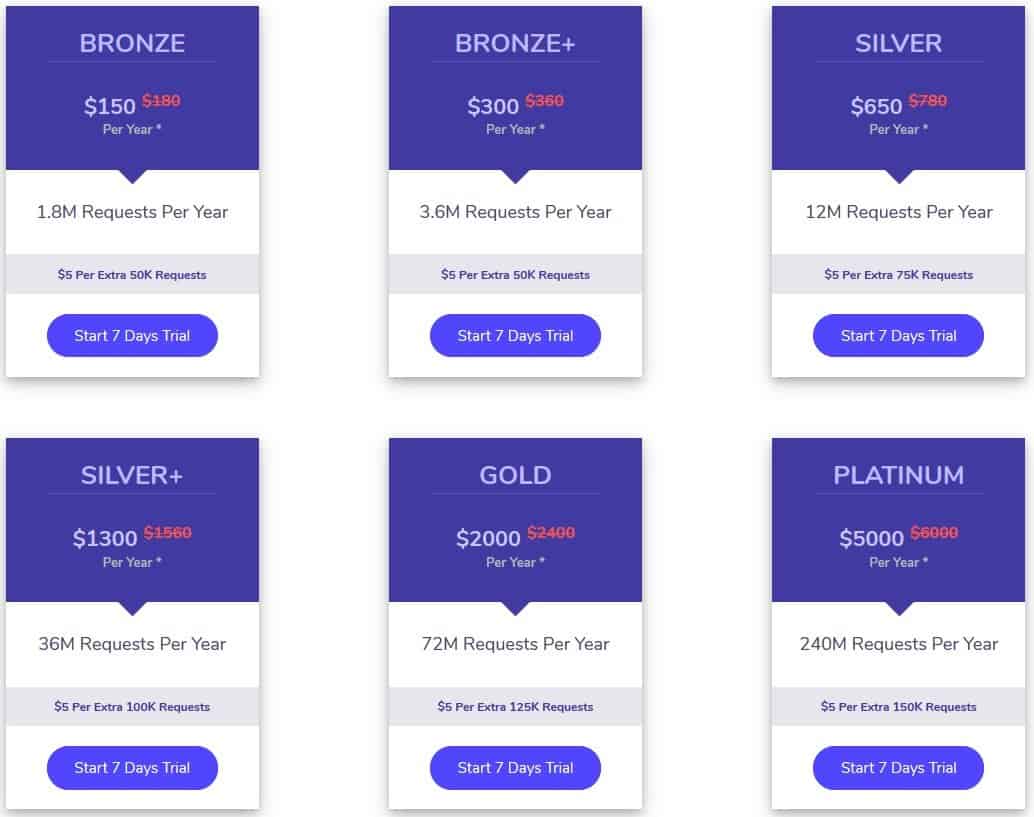
An overview of annual payment plans
How to get a location from IP address in JavaScript
Now that we’ve covered the basics of what IP Geolocation API gives you, it’s time to cover how to get this information into your app. We’ll cover the code for JavaScript and what you’ll need to do to get the complete geolocation info.
Before you can start working with IP location JavaScript, you’ll need to get your own API key. This is done directly through the Dashboard once you log in and it’s free for all users. After you have that you’ll be able to look up geolocation information based on the visitors IP address. Next comes installing the IP Geolocation API JavaScript SDK. The easiest way to do that is via NPM. Just run:
$ npm install ip-geolocation-api-javascript-sdkor grab the SDK from Github. Then comes the code to handle the actual response. Thanks to the SDK it’s super-simple:
function handleResponse(json) {
    console.log(json);
}

var GeolocationParams = require('ip-geolocation-api-javascript-sdk/GeolocationParams.js');
After that more options open up to you. Adding further lines of code, you’ll get different results. You can request the full geolocation response from the visitors IP:
ipgeolocationApi.getGeolocation(handleResponse);If you’re looking for the whole package, but in a different language (the language shortcut is in red – for this example it’s Spanish), the code will be slightly different:
var geolocationParams = new GeolocationParams();
geolocationParams.setIPAddress('1.1.1.1');
geolocationParams.setLang('es');

ipgeolocationApi.getGeolocation(handleResponse, geolocationParams);
Now, there will be times you’ll need only certain information and won’t be bothered with everything. In that case, you’ll need to include exactly what need (example for location, timezone, and currency in red):
var geolocationParams = new GeolocationParams();
geolocationParams.setIPAddress('1.1.1.1');
geolocationParams.setFields('geo,time_zone,currency');

ipgeolocationApi.getGeolocation(handleResponse, geolocationParams);
Very similar to that is the option to exclude certain information. This is to be used in cases where you don’t know what you want, but are certain in the things you don’t want (example for excluding the continent, country code and timezone in red; also the request is for a response in German):
var geolocationParams = new GeolocationParams();
geolocationParams.setExcludes('continent_name,country_code3,time_zone');
geolocationParams.setLang('de');

ipgeolocationApi.getGeolocation(handleResponse, geolocationParams);
Request origin
Aside from the standard API key authorized requests, JavaScript geolocation by IP Geolocation also offers requests authorized by origin feature. Using it, you’ll be able to call the IP Geolocation API from the client-side JavaScript without using your API key. This is done through the Dashboard, where all you need to do is enter your domain name. Once you’ve done it you’ll be able to make a request from the main domain in question, as well as all subdomains.
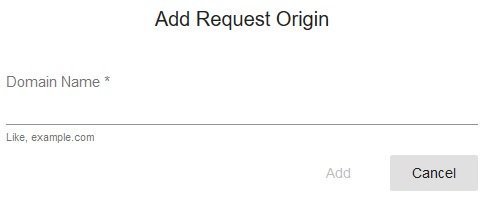
Request origin through the dashboard
It’s important to note that this feature is available only on paid plans and is limited, depending on what tier you’re using. Bronze and bronze+ have one request, silver and silver+ have two and gold, platinum and diamond have three requests. In case that’s not enough for you, you can add more requests to your plan for an extra charge of $2,50 a month per request.
Summary
Using any kind of geolocation service is necessary to give your visitors the experience they need. Small touches like personalized campaigns and local currency values will keep them coming back for more. You as the provider also benefit from this information not solely to use it as a way to reach out to visitors but to ensure your business is safer.
Recognizing the similarities, or dissimilarities of IP and billing/delivery addresses helps you reduce the chance of fraud and anything going wrong on either your end or your customers. With a plethora of both pricing plans and API options, IP Geolocation comes highly recommended and would be a great choice for anybody looking to enhance their site in this aspect.