If you are working with an email infrastructure, your main goal is to ensure the complete cycle of an email campaign will work precisely — from the moment you push the “send” button to the preview on your customers’ screen. Email testing is the most straightforward way to guarantee the deliverability of your marketing and transactional notifications. And for this matter, Python is an excellent choice. You may check the preliminary rendering of a design, spelling, links, and other details using Python technology before sending messages to your subscriber list. Additionally, you can set up an email server with API to preview your emails in web or mobile applications or send test emails to a safe environment. While working with bulk email sending, a virtual sandbox helps you avoid overrunning the actual inbox with test messages or your domain getting on a spam blacklist.

Building an Email in Python
Python has a built-in function that makes creating and sending emails simple and quick. It’s the send mail command’s mail function (). A built-in function requires the specification of the four parameters: `subject`, `message`, `from_email`, and `recipient list`.
We will use Django, a high-level Python-based web framework promoting rapid development and streamlined, practical design. Using this framework is beneficial as a lot of work is done for you; a lot of abstraction is done for you, taking away the pains of library implementations. You would need to install Django on your PC, using this command:
`pip install django`
Now, we can build the email:
“`python
from django.core.mail import send_mail
from django.core import settings
send_mail(
subject = <write your message subject here>
message = <write your message body here>
from_email = <email host goes here>
recipient_list = <recipient email or emails go in here>
)
“`
Let’s analyze the above code:
- Imported is the Django mail function.
- The choices included in the settings object (found in the settings.py file), which contains both global and per-site options, are then imported.
- Finally, we invoke the send mail function with all necessary arguments.
Setting Up an SMTP Server
To start with an email testing flow, you need to set up a Gmail account for development or an SMTP debugging server that prints emails to the command prompt instead of discarding them. An SMTP server helps resolve email functionality problems and ensure optimal email deliverability and bug-free emails. This step is critical for maintaining high email deliverability rates and ensuring your messages reach recipients’ inboxes while avoiding spam filters.
Configuring Google SMTP Provider
To complete the process of sending emails using the Google Gmail SMTP service, you should change and add a few more parameters to your project using the data from your Google Gmail account. Be advised that some details, such as the password and account, should be kept private. For this, you may set them as environment variables. A particularly efficient third-party tool for such a job is django-environ.
“`xml
DEFAULT_FROM_EMAIL = ‘<Your gmail account goes here>’
EMAIL_BACKEND = ‘django.core.mail.backends.smtp.EmailBackend’
EMAIL_HOST = ‘smtp.gmail.com’
EMAIL_HOST_USER = ‘<Your gmail account goes here>’
EMAIL_HOST_PASSWORD = ‘<Your app password here>’
EMAIL_PORT = 587
EMAIL_USE_TLS = True
“`
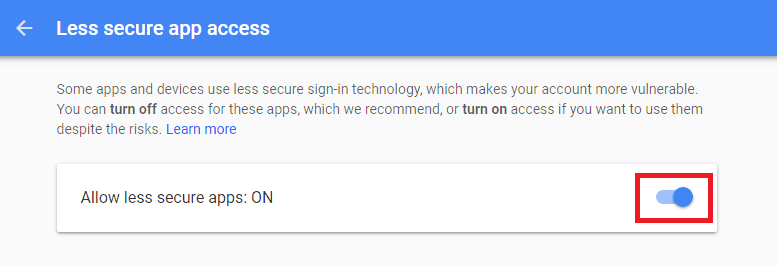
Your project’s Google SMTP setup is completed. To configure an app password, you must use this link and grant access to less secure programs.
Be aware that using secure applications with Google accounts that have 2-step Verification activated is impossible.
Using Gmail SMTP to send Emails
We will utilise the “send mail()” method and the Google SMTP setups covered in their respective prior subsections to show an email-sending process. Call the provided “send mail” function with the appropriate arguments using the Django shell to test email sending.
“`python
send_mail(
‘Message Subject’,
‘Message Body’,
settings.EMAIL_HOST_USER, # This imports Google user credential
[<you recipient email here>]
# Other fields as described before are not compulsory
)
“`
Run the script above in a python shell.
Now, look at the email address in the email’s “recipient list” column. It ought to have fallen when you were writing it. Basically, it’s how emails are sent when Google Gmail SMTP setup is configured in the backend.

Setting Up and Using a Local Python SMTP Server
Launch the built-in Python SMTP module on your personal computer to use it as a local email SMTP server for testing or development. Rather than sending the email to an intended recipient, it discards and prints the message to the console. The proper installation of Python is the only prerequisite to doing this.
Start the command prompt and enter the following command:
`python -m smtpd -c DebuggingServer -n 127.0.0.1:1025`
This will launch the SMTP server and assign TCP port 1025 to your host’s loopback interface. Any of the host’s IP addresses, such as 10.1.1.1, the host DNS name (test.com), or 0.0.0.0 to listen on all interfaces, can be used in place of 127.0.0.1. There won’t be any output in the CLI once the command has been run. Now, the server is only waiting for new connections.
Testing the Local Server
We will use telnet to send a test email message to our SMTP server. You can find further information about using telnet to send emails here.
The following commands should be entered into a new command prompt:
`telnet 127.0.0.1 1025`
You’ll see the welcome message from the server as well as the output of the telnet command trying to connect to the chosen host and port:
“`cmd
Trying 127.0.0.1…
Connected to 127.0.0.1.
Escape character is ‘^]’.
220 test.com Python SMTP proxy version 0.3
“`
Now it’s necessary to identify ourselves. Type:
`ehlo remote.test.com`
In response, the server will provide its capabilities:
“`cmd
250-v-dc1-log02.dtekgroup.tek.loc
250-8BITMIME
250 HELP
“`
The `mail from` and `rcp to` commands are used to specify the email sender and recipients respectively:
“`cmd
mail from: user@remote.test.com
250 OK
rcpt to: admin@test.com
250 OK
“`
Email addresses in this situation is largely irrelevant and may even be nonexistent. Send the `data` command first, then enter the message body:
“`cmd
data
354 End data with <CR><LF>.<CR><LF>
“`
This is followed by the email’s real Subject and its body:
“`cmd
Subject: Test email
Hello! This is the test
Hope you will see it.
– User
“`
Insert one blank line to complete the body input, then enter the single.:
“`cmd
.
250 OK
“`
To exit the session, type the quit command at this point.
You will notice the following message in the first command prompt window where we launched the SMTP server:
———- MESSAGE FOLLOWS ———-
b’Subject: Test email’
b’X-Peer: 127.0.0.1′
b”
b’Hello! This is the test’
b’Hope you will see it.’
b”
b’- User’
———— END MESSAGE ————
That means you did everything correctly.

Sending an Email to the Testing Environment
Testing emails via fake third-party servers is a secure method that doesn’t expose you to the danger of sending spam to actual customers. Regardless of whether you use email personalization in your campaign or send unified email copies to all clients, it’s advisable to have a reliable tool with a history of producing top-notch results.
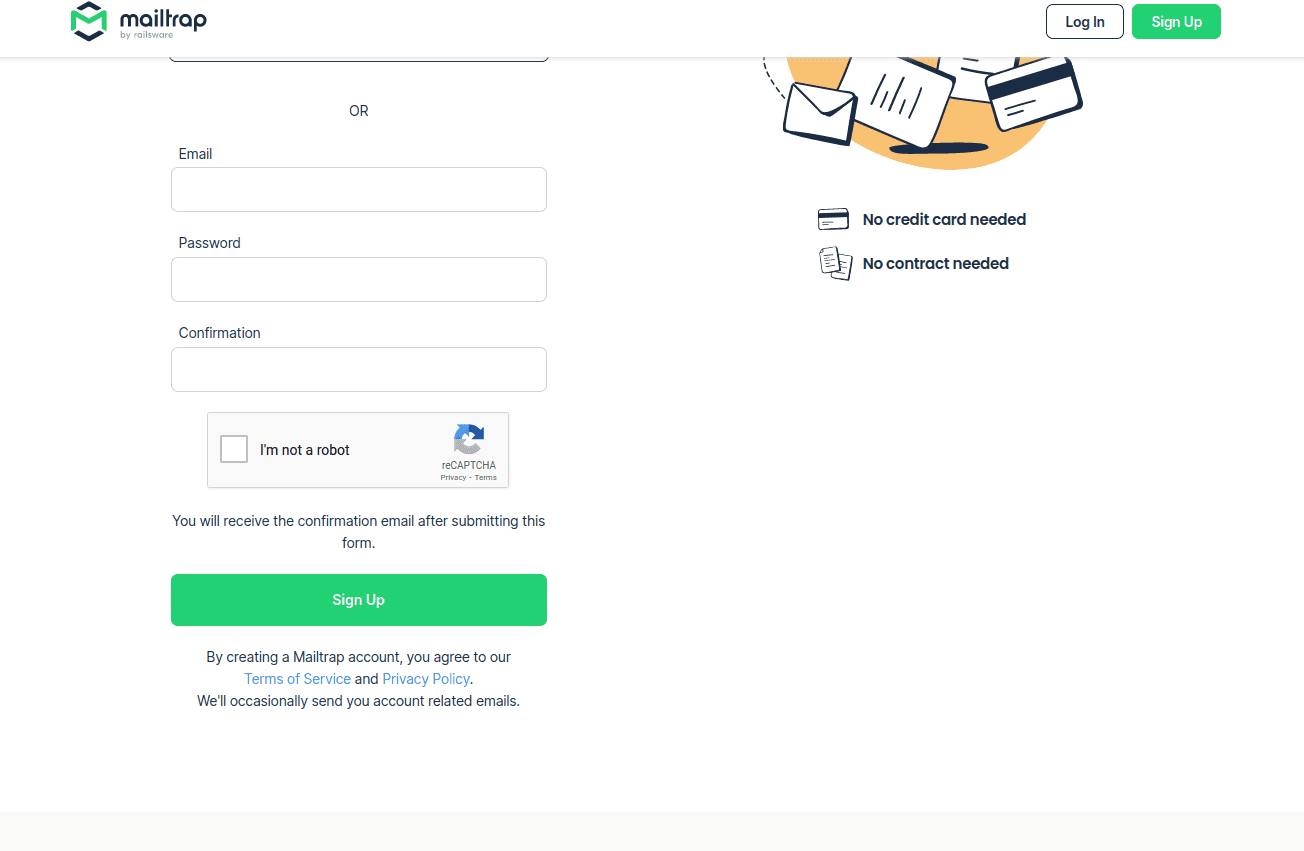
In the following example, we’ll use Mailtrap Email Sandbox.
First, we need to set up a Mailtrap account. Visit this link to get started.
“`python
import smtplib
port = 2525
smtp_server = “smtp.mailtrap.io”
login = <your login on Mailtrap>
password = <your password on Mailtrap>
“`
The bit of code is relatively simple. Examining it more closely, let’s add some error handling (note the #explanations in between). We employ the “try” and “except” blocks to detect mistakes.
The first step is always the same. Import all necessary components:
- import smtplib
- from socket import gaierror
You may now experiment with your code. Here, we will define the SMTP server separately:
port = 2525
smtp_server = “smtp.mailtrap.io”
login = <your login generated by Mailtrap>
password = <your password generated by Mailtrap>
Enter the email addresses of the sender and recipient.
from_email = “sender_email@sample-mail.com”
to_email = “recipient_email@sample_mail.com”
Write your message here:
Use two newlines (n) to divide the message’s #topic and body, and use the letter “f” to have variables automatically #inserted into the text:
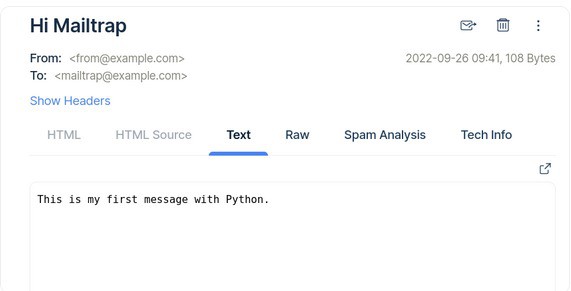
message = f”””\
Subject: Hello there
To: {to_email}
From: {from_email}
A test email sent in a test environment from me to you!.”””
#try using the aforementioned credentials, send a message
with smtplib.SMTP(smtp_server, port) as server:
server.login(login, password)
server.sendmail(sender, receiver, message)
#try the script to indicate if your message was sent or which exceptions need to be handled.
print(“Done”)
except smtplib.SMTPServerDisconnected:
print(‘connection to the server failed. false user and password’)
except smtplib.SMTPException as e:
print(‘Something went wrong: ‘ + str(e))
Get a ready-to-use template of a short text message containing your Mailtrap login information by visiting the Integrations section of the SMTP settings tab. The sendmail() instance function is the most fundamental choice for letting your Python code know who sends what to whom:
In addition to searching for the email or phone number that a message was sent to, as you can see from the example so far, you can also search using several other criteria.
Writing Functionality Tests
As we already created a project for sending test emails, we can expand it with writing tests for various functions.
Before you start, it’s noteworthy that the examples given below are based on the following two tenets assume that:
- you’ve already developed a simple automated test.
- you will test the values displayed below using your selected assertion library.
Testing an Email or SMS Content
The `text.body` property of a message provides access to an email or SMS message’s text content with the following Python code line:
`print(message.text.body) # “Hi John, …”`
The most typical use cases for testing email or SMS message content are covered in this section. You should also consult the instructions for handling content extracted automatically, like links and images.
Determining the Presence of a parameter:
`contains_text = “John” in message.text.body`
`print(contains_text) # true`
The search for an 8-digit alphanumeric code:
This illustration extracts an 8-digit code made up of 2 letters and 6 numbers.
`print(message.text.body) # “Your access code is QZ524822.”`
`match = re.search(“([A-Z]{2}[0-9]{6})”, message.text.body)`
`print(match.group()) # “Q2ZH482S”`

Testing HTML Content
You may break up the HTML content of your email into distinct components that you want to edit. That would help you remove secure data, including account verification codes, to avoid the risk of revealing your login credentials to cybercriminals or losing sensitive information if you don’t run an email backup.
Install a library for HTML. You’ll need to utilize an HTML library to extract text from email bodies in your tests. Alternative libraries to those displayed here exist for each language.
Install the necessary libraries first:
`pip install beautifulsoup4`
The complete Python code is shown below:
“`python
from bs4 import BeautifulSoup
dom = BeautifulSoup(message.html.body, ‘html.parser’)
el = dom.find(‘.verify-code’)
verification_code = el.text
print(verification_code) # “123456”
“`
Locate the desired component, by taking the HTML code below and extract the verification code:
“`html
<div>
<h1>To activate your account, enter this code:</h1>
<p class=”verify-code”>123456</p>
</div>
“`
To Wrap Up
Today we explore the correct flow of testing emails with Python. Follow these steps to ensure the deliverability, security, and accurate rendering of your messages on different devices and email clients, and provide your mailing list with a fantastic customer experience. Thank you for going through this guide with me, and good luck with your email infrastructure!