Questions like what is a sticky menu, what is a sticky header, and what is an Elementor sticky menu are probably on your mind right now, and if you’re seeking answers to any of these questions, then you’re in the right place. We’re going to help you figure out what sticky menus/headers are, as well as show you how to set them up on your WordPress blog.
What is a sticky menu?
When you open up a website, scroll down, and see that there is a menu following you while you are scrolling, then you have encountered something that is called a sticky menu. It’s a visible and fixed website element that provides you with many features, which your site visitors will surely appreciate.

What is a sticky header?
A sticky header is a little bit different from a sticky menu because of one thing. The header is affixed to the top of your screen and provides you with a navigational tool that has many options.
What is an Elementor sticky menu?
Elementor is a page builder for WordPress, and one of its features is creating a sticky menu that follows a visitor down the page as they scroll. The great thing about Elementor is that it requires no programming skills. So, with it, you can create a header with a menu, logo, and so on as well as a footer with some information about the page among other things. By using Elementor, you no longer need to mess with the template files.
Why use a sticky menu?
By implementing sticky menus on your WordPress blog, you will surely improve your blog’s quality. You will also provide easier access to additional content for all visitors.
It doesn’t just have to be a sticky menu either you can create sticky buttons, notes, and many other things.
By attaching your brand’s logo to a sticky menu, you can build brand awareness and make users associate a particular logo or symbol with you. You can also make a sticky menu that truly represents your company’s identity, brand, and so on.
Furthermore, by changing colors or font rendering, you can make anything stand out and represent your brand. But this is not necessary. You can instead just highlight certain words that you want to draw attention to. Visitors will notice this and thus might continue to explore what you have to offer on your blog.
Also, try to include important menu options and keep in mind that some visitors are using mobile devices. So, experiment before you decide how your sticky menu will look like and what icons it will have. You never know which options visitors will like the most.
Using coding to create sticky menus
Now that you know what sticky menus are and why you should use them, you are probably wondering how to implement them on your WordPress blog. If you have any programming knowledge and want to implement this sticky menu feature, we will offer you a piece of code with which you can add a sticky menu. You can use that code in your CSS file. There, you can add it manually.
This is very easy to do; the only problem with the CSS file is that not much can be personalized and changed without causing errors. Because of that, we recommend you use a plugin named WP Sticky to create sticky elements.
We will talk about that plugin soon, but for now, take a look below if you are interested in using the code method.
This is the CSS code:
div.sticky {

position: -webkit-sticky; /* Safari */

position: sticky;

top: 0;

}
You can find the code above at this link.
The code above can be manually added after you access your WordPress dashboard and then click on Appearance. After doing that, click on Customize to open the blog’s personalization options.
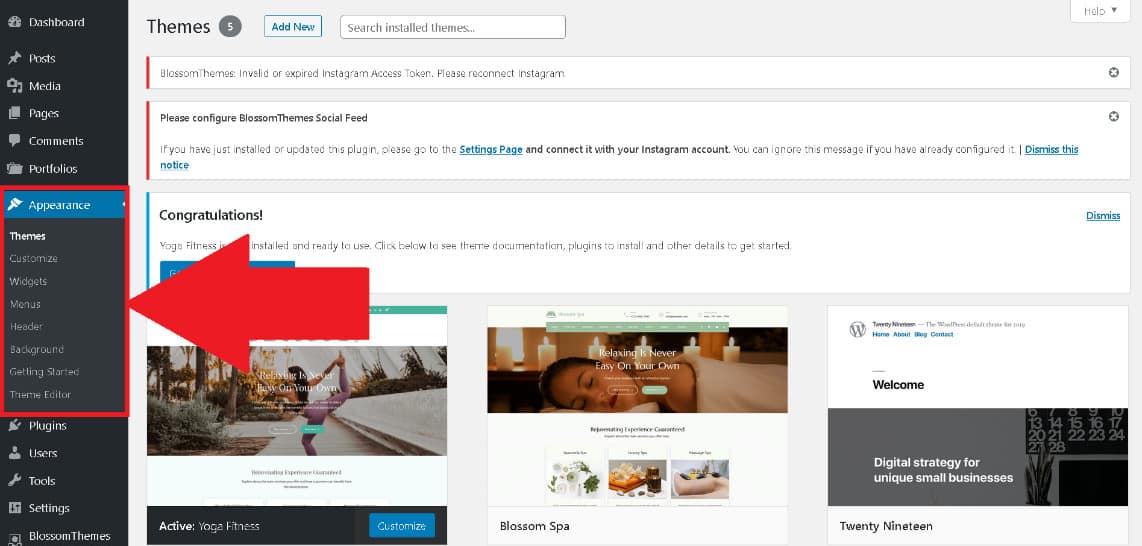
In front of you will appear a new dashboard where you can try out various options just by clicking on anything you want. For example, if you want to change the title, click the blue circle with the white pencil icon. But, the thing we are most interested in is the option to add more CSS code to a site.
You can add it just by clicking on Additional CSS. This should be located in the bottom-right corner and provide you with a developer console where you can paste the code.
After you add your code, just press the Publish button and refresh the site to activate the code. See? It is so easy to use the code, but there is an even simpler way of creating sticky elements.

Using the WP Sticky plugin
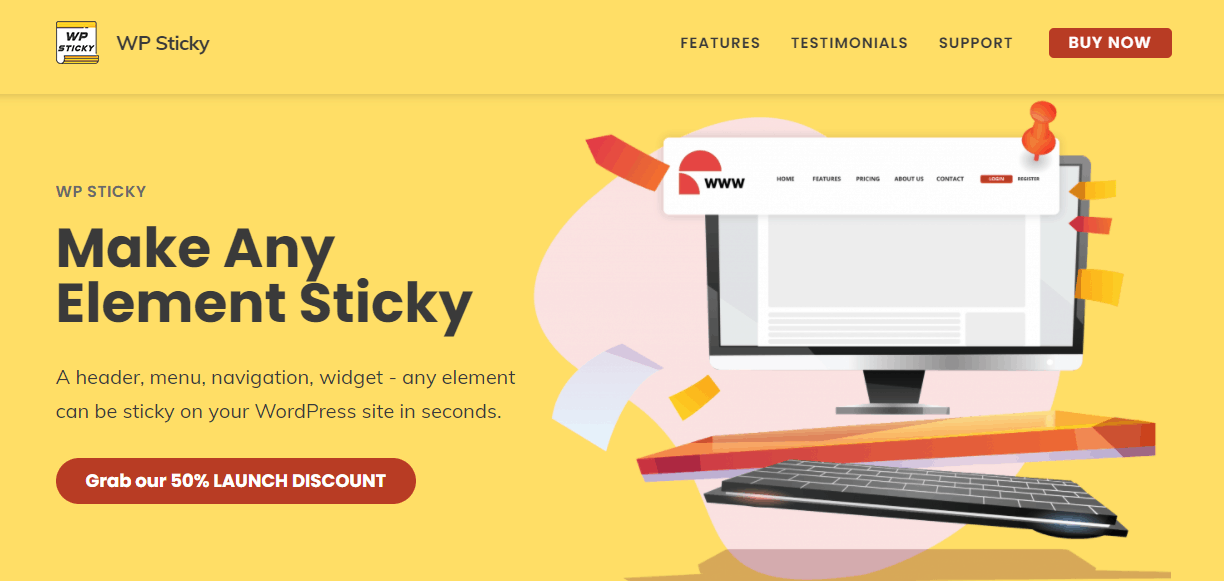
Now that you are familiar with the code method of adding a sticky menu, you might be thinking how difficult the process is, or you might want more features. In that case, we would like to recommend an awesome sticky menu plugin by the name of WP Sticky.
This WordPress plugin was made by WebFactory Ltd in 2017. WP Sticky provides you with the ability to create sticky menus and other sticky elements without using any code and understanding anything about the basics of programming.
With this plugin, you avoid all the obstacles you would encounter through programming since you can do everything you need with one click. On the WP Sticky site, you can see how the plugin looks like, and you can find examples of the plugin in action.
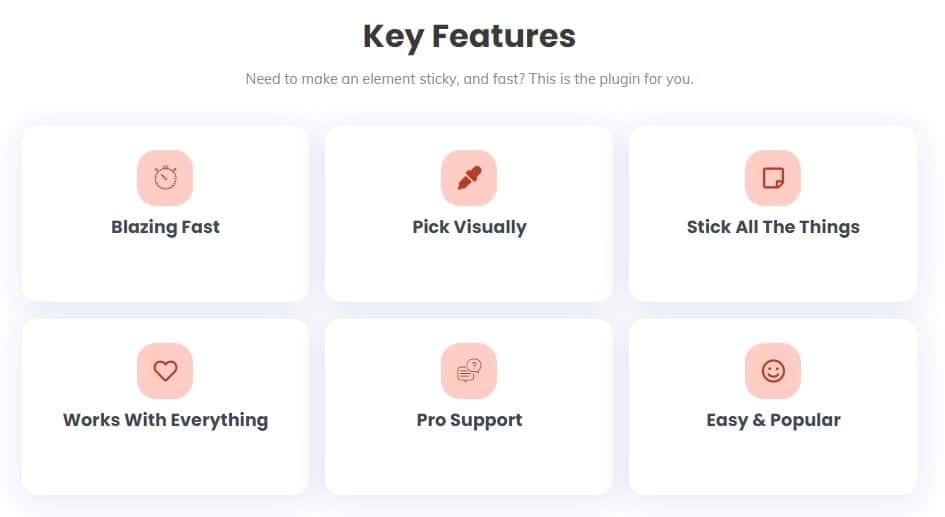
The features that this plugin provides are great, and you will surely love them, especially if you want to improve your blog’s quality. Everyone who uses this plugin already adores it because of its easy yet quick use. With just a few clicks, you can easily add whatever sticky element you want to your blog.
It provides you with the ability to make any element sticky without messing with code. You can create things like a sticky header, sticky menu, sticky ad, sticky widgets, and so on.
These sticky elements will work together, and you won’t find them interfering with each other and making a mess. Plus, you can add as many sticky menus and elements as you want to your blog.
Still, the best thing about this plugin is its compatibility with other plugins, themes, and page builders. And since you don’t have to use any code, you can use the visual element picker and make any element you want sticky.
Having said that, WebFactory Ltd provides great professional support for the plugin users. That support will be there for you at any time. They provide this kind of support because they are interested in improving your user experience and the plugin’s quality.
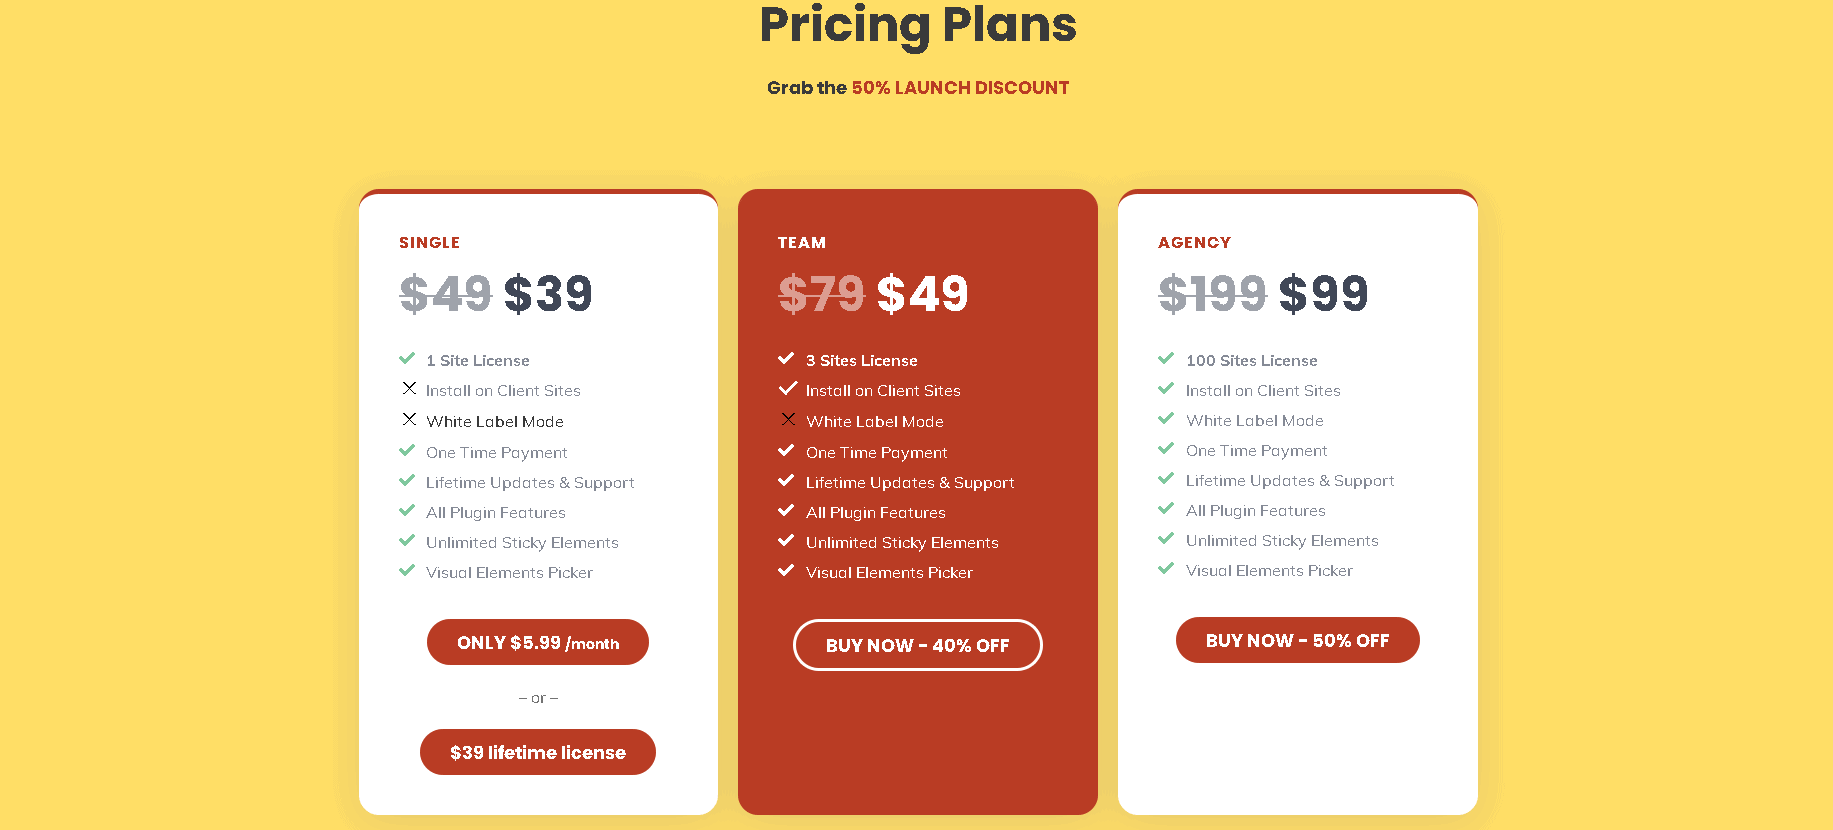
On the WP Sticky site, you can find all the plans and prices that they offer. There are three plans that are now on sale, so you shouldn’t let that great deal pass you by. You can choose the Single, Team, or Agency plan. Each plan has its own benefits. The biggest difference between them is the number of sites you can use this plugin on.
If you choose the Single plan, you get a license for one site. The Team plan gets you a license for three sites, and the Agency plan a license for 100 sites. The Agency plan has all the features and costs only $99. All the prices are for one-time payments, so you don’t have to worry about monthly fees. And in case you change your mind within the first seven days, they have a refund policy. With no questions asked, they will return all your money.
Now, you are probably curious about how to use the plugin after you decide to purchase it. So after installing the plugin, you should check if the plugin is running. If yes, it will show up in the settings of your WordPress site.
Then, you just click on WP Sticky PRO, and it will open the plugin dashboard. Now you will see the many options that this plugin provides.
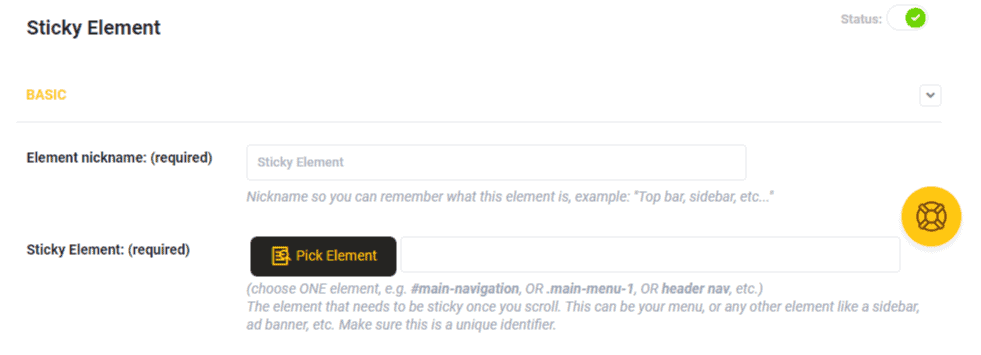
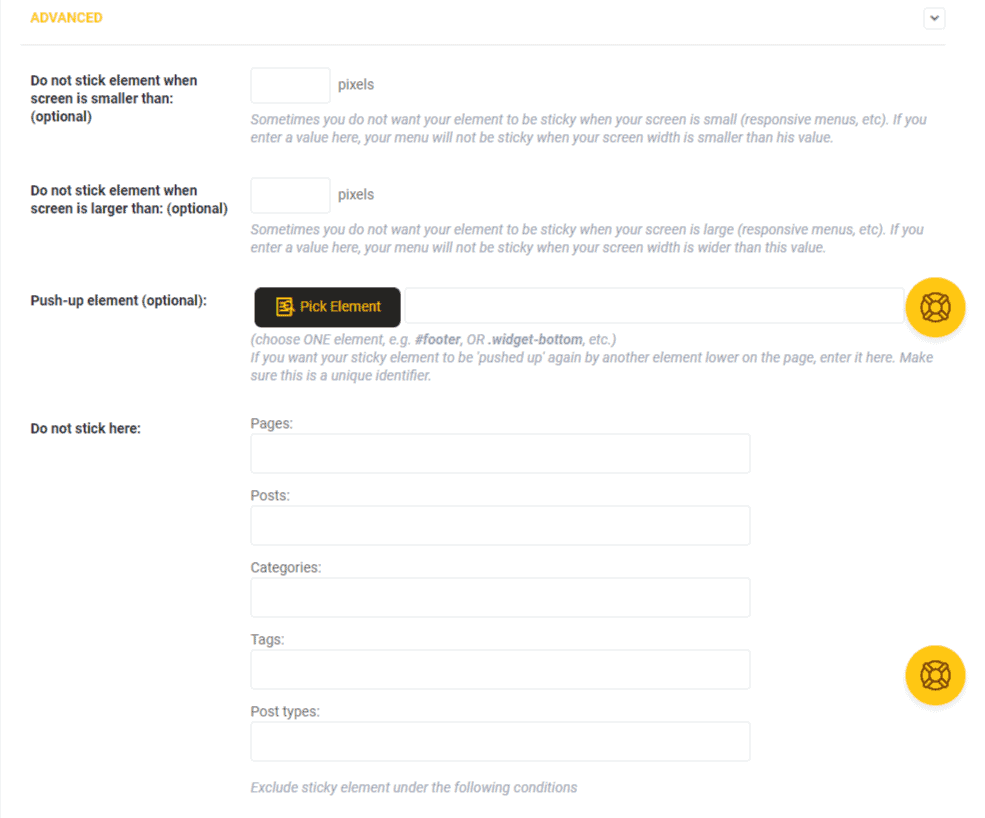
You can add a new sticky element, name that element, change its background color, define a Z-index that will help you with overlapping, and use many more options. Only the sky is the limit, and it is on you to try out everything that the plugin has to offer.
Also, as mentioned earlier, you can add as many new sticky elements as you want – experiment just by clicking on the options.
If you are curious about how things will look after you are finished, just by clicking on Save Changes and then on Preview Sticky, you can see everything you have done to your blog. If you don’t like something, you can easily change it and again click on Save Changes and Preview Sticky. By doing so, you get rid of unwanted things without causing any problems.
Summary
As the popularity of WordPress grew, so did various programs emerge that improve the users’ and visitors’ experience. By using sticky menus, not only will you further improve that experience, but you will also improve your website design. Sticky menus are one of the best things that you can introduce to your website/blog.
With reading this article, you got a rough explanation of how to use a sticky menu plugin. Plus, you now also know what benefits you get from using sticky menus.
The best sticky menu plugin for WordPress is WP Sticky. Indeed, it is not a free plugin, but once you buy it, the plugin stays yours forever and helps make your pages look much more organized.
With WP Sticky, you can experiment and see what suits your style and blog the best, and then you can customize your website/blog so that it is more accessible to all visitors.
While scrolling on your website/blog, visitors will be able to use sticky menus. Through those, they can easily explore your other content and get to know your website/blog further after they finish browsing one page.
Now that you know about WP Sticky and its many awesome features do give it a try. You always have the option to get your money back in seven days if you are not a fan of it.