According to the most recent Stack Overflow developers survey, over 85% of developers are using Git. While Kernl was originally being developed this was something I kept at the top of my mind.
I also didn’t want them to install an extra plugin to do so because I wanted the experience for my customers to be seamless as possible. This is how Kernl’s automatic WordPress Git deployment was born!
Why Should I Use Automatic WordPress Git Deployments?
There are a few great reasons to use automatic Git deployments with your premium WordPress plugins/themes.
- Productivity – You no longer have to waste time creating a zip file from your plugin/theme, uploading the zip to Kernl, creating your change log, etc. Kernl can automatically do all of this for you.
- Everyone can deploy – If the developer has access to Git, they can trigger a deploy by bumping the kernl.version file. The best part is they don’t need to know the gritty details of deployment because Kernl handles those for them.
- Reliability – No need to worry if you zipped the plugin/theme correctly, removed files that you don’t want to be distributed, or named things correctly. Kernl will handle all of these for you as soon as you push.
- Safer Releases – Because you can easily deploy updates with Git, it becomes far easier to do smaller releases. Smaller releases are safer because the surface area for bugs is smaller.
Most modern software development teams practice continuous deployment (or at the very least push-button deployments), and now with Kernl, there is no reason you or your team can’t either. Now let’s get started with your first Git deployed WordPress product!
Step 1 – Sign up for Kernl
Kernl.us is a development platform for premium WordPress plugins and themes. It does things like serve updates, license management, analytics, and git deployments. Kernl has a 30-day free trial (no credit card required!), so you can safely try this out with no risks!
To get started, go to https://kernl.us and click the big “Start Your Free Trial” button. After you fill out the form, you can proceed to step 2.
Step 2 – Connect GitHub/GitLab/BitBucket
Now that you’ve signed up for Kernl, the next step is wiring up your Bitbucket, GitHub, or GitLab account. To do so, click the “Continuous Deployment” link.
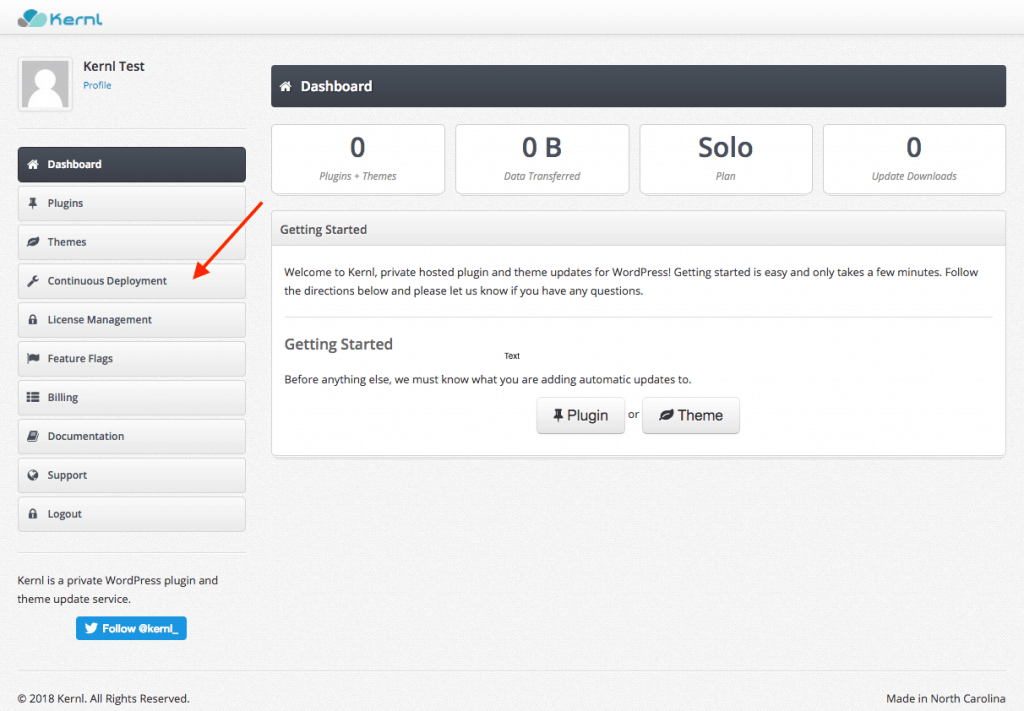
Next, select your Git provider and follow the directions on the screen.

Step 3: Create a plugin and associate it with your Git repository
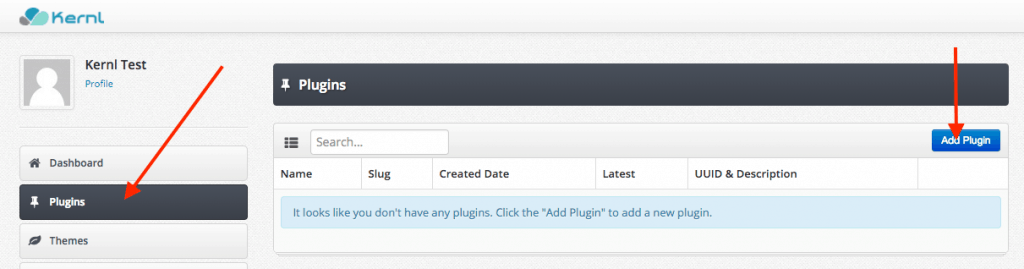
Now that your account is connected to Git let’s create a plugin and associate it with a Git repository. To do that, click the “Plugins” link on the left and then click “Add Plugin.”
Now you need to enter some necessary information about your plugin (name, slug, description). After that, click the “CD / CI Services” tab.
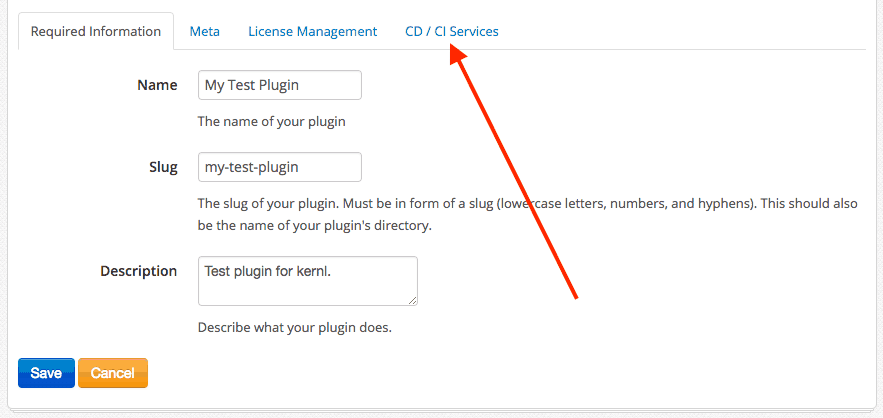 Now the fun part! You’ll see a dropdown with a list of all your Git repositories. Go ahead and select the repository that your plugin lives in. After that, select the branch that Kernl should make builds from. If you leave this blank, Kernl will always build from “master.” Finally, check the box to “Automatically manage deploy keys and webhooks.” This lets Kernl know when you’ve pushed new code.
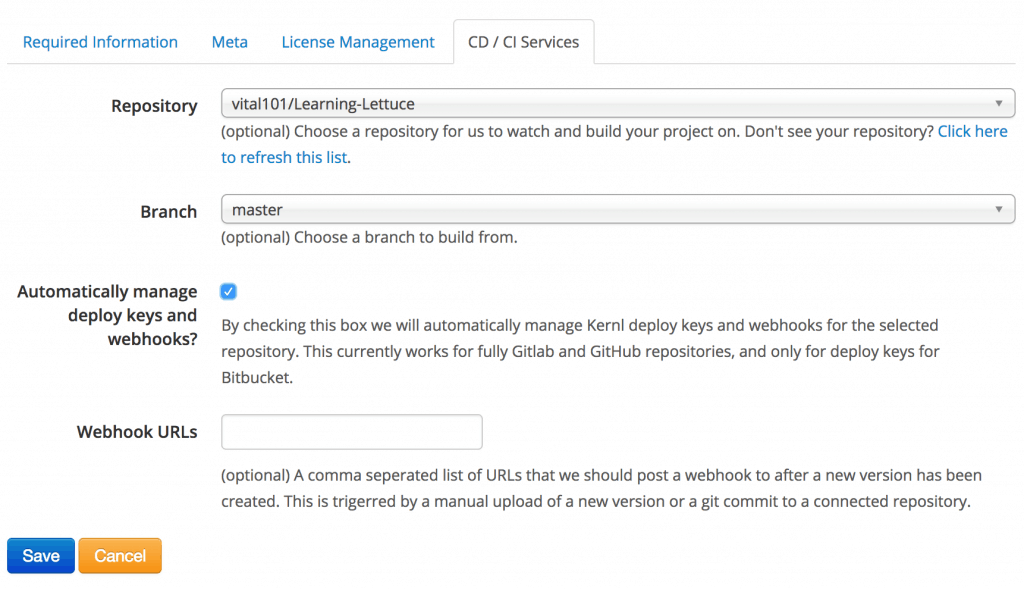
Click “Save” and proceed to step 4.
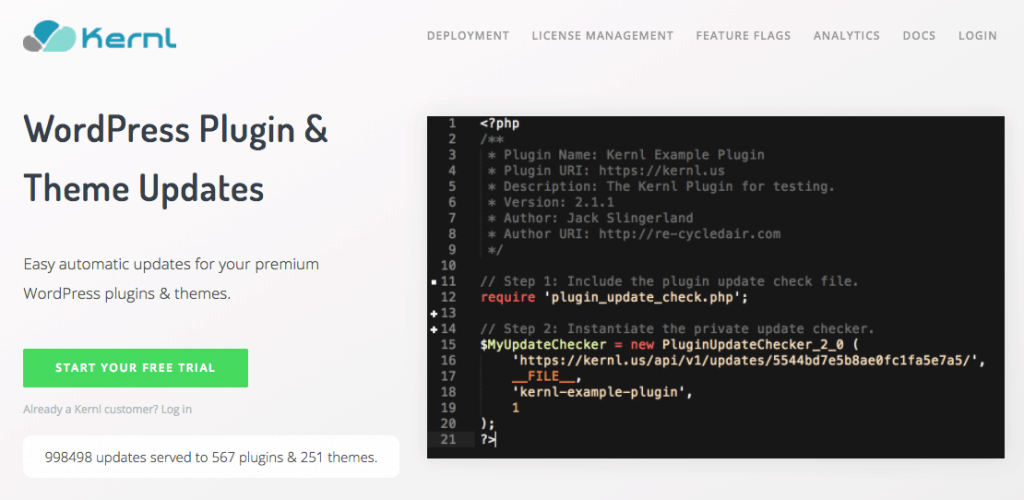
Step 4: The kernl.version file
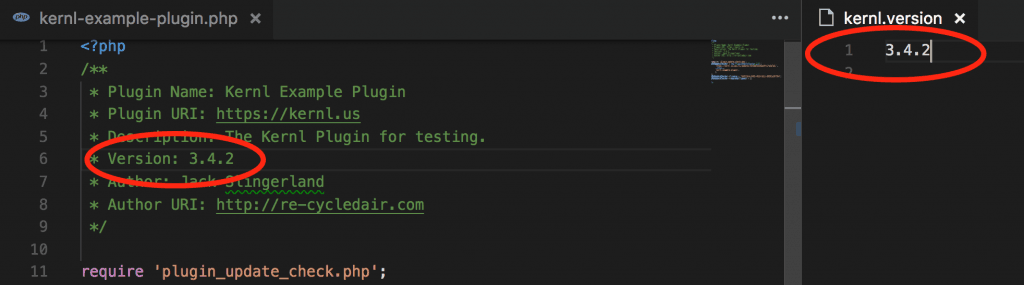
One of the nice things about Kernl is that it will not build your plugin/theme unless you signal it to do so. How does Kernl accomplish this? By looking for a kernl.version in the root of your Git repository.

So how does it work? It’s really simple! Whenever the version in the kernl.version file is newer than the most recent version of your plugin in Kernl a new build is triggered. This means that you can make a bunch of different commits and never have it trigger a build, but then when you want to trigger a build, you update the kernl.version file. For example:
- My kernl.version file contains 1.5.1
- On Kernl, the latest version I’ve released to my customers is 1.5.1.
- I make a bunch of changes, commit them, and push them to Git.
- No build happens.
So how would this happen if I wanted a build and update to be produced? Simple.
- My kernl.version file contains 1.5.2
- On Kernl, the latest version I’ve released to my customers is 1.5.1
- I make changes, commit, and push them to Git.
- Kernl sees that the kernl.version file is now > 1.5.1 and creates a new update (1.5.2) for your customers and distributes the update.
To get started, just drop a kernl.version file in your plugin’s root directory and make sure the version matches what’s in your plugin’s main file. Commit and push this to Git.
Step 5: Manually upload your first version
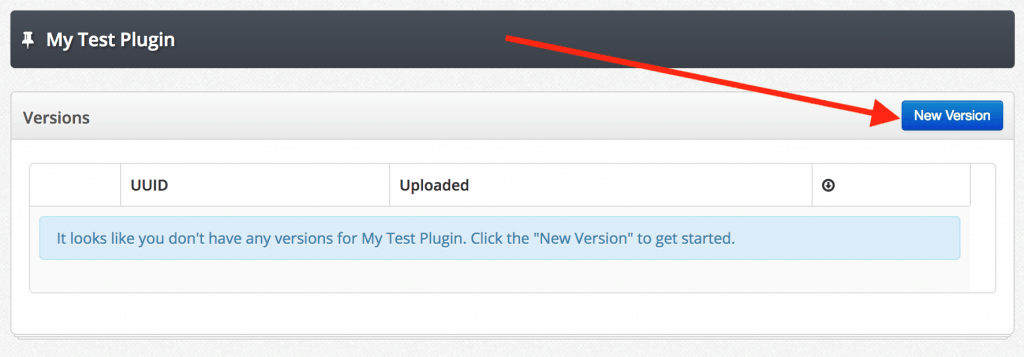
Assuming you’ve followed the Kernl plugin setup guide, go ahead and zip up your plugin. Next, upload this zip to Kernl. To do that, find your plugin and click “Versions.”

After that, click the “New Version” button. Fill out the version and file upload field, and then click save.
Step 6: You’re done!
Once you have the first version of your plugin uploaded, every subsequent push to your Git repository will be checked for an updated kernl.version file. If the version is newer than the latest version of Kernl, then a new build is triggered.