When browsing the web, you’re mostly looking at bland sites that lump together after a while and, apart from your favorites, you really can’t remember them afterward. Doing your work on the web means that you’ll be getting a lot of interesting ideas from other sites that you can then, in turn, implement on your own.
There are a few different approaches to creating short pieces of animated content, and you can always hire a freelance animator.
Everybody is looking for something like this – something impactful that stays with you and now you can have it with Slides – a page building solution that uses slides from Designmodo.
Pro level visuals in minutes
Now, if you’ve already peeked and seen the type of sites they’re presenting your first reaction could be overwhelming. All the sites look very professional and it seems that a whole lot of knowledge and effort has to go into them, so it’s natural to feel like you won’t be able to achieve the goals you’ve set for yourself. Especially if you’re new to web development and are still just getting your bearings.
Well, we’re here to tell to have no fear, because Slides works similar to, or is even easier to use, than most visual page builders you’ve probably come in contact with. Essentially it’s just stacking slides one after the other, changing the basic information you want to put on them along the way.
View and reorder your slides as much as you want
Of course, there are more things you can and should keep an eye on but (and we’ll get into the details), in a nutshell, if you’ve ever used PowerPoint to create a presentation you should have enough knowledge to create something you’ll really be proud of. The base of everything is the great visual presentation that Slides will enable you to present to your visitors that are surely going to stick with them.
Creating a page step by step
Slides
As we’ve already mentioned you’ll need to sort out how the pages of your site will look, how many there will be, and which slides (in their base form) best fit into your idea. There are a few categories to choose from, but you can always check out all of them at once if you don’t enable any filter.
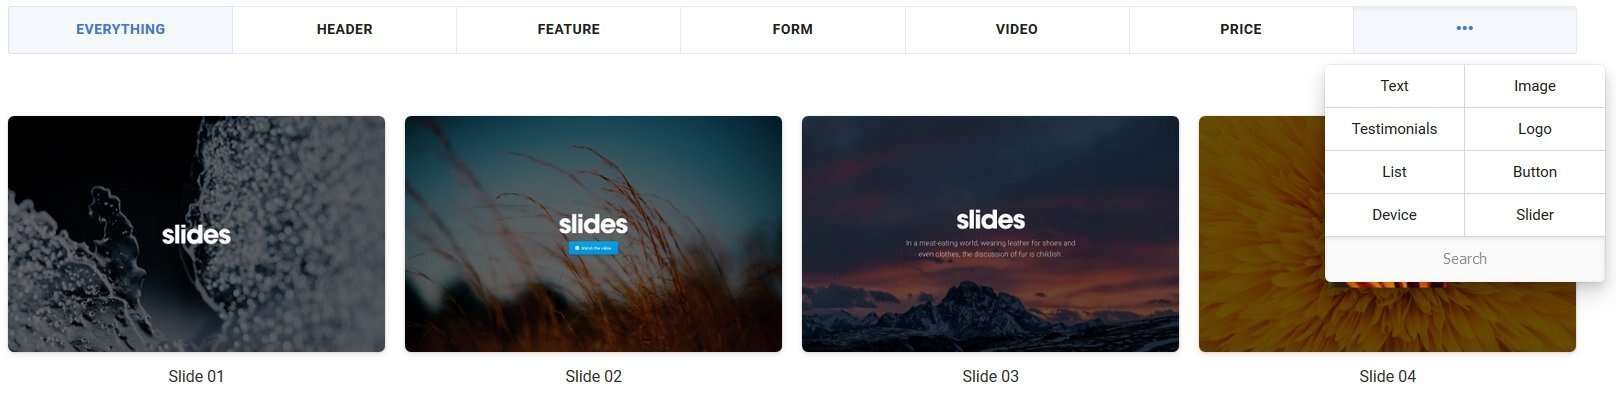
Choose from a vast array of slides comprised in easy to use categories
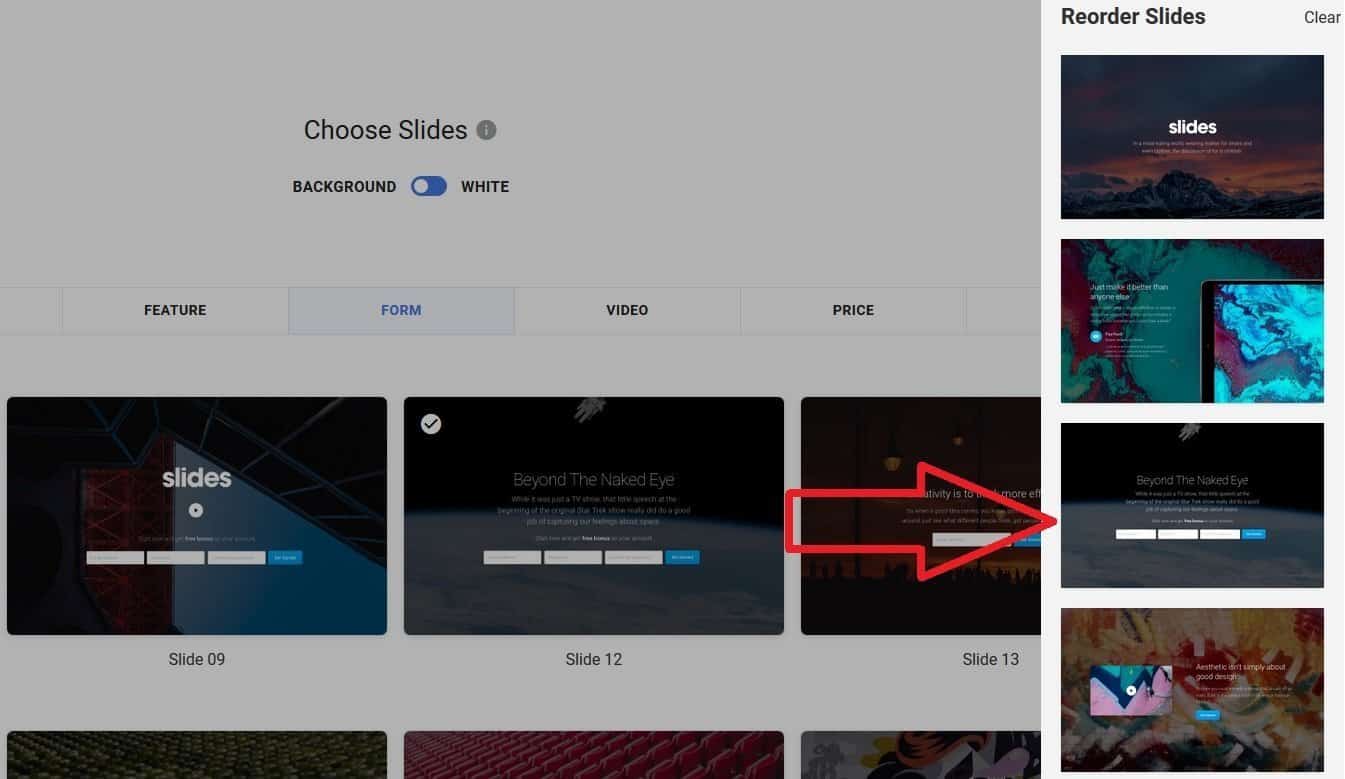
In this section, you’re making your template which you’ll then further customize at will. Just selecting a given slide will transfer it to the right sidebar where all the chosen ones are situated. From here you’ll get to review them all, change their order, duplicate them, or change the background to white.
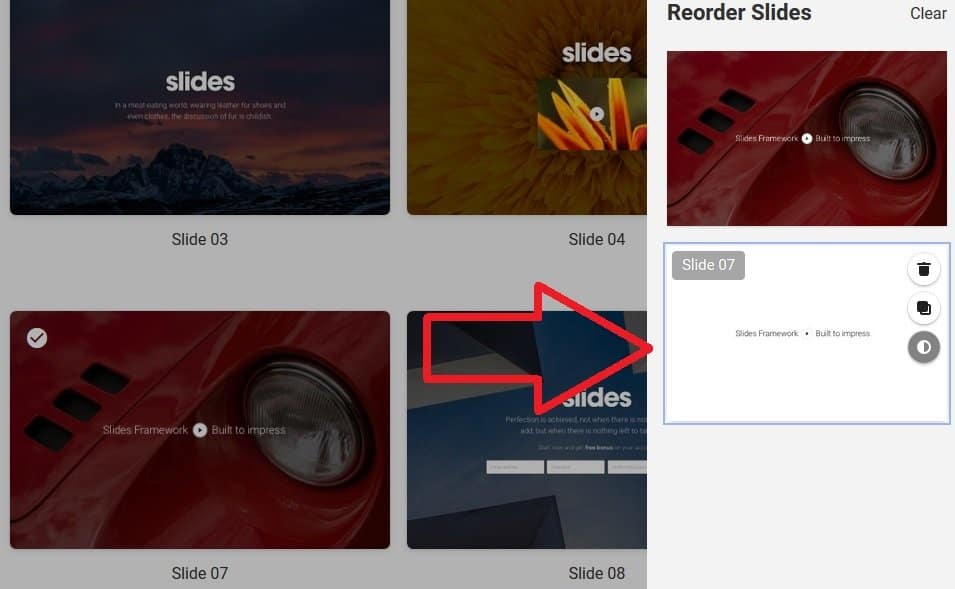
Edit each slide to better fit your intended idea
This will be your overview for the whole process and although simple it’ll provide you with everything you’ll need to quickly navigate through all you’ve done.
Animation
The next tab you’ll spend your time is animation. Here you’ll get to set up how your text and content, in general, is presented to your visitors, more specifically hot it enters and leaves the page. You’ll have your pick of various premade animations that will be incorporated into your pages.
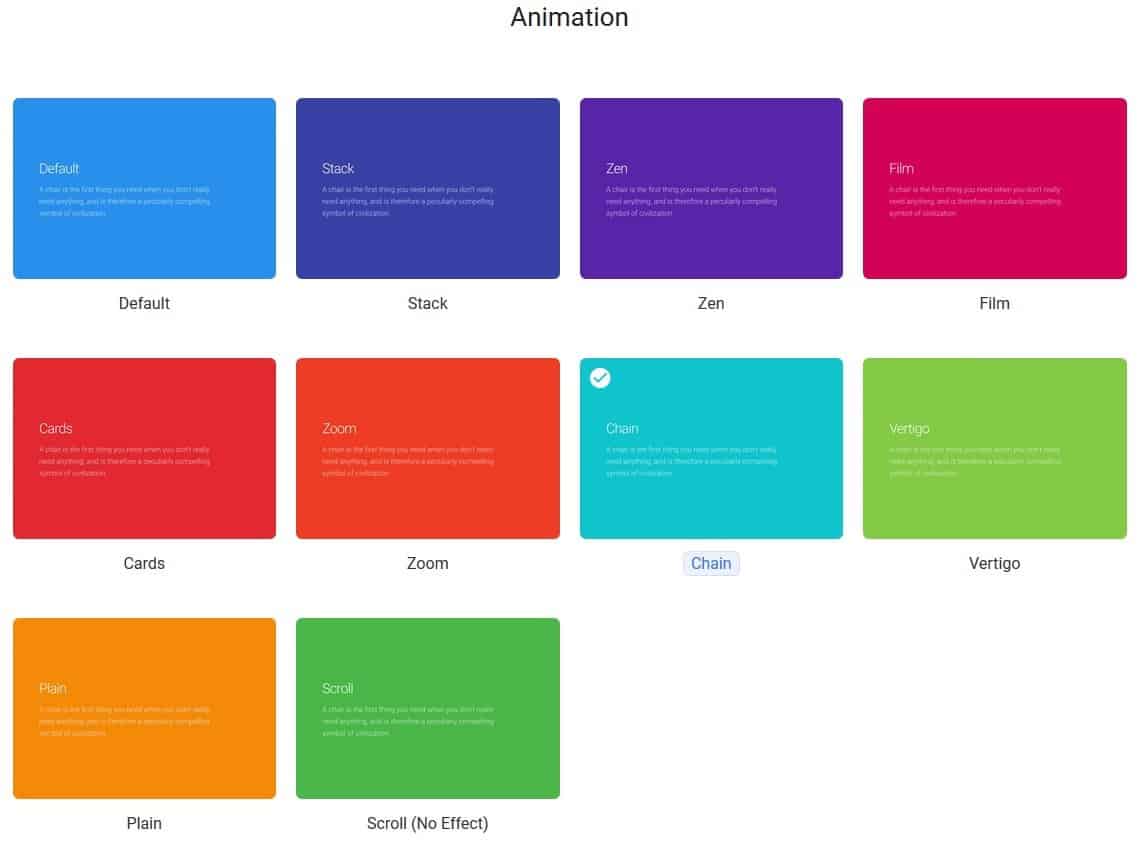
Add animation to your slides to be even more eye-popping
Again, this should all be very familiar to anybody who has done presentations before, since all the animations pretty much work the same way. Keep in mind you shouldn’t overdo it with the animations. There really is no sense in content flying into and exiting the page from all sides – it could have quite the opposite effect and prove confusing to your visitors.
Panels
Next stop is the panels which consist of the top and bottom panels and are used by your visitors for navigation throughout the pages on your site. Although they should all essentially cover the same things and act as menus for your visitors there are a number of presentation options to choose from while deciding on the perfect look that will encompass your page content just the way you want it to.
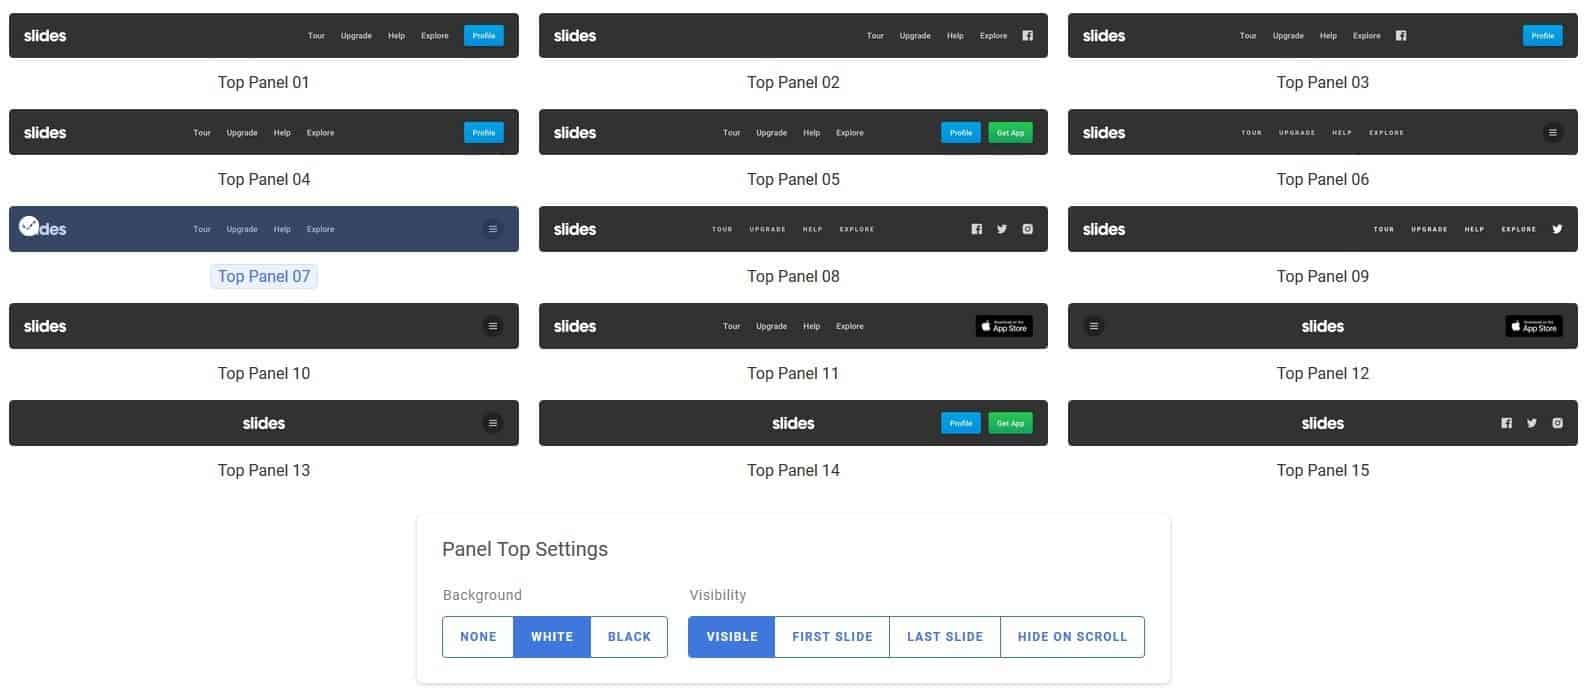
Use panels that contain all menu features your slide needs
Once you have the right panel selected you can further customize it by changing the background to black or white or leave it open so that it blends to the background. Furthermore, you’ll need to set up how it’s going to perform visually on the pages – will it appear on the just the first, the last or every slide and will it hide itself after scrolling down. The last option is most commonly used for mobile browsing but is seeing more use in regular browser based layouts. No matter which panel you go with they will be seamlessly integrated in the slides and will automatically set themselves up (disappearing and reappearing based on the menus that are open).
Navigation
Your visitors will have to move through the site and the slides you’ve made somehow. When creating a page with this particular visual style you should forget about regular scroll bars on the side of the window. To complete the visual experience you’re offering you’ll use the special navigation settings are on par with the visual identity of the slides.
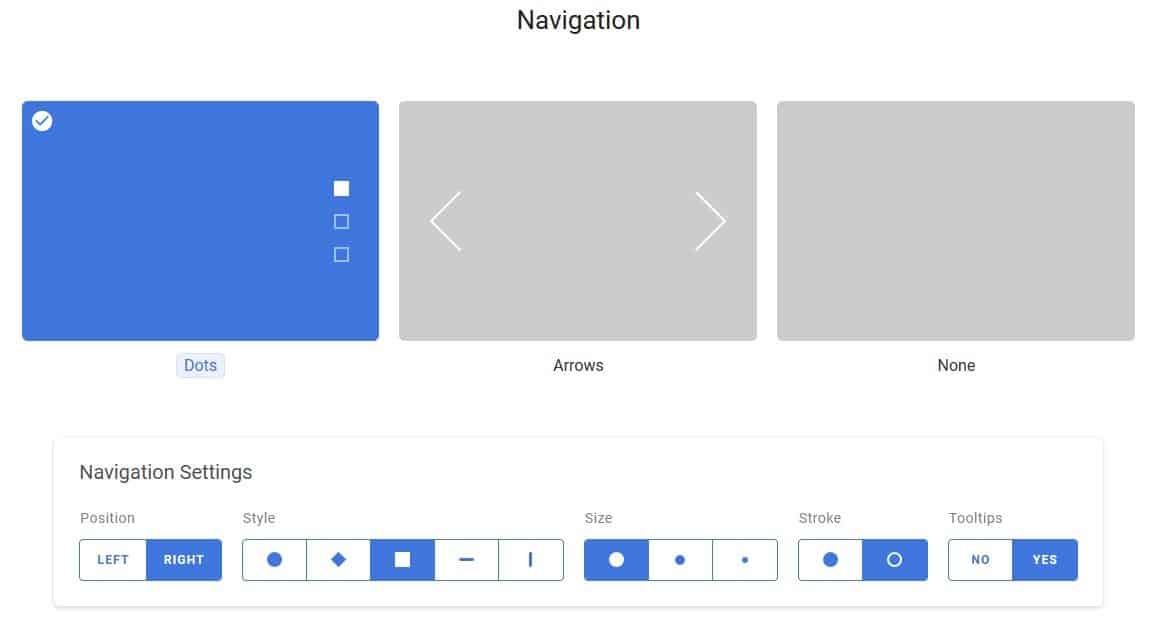
Set up how your visitors move through your slides
The two main navigation types are dots and arrows, where the former represents a top to bottom scrolling method, while the latter represents a left to right method. Which one you’ll pick is all on you. It is worth pointing out that while you’ll have some editing control over the appearance (circle, line, square etc.) of the buttons, as well as their position and size, and even the enabling of a tooltip option, the arrows are fixed the way they are and can’t be changed. It might seem limiting at first, but there really isn’t an adequate replacement for the arrows when you think about it.
Styles
The final general visual aspect of your site you’ll get to edit is the style of the letters. Although there are certain preset templates already in place you’re not limited by them in any way. If you choose to, you can change the letter styles individually for every part of the slide (base, title, button).

Choose a specific font for each element of the slide
The custom style options really do seem endless with a vast database of fonts available for you to choose from. Even though it might not seem like mashing opposing fonts may not be the way to go if you want to exaggerate a certain element on the slide it could be the right choice.
Settings
Last, but certainly not least, you can change certain settings that will apply to the whole project. These will include optimizing the assets for faster speeds, preloading the content when loading the site so everything is displayed at the same time, simplified mobile visuals etc.

Tweak the nuances of your slides
These additional options provide you with that little bit extra that will help your site perform, but are not universal, so you’ll have to turn them on/off. A few minutes spent here and a little tweak here or there could mean much more for visitors browsing your site and their enjoyment while doing so.
Getting technical
Now that you know how to make a site with slides from scratch it’s time to get into the technical stuff and get to exporting everything you’ve done into your site where all your content is. This part does require a little more knowledge but not so much to discourage you. Namely, after you’ve completed all you’ve wanted to you can save your project and export it.

Export all the content you’ve created for further manual editing and uploading to your servers
Exports can be done for single slides, or entire projects. The really great thing is that once you’ve exported all the content you can then change any of it manually directly in the code (HTML, CSS and JS) before uploading it to your servers. Advance coding know-how is required for these changes and they aren’t obligatory, but it gives even more options for expert users. No matter if you do decide to edit more manually, the uploading is done directly to your servers, so you won’t have to go through an additional platform like WordPress.
While we’re on the topic of technical issues and capabilities we have to note that all the graphics are vector based and as such the quality won’t vary depending on the resolution of the screen the slides are viewed on. This works splendidly with the auto-responsive feature that scales everything perfectly for phones and tablets. The transition is seamless, but keep in mind that when transferring not all animations, background videos and some other features will transfer directly since it would be too much for screens that size to handle. They are therefore simplified or cut in their entirety.
More modules
When digging even deeper under the surface you get to the really juicy stuff and find out that even after everything mentioned Slides offers even more. You’ll be able to use various modules that are integrated into the editor and each of them provides more functionality to your slides and includes: contact forms, sidebars, grids, sliders, dialog boxes, popups, social media plugins and many more. There are also integrations with popular services used in sites all around the web like MailChimp, YouTube or Google maps.
Every one of these modules and integration options makes it so you won’t have to Slides hand in hand with some other service, since you’ll have everything you’ll need right here, all in the same place.
Summary
Slides from Designmodo is a pretty straightforward service – it gives you an editor to build graphically advanced sites using slides in a way even newcomers can understand and use. Not many other editors can say the same. Before you decide on anything be sure to check out their pricing table to get a better hold on the bottom line which is also, of course, an important factor of decision making.
Honestly, there isn’t much more to add. We believe the visuals speak for themselves and with this type of editor that is for the best. This is why Slides comes with a recommendation to anyone looking to start a new site with a slightly different visual angle then your typical “blog type pages” or those trying to reimagine their site in a brand new way. We’re sure you won’t be disappointed.