Front-end post submissions can be done with code, but we recommend using a plugin as a more user-friendly and safe option. Especially if you are new to this and never really had any coding experience.
When we say you can receive WordPress posts from the front-end, we mean you can use a type of front-end editor or form in which users can fill in some post details and press a button to submit the information.

This info then shows up in WordPress as a post, if accepted by the admin.
This can be beneficial if you are working with regular and frequent WordPress articles. Because you as the admin can let people submit guest posts from the front-end and save them as drafts. This way visitors can register and submit blog posts that you can later edit and publish.
If this is something you wish to try out, then keep on reading.
Having more users submit posts to your site can help you upload blog posts more often and on a regular basis. This means you can keep your content fresh.
Being regular with your posting can also help you promote your posts and blogs on social media and in email campaigns in order to increase following and generate leads.
Basically, front-end submissions can be quite handy. That is why, in this article, we will show you step by step how to set up and accept front-end post submissions using the Forminator Payment, Quiz, and Contact Form plugin.
This plugin is a completely free and expandable form, polls, and quizzes builder designed for WordPress. It makes it really easy to create different forms, feedback widgets, and include payment options in forms whenever you need to.
The plugin is very user-friendly because it comes with a drag and drop builder that makes it easy to set up and add forms to your site. With it, you can also add interactive content to help increase conversions.
In short, if you decide on using this plugin you will be able to create forms with as many fields as needed (name, email, phone, file upload, website, date, time, GDPR-friendly opt-ins, payments, and more), interactive polls, fun quizzes that your visitors can share on social media, and different calculations that collect info.
On top of that, it will help you generate leads, take orders, engage visitors, and add different payment options that are integrated with Stripe and PayPal.
Besides Stripe and PayPal, this plugin is integrated with some third-party applications as well, such as HubSpot, Google Sheets, Trello, Zapier, MailChimp, Slack, and others. This means that using it you can collect a lot of info and data about your visitors.
However, the most important part of this plugin is the user front-end post submission option. With this option, you can let your visitors send in post submissions without the need to access and login to your WordPress dashboard.
That way you don’t have to give the visitors any login information or be worried that they could change something on your site by accident.
Your visitors can submit ideas from the front-end of your site, and then you can edit and publish those ideas if they are something that’s appropriate for your site. You can also assign posts to specific or default authors, save them as drafts, or publish them immediately.
How to Set Up Front-End Post Submissions
To start, you need to download and activate the plugin. You can find this plugin in the WordPress repository or by clicking on this link.
To enable front-end submission, you need to create forms that will allow your visitors to upload posts and add content to any post type. We will go over the whole process of creating forms first, and then we will focus specifically on front-end submissions.
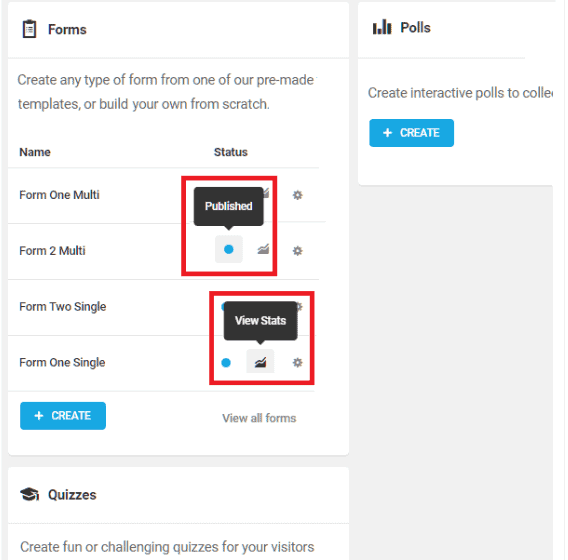
Once you download the plugin, a new tab will appear on your dashboard. There, you will see your Overview and Quick Access panels, as well as the status of your active forms and the option to create new ones.
If you click on View Documentation, you will see your current and existing forms, last submissions, and the total number of your submissions.
Each panel has a publication status indicator and different links that will take you to the editing screen for each form. There, you can click Create to begin creating new polls, forms, or quizzes.
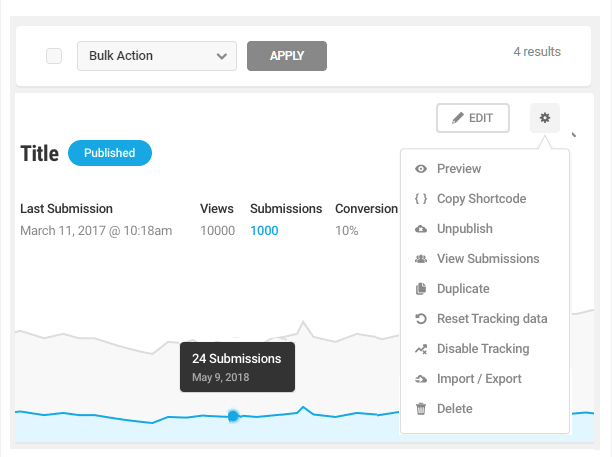
There will also be some information here, such as a breakdown of entries, the title of the form, current status of the form (draft or published), date of your last submission, an edit button, site popularity, number of views, and conversion rates (percentage of users who submitted the form compared to the total number of viewers).
These metrics can help you see how well your forms are doing and if you need to change something to improve your site statistics.

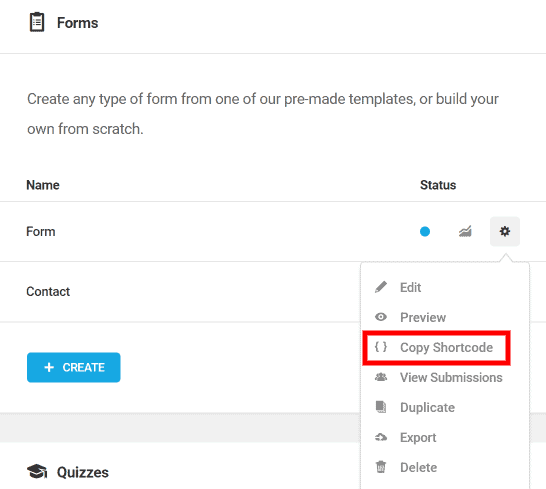
In the right corner, you can click on the gear icon. A drop-down menu will appear with even more features, reserved for admins. The features being:
- Preview
- Copy shortcode (if you need to paste your form, quiz, etc. into other pages or posts)
- Publish or unpublish button
- View submissions
- Duplicate
- Reset tracking data (this will reset the numbers representing user views, submissions, conversions)
- Export (using this you can copy a link and paste it into the Forminator tool on any site)
- Delete
Create a Form
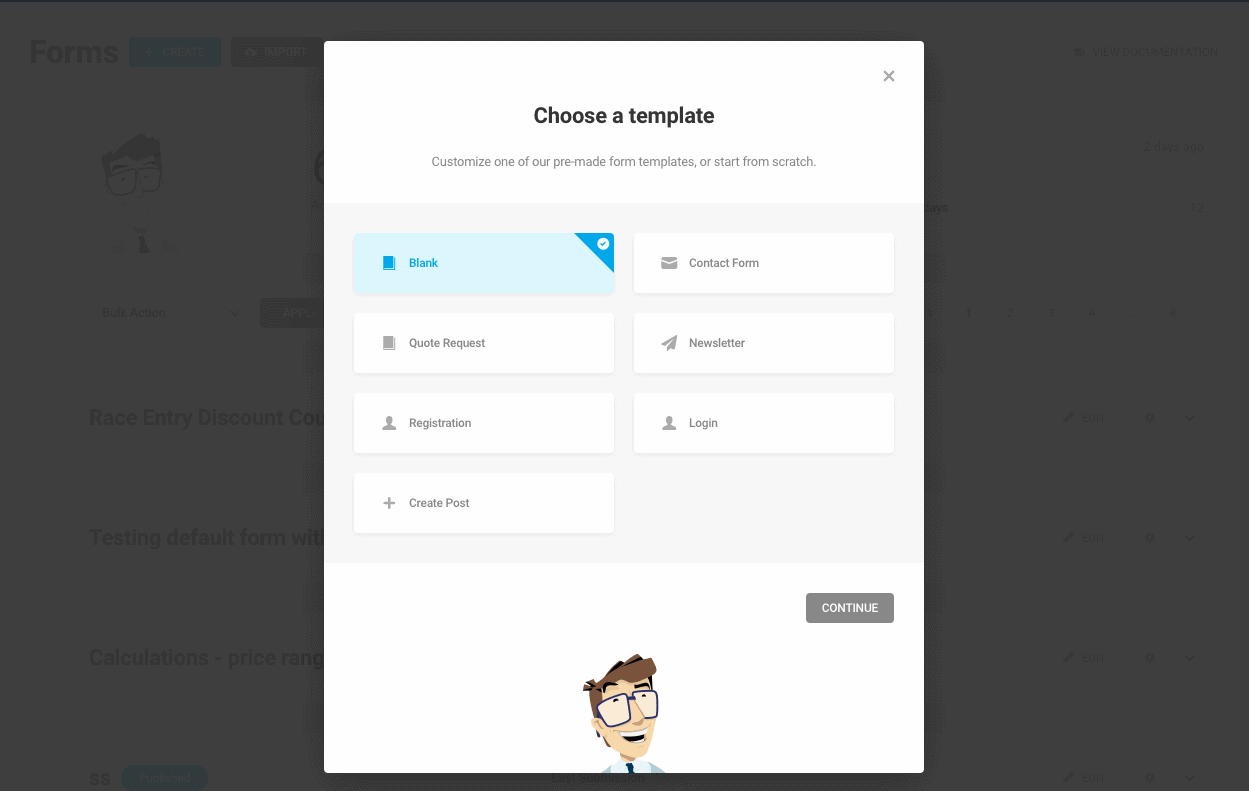
Adding a new form to the site is quite easy. From your dashboard, you need to go into Forms and click on Create. There, a pop up will appear in which you can start editing and creating your form.
There is also the Import option if you wish to import your forms from a different site, or instead, you can choose to use one of the pre-made templates. This is especially useful if you have little or no experience in configuring forms.
Naturally, these templates can be edited and changed as needed. The templates offered by Forminator are:
- Blank- no default fields
- Contact form- designed to collect user-submitted information
- Quote request- users can submit a detailed request for feedback or more info
- Newsletter
- Registration form- used to generate the creation of new user profiles
- Login
- Create Post
The registration and login forms are the most commonly used ones and they do come with a password field as well as user registration tab specifically designed for those two forms.
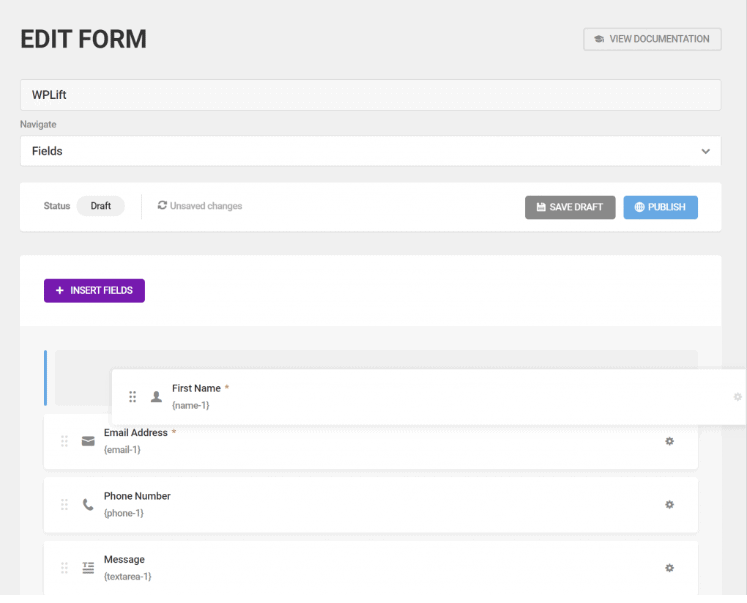
As said, after you click on Create, a builder will appear. There you can construct your forms and add fields, as well as control the layout of your form.
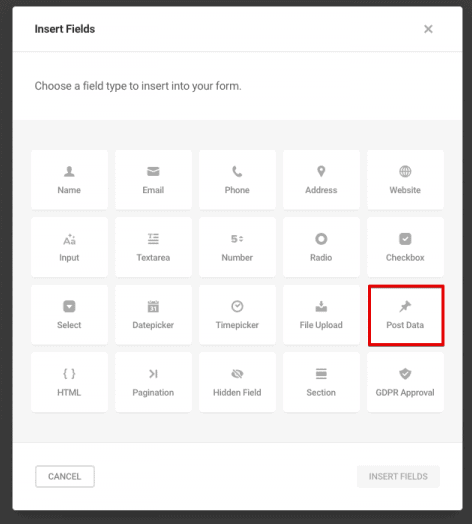
To add a field all you need to do is drag and drop it on the left side of the editor. You can also click on the Insert Field button.
Next, a pop up will show up in which you can choose the types of fields you want. You will get a variety of different field types to include, such as name, email, phone, website, file upload, HTML section, GDPR approval, Stripe, and PayPal, etc.
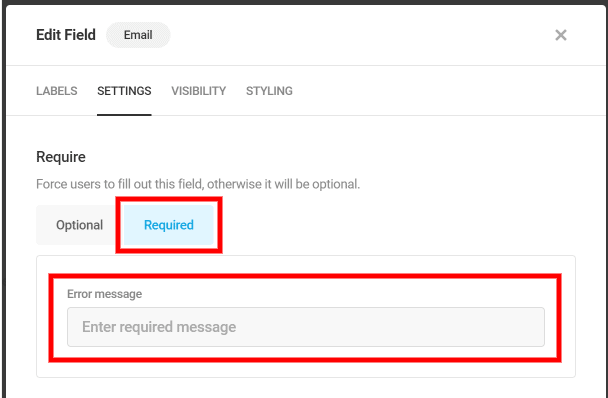
If you click on the fields, you will access their various configuration options. For example, the email address field comes with a “required” setting which forbids your users from submitting a form if they do not enter a valid email address.
To add a custom CSS class to a field, you can click on the Advanced settings option. Also, there will be the Visibility option that you can choose to set up or not.
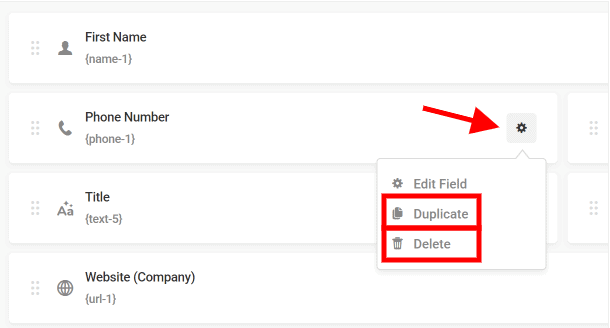
Fields and their settings can be deleted or duplicated if you click on the gear button next to the field and select delete or duplicate.
There is also the option to specify if a field is required or optional. If you select required, an additional field will open in which you can enter an error message that will appear when a visitor leaves an empty field.
You can arrange your fields in any way that you want and with that establish a basic layout. For example, to organize them into columns, drag and drop a field in the same row as another field.
Once finished, you can preview and review your form using a button at the top of the editor screen.
When it comes to other settings, you can edit the form appearance by clicking on the Form settings button, and then on the Appearance Settings.
Here, you will have multiple themes for your form to choose from and you will even be able to modify your typography, fonts, and add customs CSS so your form fits any theme.
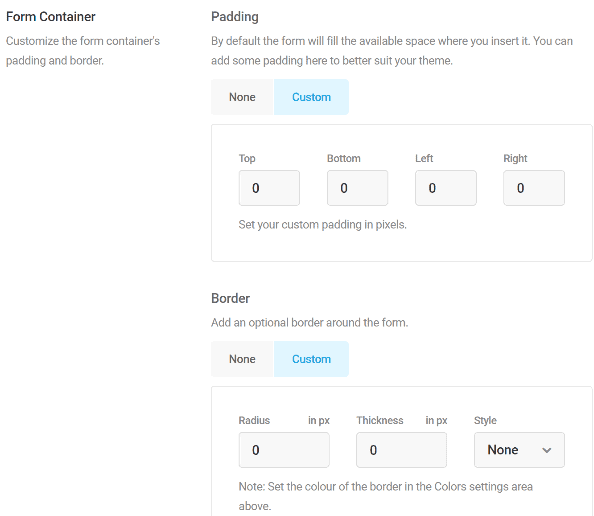
Also, you can customize the appearance of the main container of the form by adding borders, spacing, and padding.
Next, you can set up your form behavior. This lets you configure whether you want to use Ajax form submission or reload the page, define what should be done after someone submits a form (for example, take them to another page or display a thank you message), enable error messages, set up spam protection, and define whether you want to close a form after a certain date or after a certain number of submission.
In the Security tab, you can define if you will allow only logged-in submissions and enable Honeypot protection that tricks spam bots by giving them challenges. Basically, if a bot tries the challenge, you will know it is a spam.
How does this work? Once a form is displayed, a hidden input is created that must match the desired condition. If the condition is not met, it will state the form is submitted, but it will not actually be submitted. Why? Well, since the honeypot input is hidden and generated only when a form is displayed in the browser, the bot will miss that and will send a request without the hidden input, thus failing the test.
All in all, it is quite a useful and helpful feature.
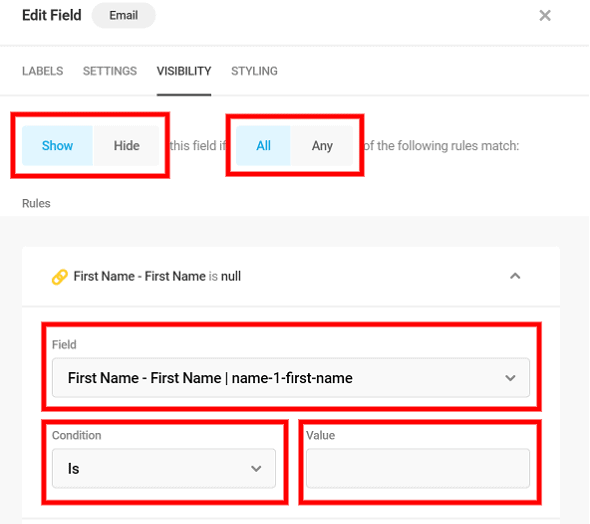
Conditional logic is another feature that lets you show or hide certain fields depending on how a user answered other fields. To add this, go to the Visibility tab and click on the Add Rule section.
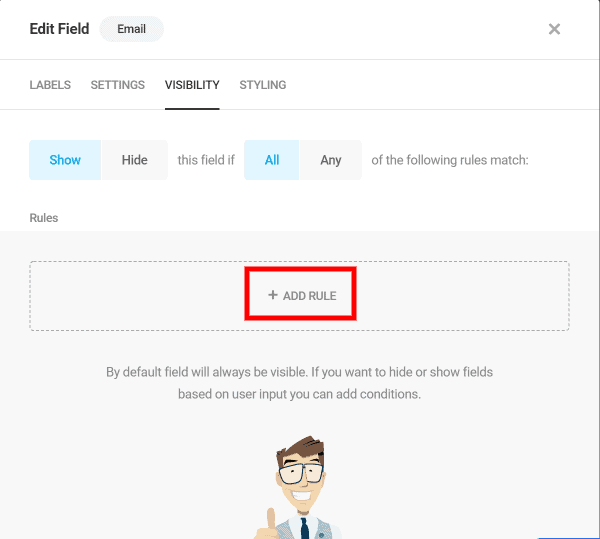
A pop up will appear in which you should choose if you want to show or hide the rule (or rules). You can have multiple rules but remember to specify if all conditions must be met or just one.
Then, you can set up email notifications as well as the option when to send different notifications. This is also where the MailChimp integration comes in handy as you can connect the forms to your MailChimp account and automatically add submission as MailChimp subscribers.
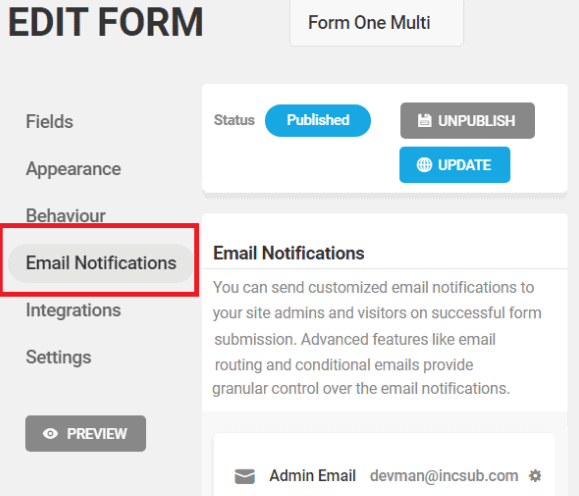
We have to mention that the Email Notifications can be set as conditional as well. That means that you can control the form and instruct it to send emails only when a specific condition is met. FOr instance, you can automatically send an email to the marketing or accounting if a specific condition is met.
Settings
The Settings tab will allow you to define how the submitted data is stored. For example, if you don’t want to store any data, you can choose Disable store submissions in my database.
Also, in the privacy section, you have the option to auto-delete form submissions after some time.
Under Account Erasure Requests you can choose what happens to the submissions once you delete a user from your site. You can either retain all submissions or remove them.
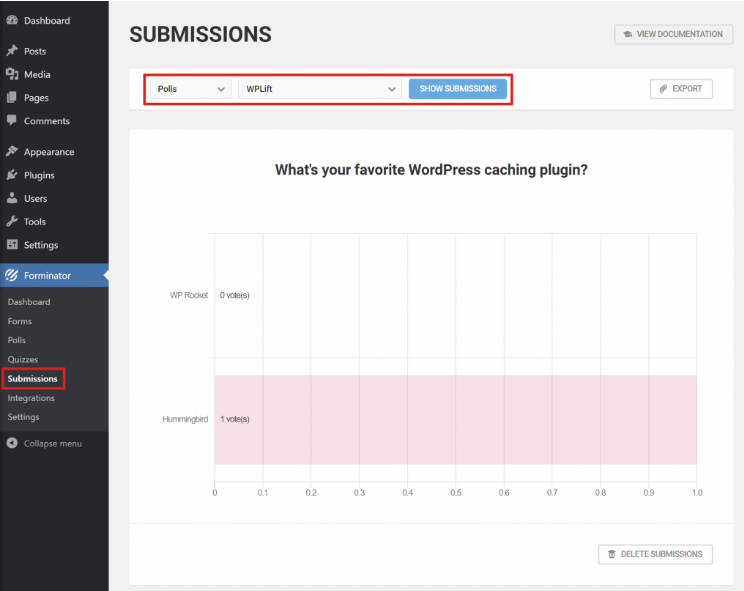
Submission Overview
The plugin gives you the ability to see, in your dashboard, the form entry and an overview of the submissions.
There is also the option to disable or limit this for GDPR compliance.
On top of that, you will have the anti-spam protection option using which you can choose to only let logged-in users submit a form, so you are not bombarded with notifications of users submitting posts that turn out to be spam.
Displaying a Form
Once you finish designing your form, it is time to add it to your site. For this, the plugin uses shortcodes. You can find these in the Forms, Polls, or Quizzes tabs.
To add one of these to your site, you need to copy the shortcode related to a form, poll, or quiz and paste it to any page or post of your site within the editor.
If you are using the Divi theme, you can add those shortcodes using the Code module, or if you are using the Gutenberg editor, you can add a form using the Forminator block.
To access the shortcodes, go to the dashboard, find the form you want to use and click on the gear icon to open the settings. Then, select and copy a shortcode, and finally paste it anywhere you want.
Adding a Front-End Submission Form
After we have explained how to add and edit forms, in this section, we will specifically focus on creating front-end submissions.
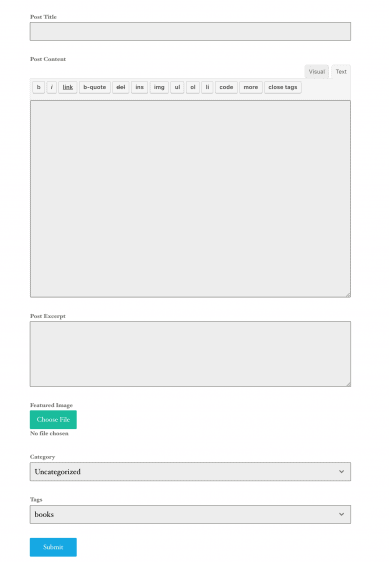
All you need to do is follow the same steps we mentioned in part detailing how to build a form. However, when you are choosing which field type you wish to add, you need to click on the Post Data field type.
Once finished, the form will look like this to your users. When you choose the post data field type, everything remains the same. You can customize and edit your form, define its behavior, set up conditional logic or email notifications, and publish it to your site.
Who Should Use This Plugin and Why?
This plugin is an absolutely free one-stop solution for creating all kinds of different forms, personality & knowledge quizzes, and polls easily.
It comes with so many integrations and features that many other plugins charge for.
Basically, this plugin will provide you with the ability to create all these different forms, quizzes, and polls while also offering you a lot of versatility when it comes to customizing and editing your forms.
It might take some time and practice to really understand how to create forms and use all of the settings and features offered by this plugin, but we can guarantee that once you get the hang of things, you will be really satisfied with the Forminator plugin.