No matter what kind of site you find yourself running, your main goal is always to attract and then retain your visitor base. One of the easiest ways to ensure this is to offer them subscription options, making them full-fledged members.
If you’re running your website through WordPress, then one of the best plugins to get your subscription site started is, without a doubt, is Paid member subscriptions from Cozmoslabs. With it, you’ll be able to set up the whole subscription system and right here is where we’ll show you how to do just that, step by step.
Creating a WordPress membership site using Paid Member Subscriptions allows you to manage access levels and automate member communication effectively. With features like a customizable subscribe email template, you can deliver branded, personalized messages to new subscribers.
Step 1 – Enabling subscriptions
After you’ve installed and activated the plugin, you’ll need to enable subscriptions for your site. This first step isn’t directly linked to the plugin but needs to be activated in the WordPress general site settings.

Enable registrations on your site
Step 2 – Creating plans/tiers
After you’ve made it possible for your visitors to become members, it’s time to create subscription plans or tiers that provide benefits to those who sign up. We’ll start with the most basic free tier which, in some form or another, all prominent sites/services have.
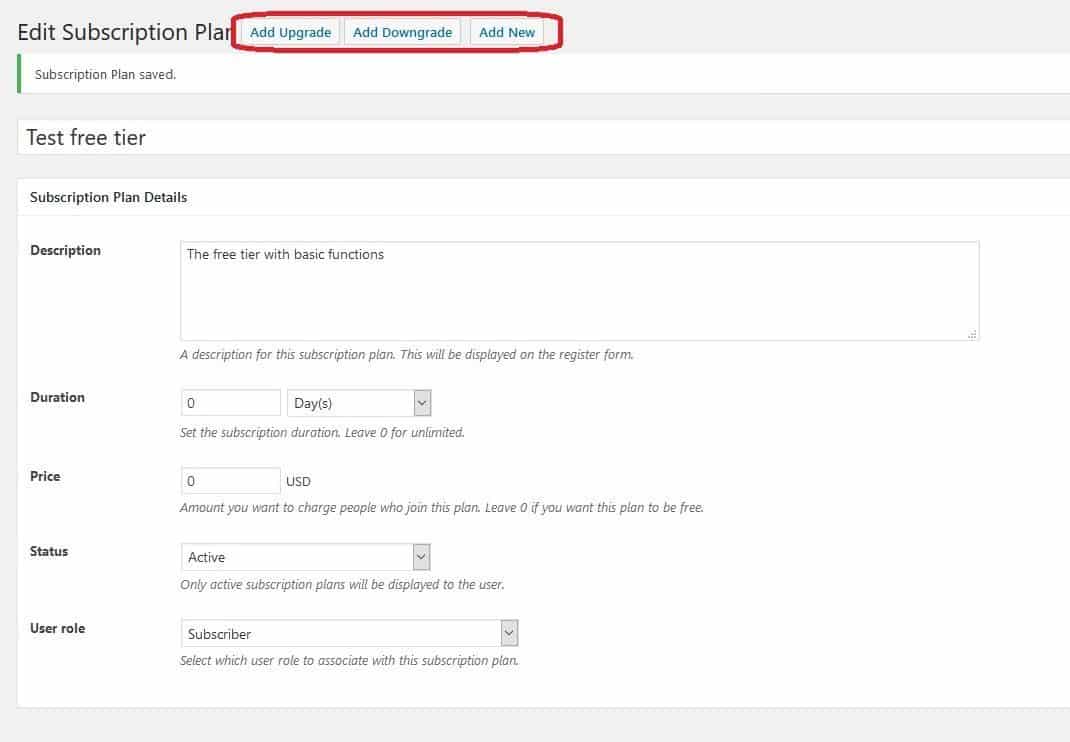
The starting point of a subscription plan
The great thing about Paid Member Subscriptions is the option to create connecting plans which scale up and down as upgrades or downgrades (seen highlighted in red on the picture above). By just choosing an option that is presented you’re automatically given a new, connected plan, in a simple click.
You’re then free to edit the setting of this new plan as you see fit (in our case it’s an upgrade to a premium tier seen below).
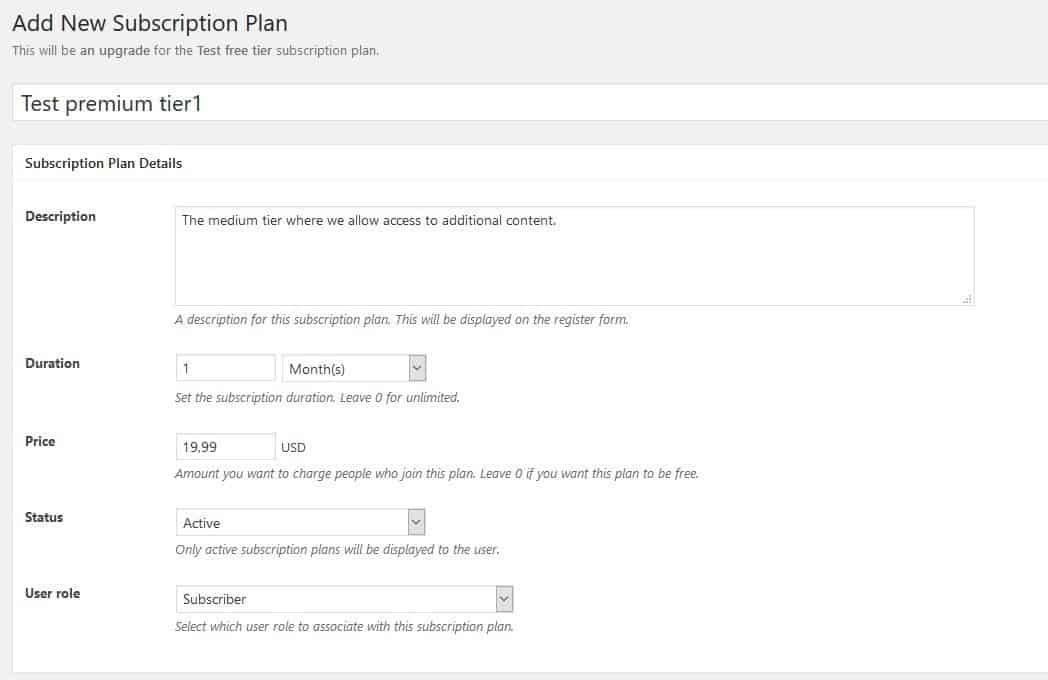
The first premium plan
As you can see there are some differences in the way we’ve set up these plans – the price and duration. If you leave the duration at zero, the subscription won’t expire. In this example, it’s used for the free plan, but it can also be used for lifetime memberships that don’t have expiration dates.
Price is of course at zero for the free tier, whereas the premium tier requires payment. You can stack plans like these in the same way if you have multiple paying plans with different features.
Step 3 – Defining restrictions
The plugin works on a restriction principle, which means if you don’t have the right “clearance” (subscription to a plan), then the content you’re trying to access will be blocked for you. With that in mind, you need to set up what is shown to your visitors who are not yet members when accessing this premium content.
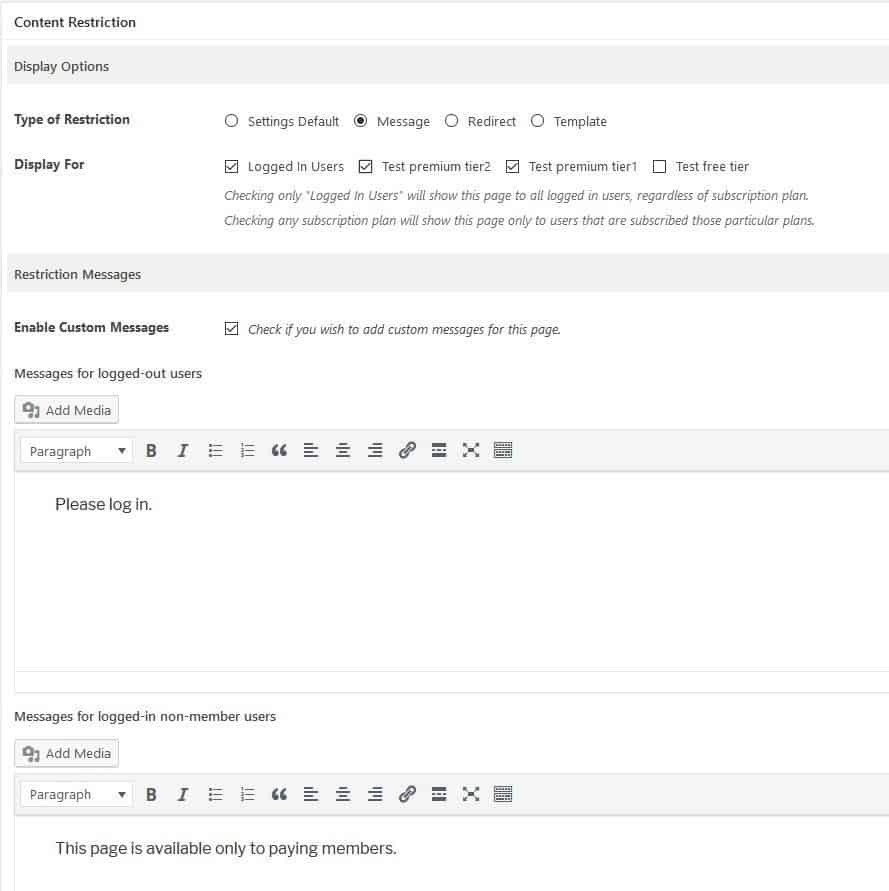
Choose how to restrict content
It’s essential to put enough thought into when content will be unavailable and for whom. This is the reason why visitors will want to become members, so you can safely add an asterisk to this step since it’s probably the most important one for building up your member numbers.
Step 4 – Registration forms
Okay, so you’ve created your sub plans, restricted content behind said plans and you have casual visitors wanting to become members in order to access all the content you have to offer. This is done through forms.
All the forms are already built into the plugin, and all you need are shortcodes to implement them on your pages.
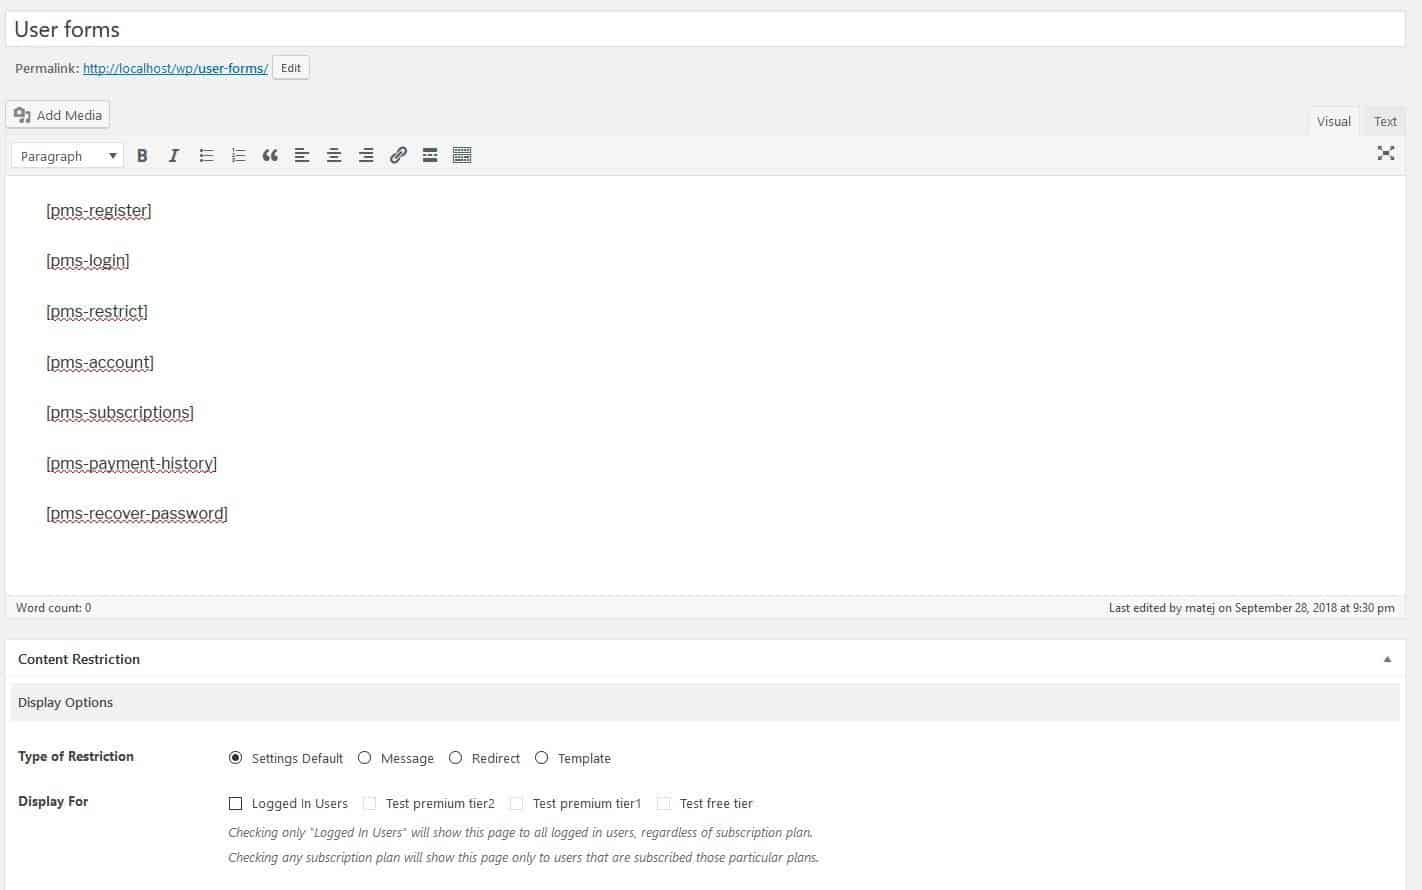
All relevant shortcodes you’ll be using
In the example shown, we’ve listed all the different forms that are available, just so you can get a sense of everything that’s available. Normally, you would use one form per page and one pertaining to accessing your account look like the example below.
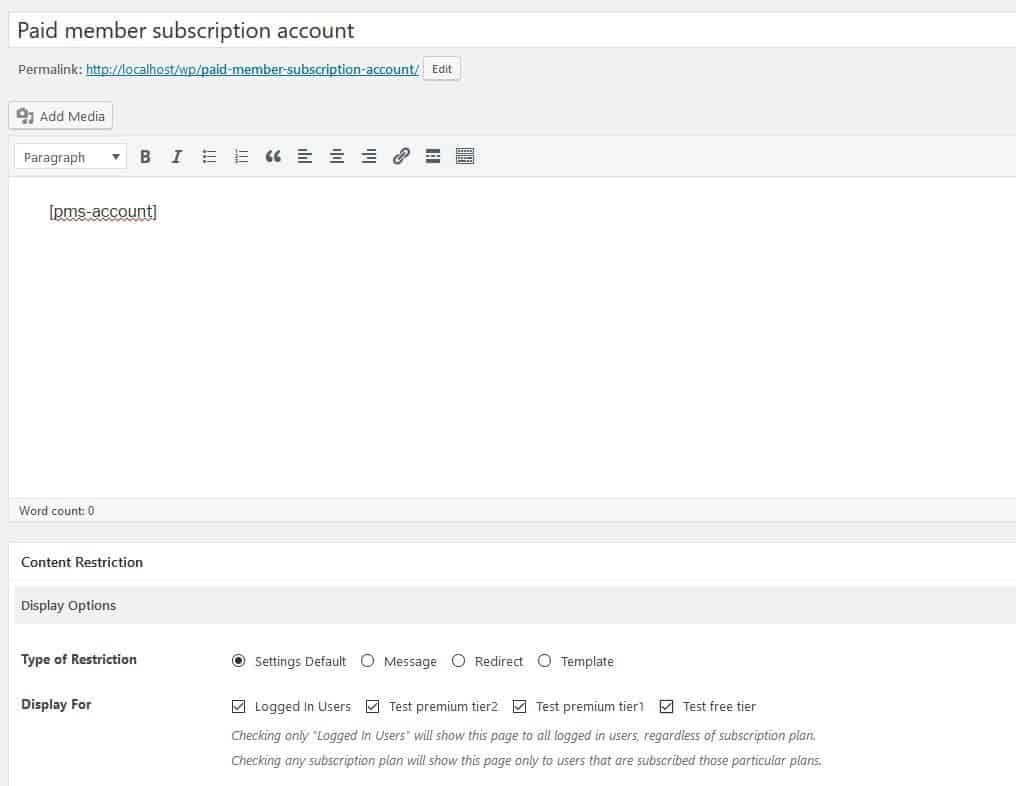
An account form page from the backend
Step 5 – Pages with shortcodes
Now that you know the shortcodes and have created pages that use them, you’ll need to set up a landing page for your new members. Every page you’ve published will be available for redirecting; all you have to do is choose.
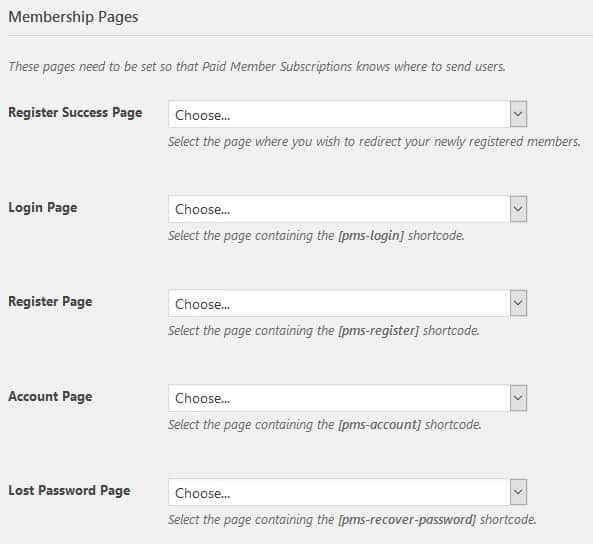
Set up where to redirect your visitors
From the frontend, your visitors will be redirected to a page with a registration form that looks similar to the picture below.
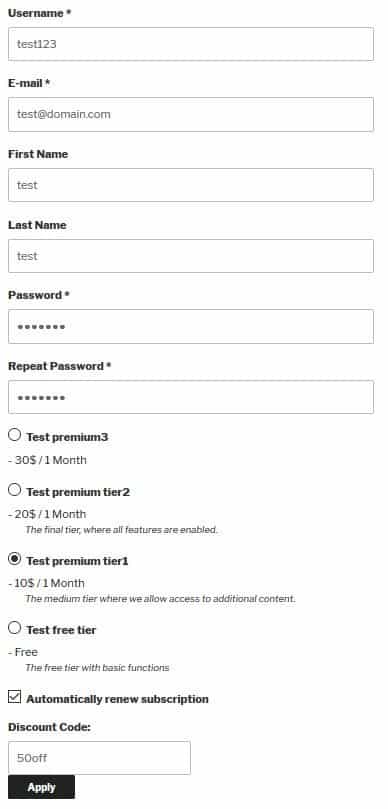
A frontend look at a registration form
Step 6 – Payment
Of course, since you’re developing a membership site, you’ll need to set up a payment method. With the free plugin package, your only option is PayPal, but there are more options available, which we’ll get into more later.

The default payment option is PayPal
Step 7 – Emails
While running any kind of service, be it free or paid, you’ll want to be as clear as possible towards your customers. That’s precisely why it’s important to include automatic emails that confirm a visitor has become a member, that a new subscription has been activated, or that a subscription is canceled, or has expired.
Doing it this way there won’t be any doubt from either side (you, or your visitor) what has occurred. An example of a successful registration mail can be seen below.
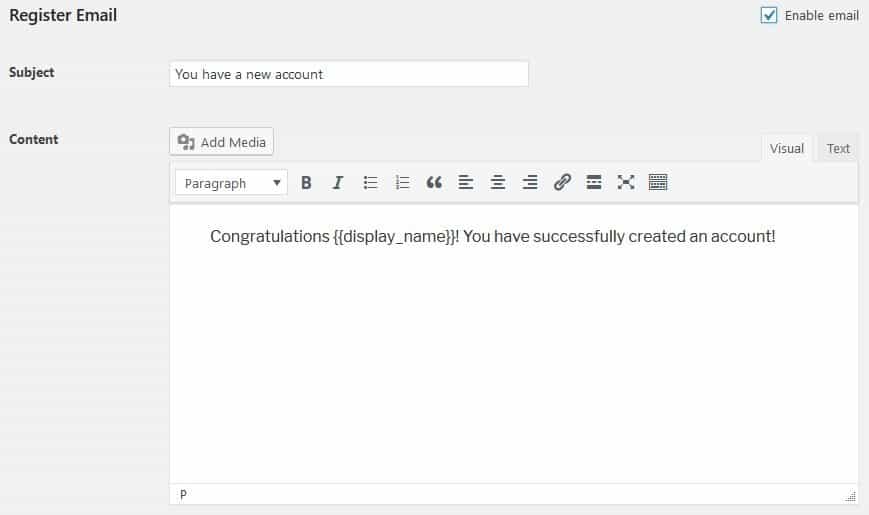
An example of a registration confirmation mail
Free and Premium
All the aforementioned steps cover the basic set up for your subscriptions and all of them are absolutely free. Within the free tier, you’ll also get functions that connect other popular plugins such as WooCommerce integration (if you’re using it), detailed payment logs for helping with financial control and oversight, as well as security features that help with the prevention of account sharing.
Paid Member Subscriptions, however, comes with two payment tiers that greatly enhance your options in creating the perfect subscription plan on top of everything we’ve already gone through. Upgrading your plugin gives you access to features like content dripping and a “pay what you want” option for members. You can find all the available add-ons below.
Add-ons
The basic package is ready to be used by everyone, but you can advance it further with various add-ons you have at your disposal.
Basic Add-ons (Pro and Hobbyist versions)
bbPress – enables you to restrict forum content relating to the bbPress integration

Used for restricting forum content
Global Content Restriction – add rules for filtering the content on your site (posts, pages, etc.) based on subscription plans

Restrict content based on the subscription plan
Discount Codes – adds the option of creating custom discounts that your (potential) members can use to get great deals
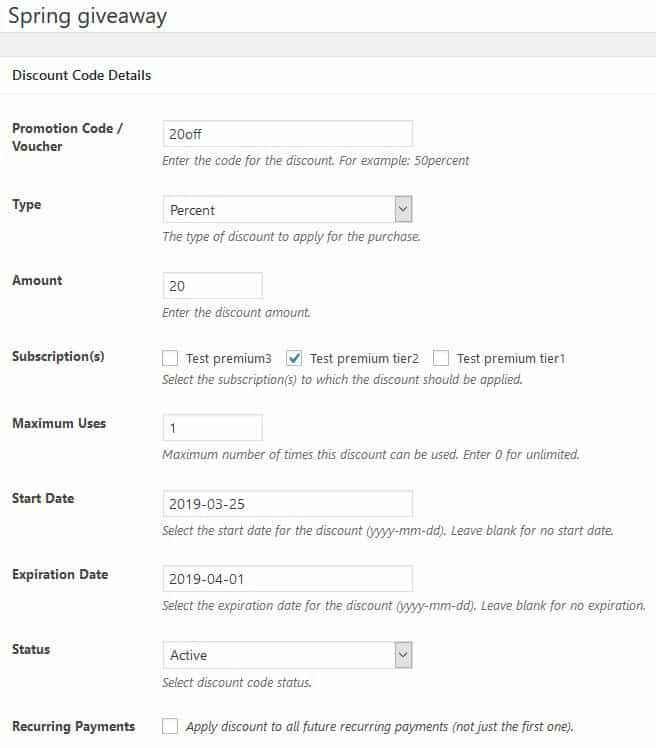
Create discounts
Email Reminders – set up automatic email reminders that go out to members when some certain criteria are met (an example could be an expiring subscription)
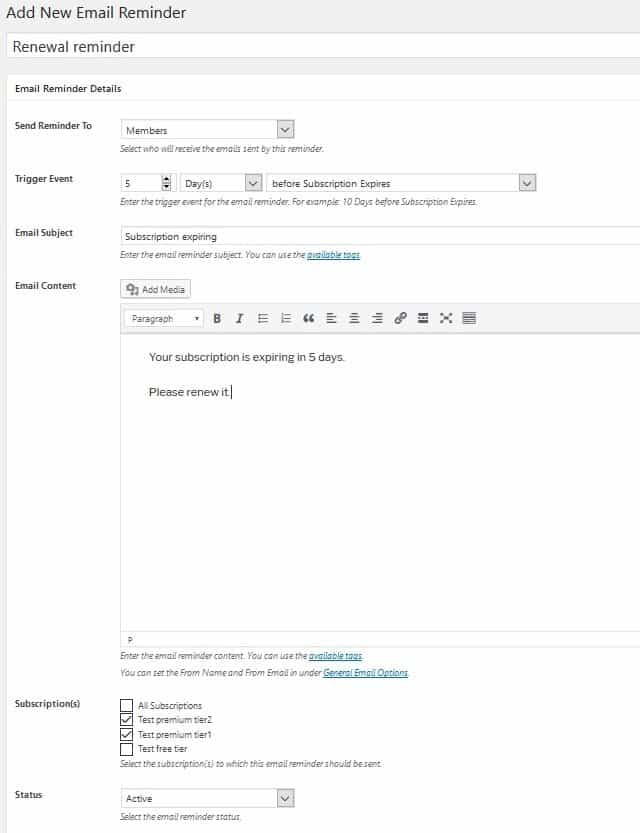
Create automatic email reminders
Navigation Menu Filtering – similar to global content restriction, here you can restrict content showing up in menus for those not on an appropriate subscription plans
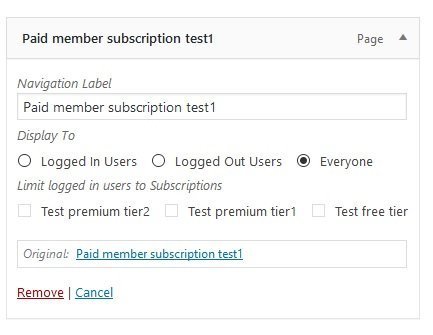
Restrict menu access according to subscription plans
Fixed Period Membership – enables you to choose between a regular (recurring) subscription and a fixed subscription
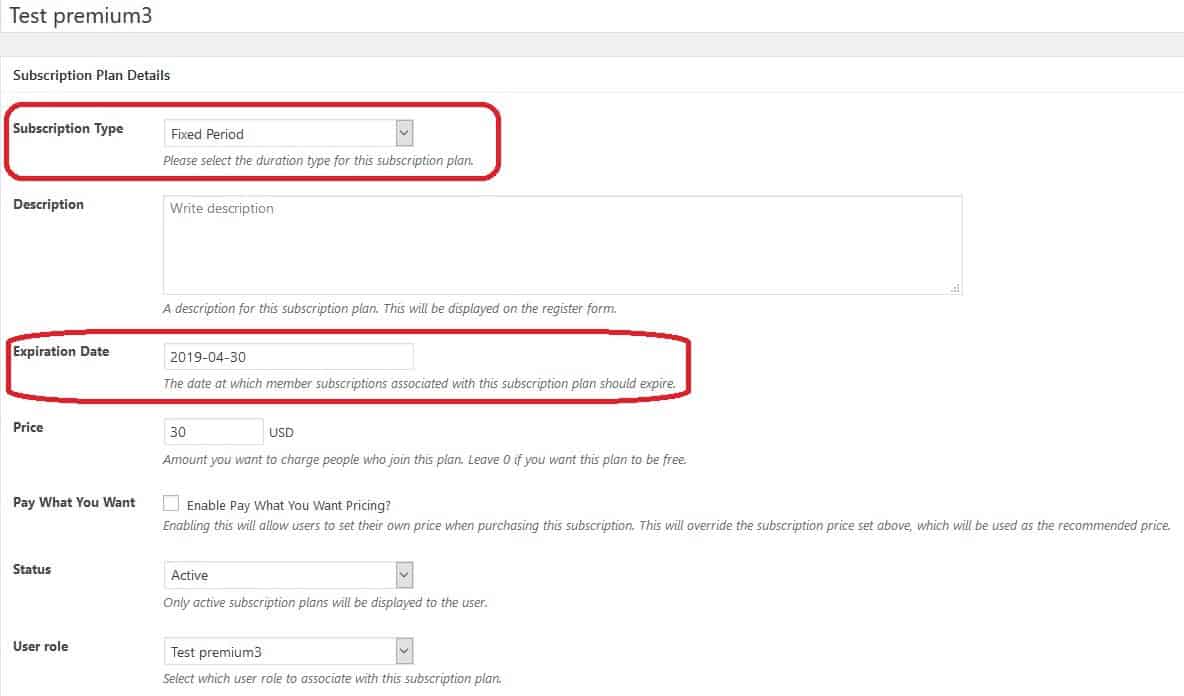
Create a fixed membership option, not just a recurring one
Pay What You Want – if you don’t want to burden your members with fixed payment rates, you can offer them a chance to pay what they feel is right (min. and max. amounts can be set)
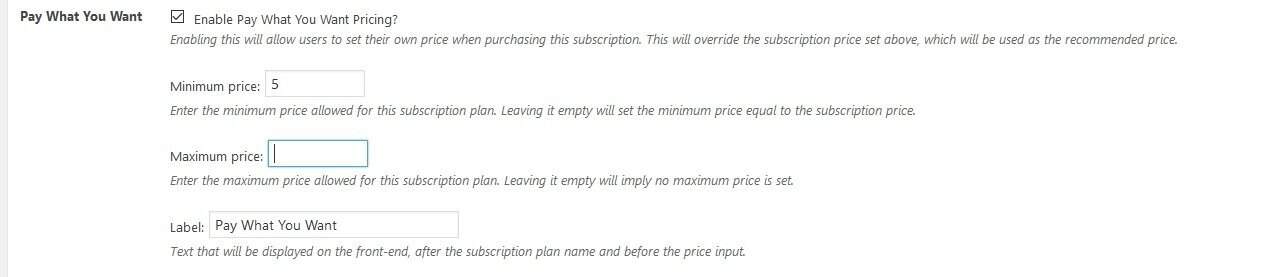
Implement a more liberal payment method
Pro Add-ons (Pro version only)
Recurring Payments for PayPal Standard – give your members the option to set up recurring payment plans, so that the subscription fee is automatically deducted from their account every month (or whichever time interval is used on your site)

Additional payment option for members are always welcome
PayPal Pro and PayPal Express – enables your members to use PayPal Pro and express if they have them
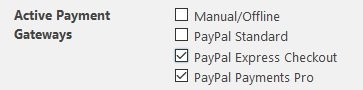
Enhance your payment options
Stripe Gateway – offers your members direct payments with credit and debit cards using Stripe

When PayPal is not enough
Content Dripping – choose how quickly do your members get to the restricted content after they sign up for a subscription
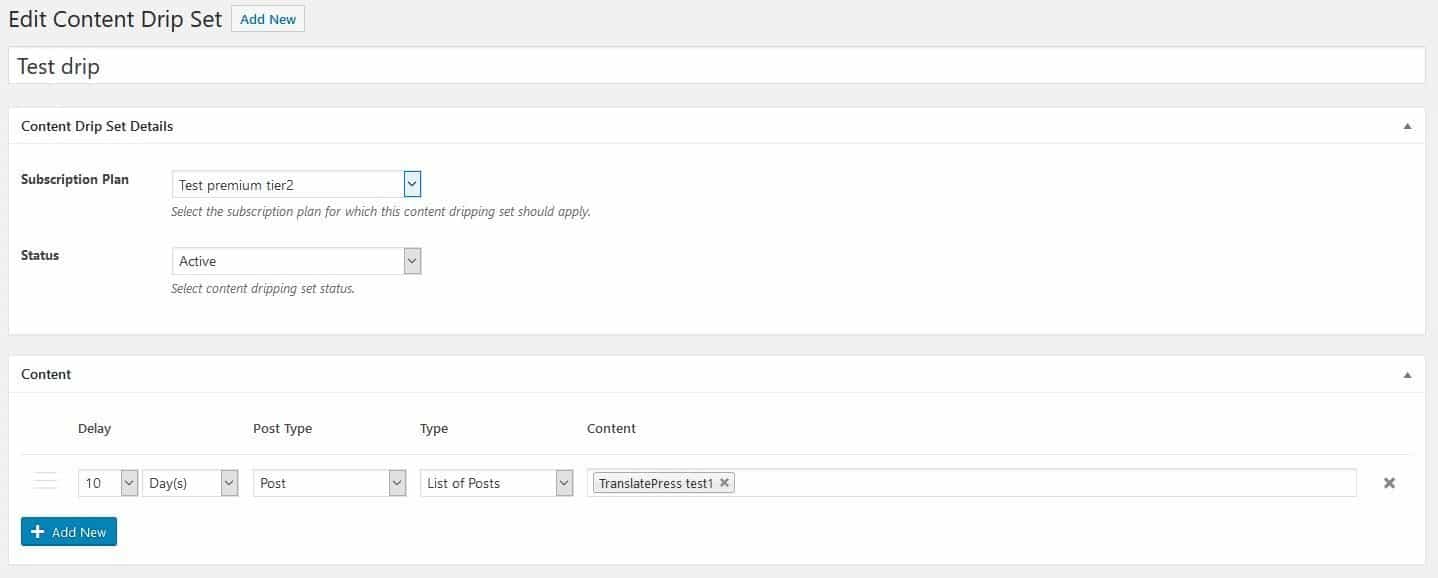
Time your content output for new members
Multiple Subscriptions per User – give your members the option to subscribe to multiple subscriptions from the same account

Enable more than one subscription per account
Invoices – generate PDF invoices for both you and your members for every payment
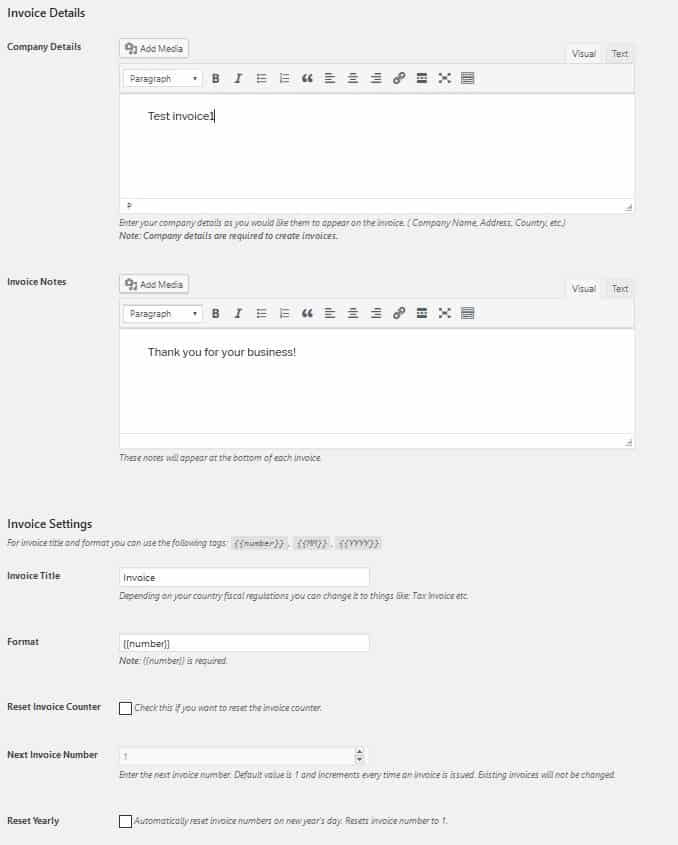
Generate invoices for your members
Summary
Paid Member Subscriptions has something for everybody. The free options are robust enough for smaller sites, but with the add-ons, it becomes a full-fledged professional option for any type of commercial site you could be running.
Now that you know how to use the plugin, you don’t have an excuse anymore why you’re not doing it.