Whenever you leave your email on a website, you know your inbox will be graced with their newsletter every now and then. Most likely, the email you will receive will look impeccably done, as if you received a special version of their website created specifically for that occasion. These HTML emails are truly an art form in itself, and they are very hard to ignore once they reach your inbox.
With their gorgeous colors, pictures, fonts and appealing promises, it is no wonder they are one of the favorite marketer’s tool. The HTML emails more often than not result in more conversions than other marketing tactics.
Unfortunately, this means that anyone looking to start an email conversation with their customers is up for a challenge. As gorgeous as they might be, the truth is, they set the bar up high for all new players.
If you are a proud owner of a new website for a blog, service or a product, you know a plain old text email won’t do the trick. You need your information to be visually appealing, and better organized than a scary chunk of text which might annoy your reader.
So now you have to find a copywriter, a designer and a developer to enable you to communicate with your customers through your newsletter. You don’t want your email to end up in the trash or labeled as spam.
But what if it doesn’t have to be that way, and there is a solution that will make you able to create an HTML email all by yourself? Allow us to show you how, using one of the best Drag & Drop builder apps, you can create these amazing emails to send to your customers, without having to hire a whole team.
But, I don’t have any coding skills!
You don’t have to have any. Actually, the best part about Postcards is that it requires zero coding skills from you. And yet, you will get an eye-catching, HTML email that people will want to read and follow through in the end.
HTML emails are generally considered to be somewhat hard to code, as they need to pass several filters to end up in an inbox, rather than junk. If they do not meet certain standards, they may look different, or even more likely horrible, when it comes to different email providers. All it takes is a message “This email is not displaying properly?” and your reputation and credibility can go down the drain.
This is why, with a good app like this one, you don’t have to worry about the lack of your coding skills. It provides you with a solution that perfectly renders across all major email clients. You can be sure that the email you created will look good and display exactly the same in any inbox.
It will also look good on any display as well so your newsletter will look amazing on both your users’ computer and mobile device. You want them to look at your newsletter in awe even on their mobile device.
When you decide to give Postcards a go and to create the emails yourself, first and most important feature of this app is that everything is set up for you. The fact is that it has over 70, drag & drop based components available for you. You can use each one of these to create your email without having to code any of them. Among these 70 components, you will find included all that you might need for a perfect email. You can simply pick, drag and drop, every part of the email, all the way from header to footer.
The components of this app have you covered for your newsletter, as with this app you can create perfect HTML emails for your blog, e-commerce, news website, or simply to share updates about your business with your clients.
How do I use Postcards?
You are in the Designmodo’s app now (you can try it for free) and you are scared by the number of options presented before you? There are many options, but you shouldn’t settle for anything less. You want your email to look professional and to convert your readers, so you should have all the options you need to do that.
Don’t panic – start with editing the basics of the template. Make sure that you have the template ready and assembled to your liking before you start adding the components. Choose the background color or image, font, and overall style of your future email.
You can change the font the match the one you used on your website with over 800 Google Fonts to choose from. Customize each color and do not worry about pictures – you can effortlessly upload any picture you would like to set it as your background.

Designmodo Postcards Drag & Drop editor
Once you are happy with the layout, it is time to get serious. On the left-hand side, you will find different modules. You can find modules for content, calls to action, or e-commerce modules, so that you can present your “just in” products. Or, if you have a blog, you can use “top stories” module to show off your writing.
We suggest starting with your menu, as it is commonly the highest set module of them all. Click on the pencil button that will appear in the upper right corner of the module, and the editor will open on the right of the screen.

Designmodo Postcards Menu
In the editor, you can, for example, add your social media links among other things. This is the perfect place for these, as your readers might want to join the Social media community together with your other happy users. People want to know what other people are saying about you. You can also add these icons in the footer, depending on your preferences.
After the menu, usually goes header, and so on, but the end result is entirely up to you. Pick the modules and drag them to create the perfect email template. It is as simple as that. If you’d like your footer to be right above the header, that’s awesome too.
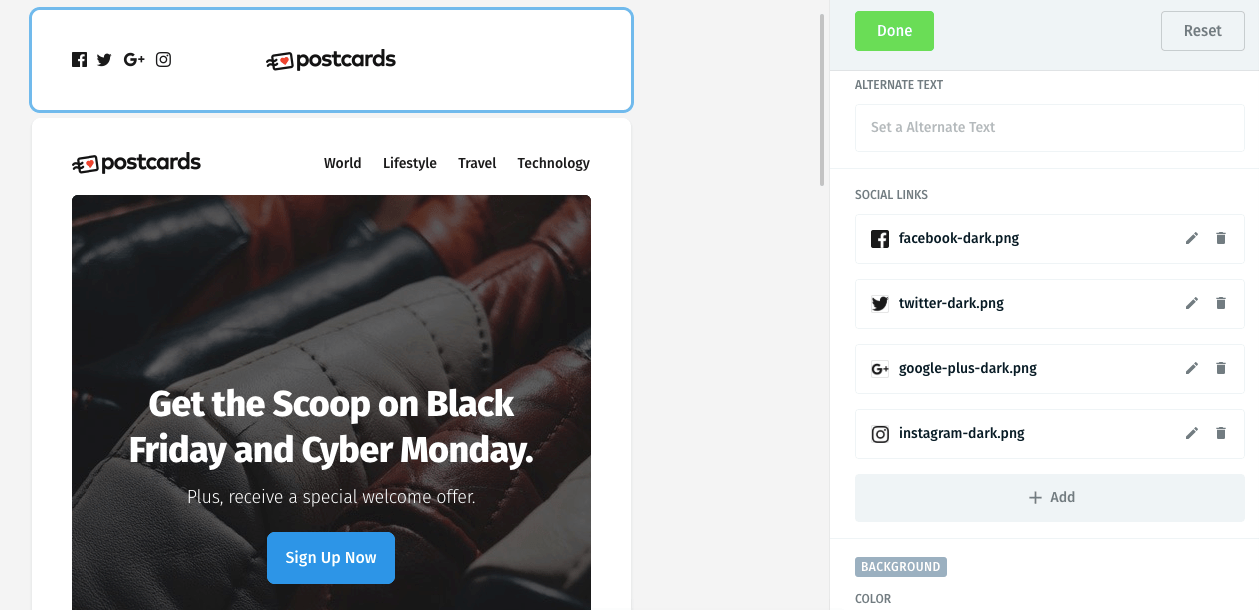
Easily add Social Media buttons
However, it would be kind of horrible if you had no option but to stick to these already created modules. Luckily, you can further customize each and every aspect of these modules with ease.
The editor is pretty straightforward, and you can easily find how to change what you would like to change. Hit the Done button once you are happy with it, or hit the reset button if you would like to try again.
The best part of this editing process that makes it so great for beginners is the fact that you can edit the text and images of each component live. See the changes you make happen in front of your eyes. The fact that you can view your changes as you make them is perfect for first-time users that are relying heavily on trial and error system to get it done.
You can also use your own pictures – no need to be stuck with the default ones. Simply upload the pictures that you would like to have into the app. Any colors that you don’t like in the templates? Change them as well.

Add your own images
Another great option that you will find within Postcards is the opportunity to preview your new HTML email. By clicking on the blue eye icon on the right, you will be able to see how your mail would look on a desktop or a mobile device.
It has never been easier to create the newsletter without hiring the whole team to help you out. The best part of it is that you can practice as much as you’d like, as Postcards allows you to save and export as many templates as you need. You are bound to get better at this with each email you export.
In the end, you will have a clean HTML code which will work with all the email service provider platforms. Time to hit the send button, and to start converting readers into customers!